
Instructions / Assembly


Page 4
For cabinet door installation, you will need the following tools: tape measure,
drill, drill bit, pencil, Phillips screwdriver, safety glasses and a speed
square (optional).
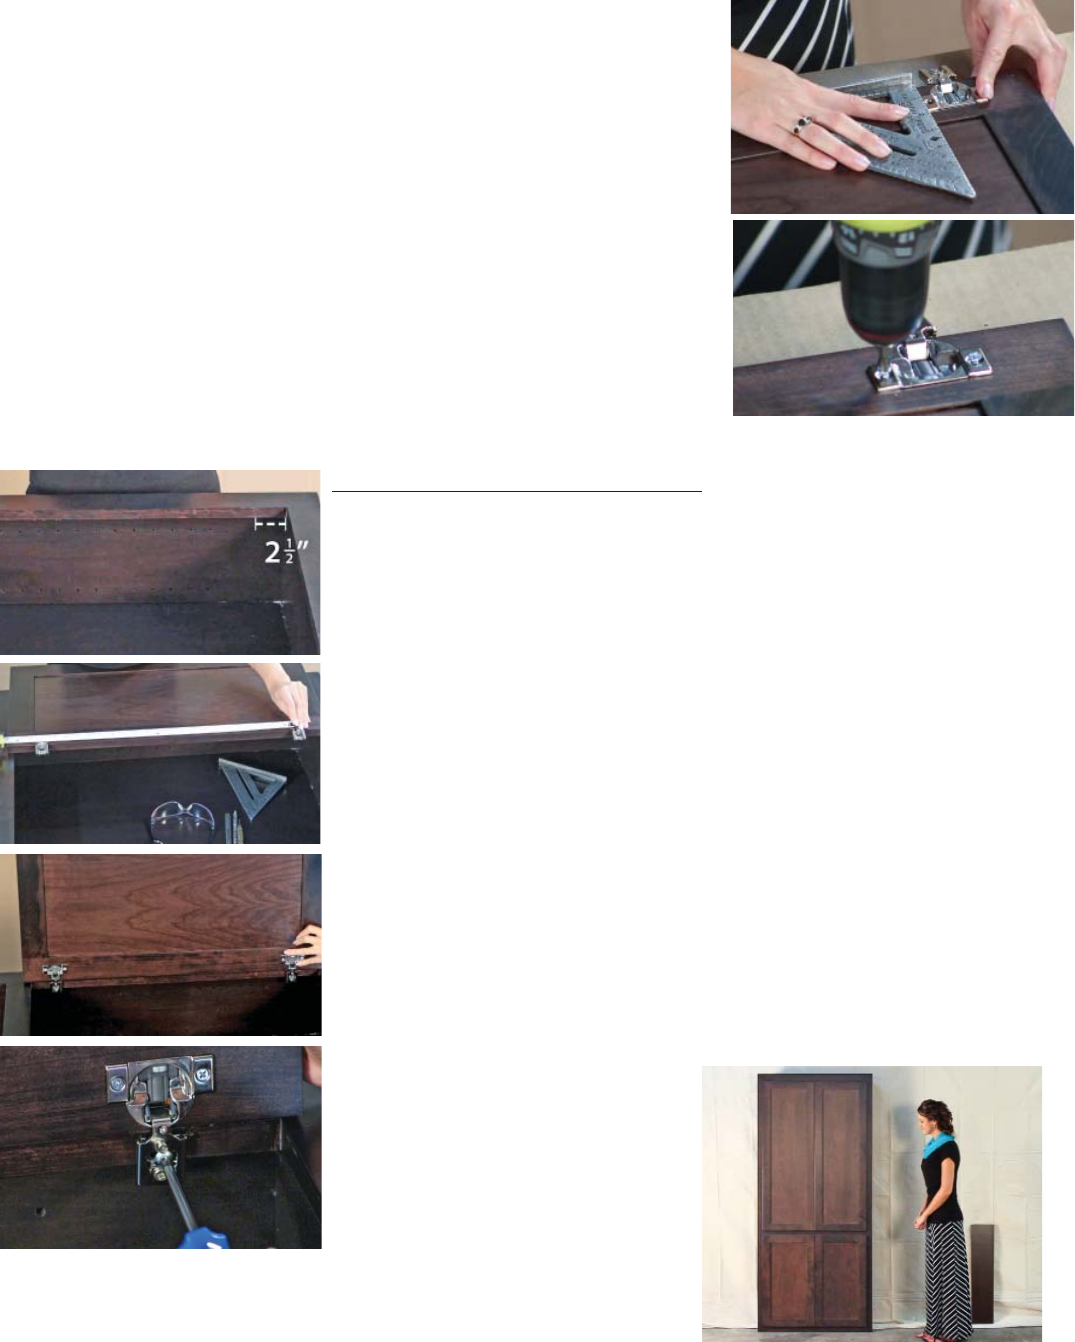
1. Insert the cup hinge into the large pre-drilled hole in the back of the
cabinet door.
2. Align the hinge to be square to the door. Drill two pilot holes by
inserting a self-centering drill bit into each screw hole.
3. Drive the provided hinge screws into each pilot hole, fastening the hinge
snugly to the cabinet door.
4. Repeat steps 1 - 3 for all the remaining hinges.
H. MOUNTING THE CABINET DOORS
1. Make a mark 2-1/2 inches from the corner of the face frame. Drill a pilot hole
at this mark, centered on the face frame.
2. Measure the distance between the center of the hinges on the cabinet door to
determine the distance to the next pilot hole on the face frame. Make a mark.
3. Drill a pilot hole at this mark, also centered.
4. Align the cabinet door with hinges over the pilot holes you just made.
5. Using a Phillips screwdriver, install the screws to attach the hinges to the face
frame.
6. When the door is installed, close it to check the alignment of the door. Use the
adjustment features of the hinge to adjust the door correctly.
7. Repeat steps 1 - 5 for the remaining cabinet doors.
Congratulations! Your RTA InvisiDoor assembly is now complete!
Read the next section to learn how to properly install your RTA InvisiDoor
(2)
(3)
(1)
(2)
(4)
(5)