
User Manual
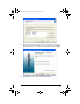
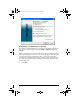

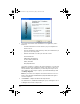


Table Of Contents
- Important Information
- Regulatory Information
- USA FCC Information Concerning Radio Frequency Interference
- Europe - EU Declaration of Conformity
- Overview
- System requirements
- Unpacking the boxes
- Assembling and charging the network hubs
- Before you begin
- Setting up your TI-Navigator™ network the first time
- Before you begin
- Hardware type and Ethernet adapter type
- Connecting the cables to the access point
- Starting the wizard
- Identifying your hardware and selecting a channel
- Identifying the network connection
- Configuring an Ethernet port
- Configuring a USB port
- Setting up your classroom network
- Activating the access point
- Activating Type 2 network hubs
- Activating Type 1 network hubs
- Registering your TI-Navigator™ system
- Installing the calculator operating system
- Connecting the calculators to the hubs
- Installing software Apps on the calculators
- Technical information
- Troubleshooting
- Resetting the Type 2 access point
- Resetting the Type 1 access point
- Texas Instruments Support and Service
- Battery Precautions for Calculators
- Battery Precautions for Rechargeable Battery Packs
- Texas Instruments (TI) Warranty Information
- TI LearningCheck 3.x License Agreement

40
3. Click the Calculator Software button. The Calculator Software
screen appears.
4. Under
Required OS, click the version number of the model of
calculator to which you are installing.
5. Use TI Connect™ to install the operating system on the calculator.
a) Locate the operating system file on the CD.
b) Right-click the operating system file.
c) Click
Send to TI device. TI Connect™’s Select TI Device
dialog box opens.
d) Follow the instructions on the screen. An operating system
may take ten minutes per calculator to transfer and install.
6. Install the operating system on every calculator to be used with your
TI-Navigator™ system.
InstallationGuide.book Page 40 Wednesday, May 3, 2006 10:19 AM