
Users Manual


Appendix B – Inband Management Connection Troubleshooting
92
Appendix B – Inband Management Connection
Troubleshooting
, Continued
Fail-safe
procedure 3
(outband)
To apply fail-safe outband IP address, please follow the steps below:
Prior to starting fail-safe procedure 3, ensure that an outband
physical management connection has been implemented with
WiBAS .
Step
Action
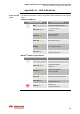
1 Setup to laptop the Ethernet IP address 192.168.255.253 with
subnet mask 255.255.255.0.
2 Open Windows Command Prompt.
3
Verify that you can ping the node, by entering the fail-safe outband
IP address and press ENTER:
ping 192.168.255.254
Echo replies should appear.
Node replies to ARP requests of fail-safe IP address
when the Ethernet link is up.
4
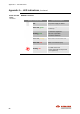
Access WiBAS via Node Manager by entering the fail-safe
outband IP Address (192.168.255.254).
5 Perform a Restore Factory Default Configuration action to clear
any previous configuration on node:
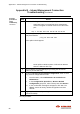
i.
From the Menu, select
Maintenance & Troubleshoot
>
Maintenance.
ii.
In the Configuration Operations > Restore Default
Configuration
group box, select Factory and click
Restore
.
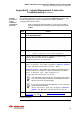
iii.
In the confirmation message that appears, click Yes. The
WiBAS returns to factory default configuration and then
reboots.
6
Login again to WiBAS by entering the default outband IP address
(192.168.1.100/24).
Alternatively, you can change laptop's connection from
outband to inband and login by entering the default
inband IP address (10.10.10.100/24).
End of procedure.