
Instruction Manual


(87PO) ROUND METAL FRAME POOL ENGLISH 7.5” X 10.3” PANTONE 295U 07/20/2012
87PO
SAVE THESE INSTRUCTIONS
Page 14
English
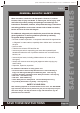
STORAGE
POOL MAINTENANCE & DRAINAGE
Do not add chemicals if the pool is occupied. This can cause skin or eye irritation.
Concentratedchlorinesolutionscandamagethepoolliner.InnoeventisIntexRecreation
Corp.,IntexDevelopmentCo.Ltd.,theirrelatedcompanies,authorizedagentsandservice
centers,retailersoremployeesliabletothebuyeroranyotherpartyforcostsassociated
withthelossofpoolwater,chemicalsorwaterdamage.Keep spare filter cartridges on
hand. Replace cartridges every two weeks. We recommend that a Krystal Clear™
Intex Filter Pump be used with all of our above-ground-pools. To purchase an Intex
Filter Pump or other accessories see your local retailer, visit our website or call
the Intex Consumer Services Department listed in the separate “Authorized Service
Centers” sheet and have your Visa or Mastercard ready.
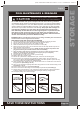
CAUTION
ALWAYSFOLLOWTHECHEMICALMANUFACTURER'S
DIRECTIONS,ANDTHEHEALTHANDHAZARDWARNINGS.
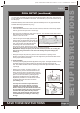
EXCESSIVE RAIN: To avoid damage to the pool and over filling, immediately drain rain water that
causes the water level to be higher than the maximum.
How to Drain Your Pool and Long Term Storage
1. Checklocalregulationsforspecificdirectionsregardingdisposalofswimmingpoolwater.
2. Checktomakesurethatthedrainpluginsidethepoolispluggedinplace.
3. Removethecapfromthedrainvalveontheoutsidepoolwall.
4. Attachthefemaleendofthegardenhosetothedrainconnector(12).
5. Placetheotherendofthehoseinanareawherethewatercanbesafelydrainedawayfromthe
houseandothernearbystructures.
6. Attachthedrainconnectortothedrainvalve.NOTE: The drain connector will push the drain
plug open inside the pool and water will start to drain immediately.
7. Whenthewaterstopsdraining,startliftingthepoolfromthesideoppositethedrain,
leadinganyremainingwatertothedrainandemptyingthepoolcompletely.
8. Disconnecthoseandadapterwhenfinished.
9. Re-insertdrainplugindrainvalveoninsideofpoolforstorage.
10. Replacedraincaponoutsideofpool.
11. Reversesetupinstructionstodisassemblethepool,andremoveallconnectingparts.
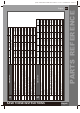
12. Besurethatthepoolandallpartsarecompletelydrybeforestorage.Airdrythelinerinthe
sunforanhourbeforefolding(see drawing 5).Sprinklesometalcumpowdertopreventthevinyl
fromstickingtogetherandtoabsorbanyresidualmoisture.
13. Createasquareshape.Startingatoneside,foldone-sixthoflinerinonitselftwice.Dothesameon
theoppositeside(see drawing 6.1 & 6.2).
14. Onceyouhavecreatedtwoopposingfoldedsides,simplyfoldoneovertheotherlikeclosingabook
(see drawing 7.1 & 7.2).
15. Foldthetwolongendstothemiddle(see drawing 8).
16. Foldoneovertheotherlikeclosingabookandfinallycompacttheliner(see drawing 9).
17. Storethelinerandaccessoriesinadry,temperaturecontrolled,between32degreesFahrenheit
(0degreesCelsius)and104degreesFahrenheit(40degreesCelsius),storagelocation.
18. Theoriginalpackingcanbeusedforstorage.
7.1
5
6.1 6.2
7.2 8 9