
Technologies Printer User Manual
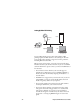
Table Of Contents
- Introducing the EasyCoder PL4 Printer
- Learning About the Printer
- Installing the Battery
- Charging the Battery
- Understanding the Control Panels
- Loading the Media
- Loading Fanfold Media
- Verifying the Printer Is Working
- Establishing Communications With a Terminal
- Setting Up the Software
- Downloading Firmware
- Using the Accessories
- Maintaining the Printer
- Troubleshooting
- Specifications

40 EasyCoder PL4 Printer User’s Guide
To successfully configure the printer for POP3 support, you
need the following information:
• The IP address of the POP3 server
• The username of the POP3 account
• The password of the POP3 account
• The poll frequency for the printer. The poll frequency tells
the printer how often to check for e-mail.
If you are unfamiliar with any of the above parameters and
settings, please contact your network administrator for
assistance.
For more information on using and sending commands to your
printer, see the EasyCoder PL-Series Printer Programmer’s
Reference Manual.
Note: If the printer times out, sending a print request
through the 802.11b connection will not turn the printer on.
Make sure the printer is on before sending your print request.
To set up for POP3 e-mail printing
1 Verify that the printer is connected to your wireless network.
If it is not connected, please refer to “Setting Up for LPD or
TCP Printing” or “Setting Up for WEP Encryption” earlier
in this guide.
2 Set the POP3 server IP address on the printer by issuing the
following command via the serial port:
! U1 SETVAR “ip.pop3.server_addr”
“xxx.xxx.xxx.xxx”
where “xxx.xxx.xxx.xxx” is the IP address of the POP3 server.
3 Set the POP3 username via the command:
! U1 SETVAR “ip.pop3.username” “my username”
where “my username” is the POP3 account name.
4 Set the POP3 account password via the command:
! U1 SETVAR “ip.pop3.password” “my password”
where “my password” is the password for the POP3 account.