User’s Manual P/N 066386-002 Ea syC od 742 er 1 EasyCoder 7421 Printer ™
Intermec Technologies Corporation 6001 36th Avenue West P.O. Box 4280 Everett, WA 98203-9280 U.S. technical and service support: 1.800.755.5505 U.S. media supplies ordering information: 1.800.227.9947 Canadian technical and service support: 1.800.687.7043 Canadian media supplies ordering information: 1.800.267.6936 Outside U.S. and Canada: supplier.
Contents Before You Begin vii Warranty Information vii Safety Summary vii Warnings, Cautions, and Notes viii About This Manual ix 1 Operating the Printer Getting to Know Your Printer 1-3 Learning How to Operate the Printer 1-5 Understanding the Power Light 1-5 Using the Feed/Pause Button 1-6 Loading Media Into the Printer 1-7 Using the Peel-Off Option 1-7 Loading Fanfold Media 1-16 Inserting the Optional Memory Card 1-20 2 Configuring the Printer Configuring the Printer 2-3 Setting the Media Sensitivity
Printing a Test Label 2-11 Using the Printhead Loading Modes 2-12 3 Maintaining the Printer Maintenance Schedule 3-3 Tools for Cleaning the Printer 3-5 Cleaning the Printhead 3-6 Cleaning the Printer Covers 3-7 Cleaning the Drive Roller and Peel-Off Bar 3-8 Cleaning the Label Sensors 3-10 4 Troubleshooting Troubleshooting Checklist 4-3 Printer Operation Problems 4-4 Print Quality Problems 4-5 Communication Problems 4-6 Using Data Line Print Mode 4-6 Preventing Data Loss 4-7 Resetting the Printer to Fact
B Communications Reference About Communications B-3 Serial Communication Protocols B-3 RS-232 Serial Interface B-8 C Character Sets International Character Sets C-3 Extended Character Sets C-7 I Index v
Before You Begin This section introduces you to standard warranty provisions, safety precautions, warnings and cautions, terms, and sources of additional product information. A documentation roadmap is also provided to help you find information. Warranty Information To receive a copy of the standard warranty provision for this product, contact your local Intermec sales organization. In the U.S. call 1.800.755.5505, and in Canada call 1.800.688.7043.
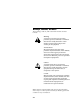
Warnings, Cautions, and Notes The warnings, cautions, and notes in this manual use these formats. Warning A warning warns you of an operating procedure, practice, condition, or statement that must be strictly observed to avoid death or serious injury to the persons working on the equipment.
About This Manual This manual contains all of the information necessary to operate, configure, maintain, and troubleshoot the 7421 bar code label printer. This manual was written for all users who need to know how to use the printer to print labels. What You Will Find in This Manual This table summarizes the information in each chapter of this manual: For Information On Refer To Operating the printer Chapter 1, “Operating the Printer.
Terms Listed below are special terms used throughout the manual. “Printer” refers to the 7421 bar code label printer. “Media” is the general term used to describe the label stock (roll, fanfold, or tag) on which the printer prints labels. “Label” refers to the individual labels of your media. “Host” refers to a personal computer or other computer that communicates with the printer. A “symbol” or “bar code symbol” consists of alphanumeric characters encoded in a bar code format.
1 Operating the Printer
This chapter introduces the 7421 printer and explains features and options that are not covered in the EasyCoder 7421 Printer Setup Guide. Getting to Know Your Printer Features of your printer include: • Support for either direct thermal or thermal transfer printing applications. • High resolution 203 dots per inch (dpi) printhead. • Ability to store downloaded formats, fonts, or graphics in removable memory cartridges. • An easy to use software application called PrintSet.
Back View Serial communications port On/Off switch Power cord connector Parallel communications port 7421U.002 Several options are available for use with your printer. See Appendix A for complete descriptions of these options.
Learning How to Operate the Printer To operate the printer, you need to understand: Power light The Power light helps you determine when the printer is on or off, or if there is a problem with the printer. Feed/Pause button The Feed/Pause button allows you to feed out media, pause the printer, and print a hardware configuration label.
Using the Feed/Pause Button The Feed/Pause button, located on the left side of the printer, performs these functions depending on the printer mode: Printer Mode Idle Printing Powered on for the first time 1-6 You Want To What to Do Feed out one label or a minimum specified amount of media. Press and release the Feed/Pause button. Continuously feed media. Press and hold the Feed/Pause button. When you release the button, the media stops feeding. Take the printer offline.
Loading Media Into the Printer In addition to loading roll media in the printer, you can: • Use the peel-off option. • Load fanfold media. You can load media with the printer power turned on or off. The following procedures for loading media assume that you have turned on the printer. Refer to the EasyCoder 7421 Printer Setup Guide for instructions on loading rolls of media. Using the Peel-Off Option Use the peel-off option in printing applications where you want to apply labels to a surface immediately.
To load labels using the peel-off option 1. Open the top cover of the printer. Ea syC od 742 er 1 7421U.003 2. Open the printhead assembly by pulling the yellow release lever toward the front of the printer. 7421U.
3. Lift the printhead up into the full open position. 7421U.006 4. Adjust the guide tabs to their widest position by winding the yellow adjustment roller toward the front of the printer. 7421U .
5. Insert the spindle into the roll of media. 4" (102mm) <3.9" (99mm) 7421U.011 6. Place the roll inside the top cover so that the end feeds from the top. 7421U.
7. Insert the end of the roll into the printer and out the front of the printer. Note: It is easier to insert the media through the printer mechanism if you cut the corners off the end of the first label. 7421U.
8. Rewind the excess paper onto the media roll while placing the spindle into the holder slots on the printer. 7421U.014 9. Center the labels in the printer path and adjust the label guides so that they just touch the edges of the label liner. 7421U.
10. Pull the labels through the printer until at least two full labels (approximately 6 inches or 15 cm) are sticking out the front of the printer. Peel the first two labels from the label liner. 11. Insert the label liner between the front of the printer and the peel-off bar until the liner appears out the bottom slot. Peel-off bar 7421U.
12. Pull the label liner out of the bottom slot until the liner is tight across the peel-off bar. 7421U.
13. Lower the printhead assembly and lock it into the operating position by pressing down firmly on both sides of the printhead. Lower the printer cover. 7421U.010 14. Activate the label taken sensor by pressing in on the top of the sensor. The printer is now ready for printing. Label taken sensor Eas yC od 7422 er 7421U.
Loading Fanfold Media In fanfold printing, you place a stack of fanfold media at the rear of the printer and feed it into the printer through a slot in the rear cover. To load media for fanfold printing 1. Open the top cover and remove the spindle from the printer. Save the spindle for use with roll media. 2. Open the printhead assembly by pulling the yellow release lever (on the left side of the printer) toward the front of the printer. 7421U.
3. Lift the printhead up into the full open position. 7421U.020 4. Adjust the guide tabs to their widest position by winding the yellow adjustment roller toward the front of the printer. 7421U .
5. Place the fanfold media slightly lower than the slot in the printer back cover and insert the media through the slot, into the printer mechanism, and out the front of the printer. Note: It is easier to insert the media through the printer mechanism if you cut the corners off the end of the first label of the media. Note how the corners of the media have been cut in the illustration below. 7421U.
6. Center the labels in the printer path and adjust the label guides so that they just touch the edges of the label liner. Wind the yellow adjustment roller toward the rear of the printer. 7421U.015 7. Lower the printhead assembly and lock it into the operating position by pressing down firmly on both sides of the printhead. Lower the printer cover.
Inserting the Optional Memory Card Use the optional memory card to store label formats, fonts, and graphics in permanent memory. To order a memory card, contact your Intermec representative. To insert the optional memory card 1. Turn the printer power off. 2. Remove the memory card slot cover. er yCod Eas 7422 7421U.028 3. Insert the memory card, label side up, into the memory card slot. Push firmly to engage the memory card. er yCod Eas 7422 7421U.
2 Configuring the Printer
HelvC NugFont Co de 39 Use this chapter to learn how to configure your 7421 printer, communicate with a PC, and print a test label with PrintSet. Configuring the Printer You are now ready to configure the printer by downloading data from the host to the printer.
HelvC NugFont Co de 39 Finding Your Media Sensitivity Number 120066102605140 SENSITIVITY NUMBER 120066102605140 5✩7 7421U.030 Note: Some ribbon rolls have the media sensitivity number printed on the inside core. Use this three-digit number to optimize print quality and print speed on your printer. You can achieve the best print quality on the printer by using only Intermec ribbon and media products. The default sensitivity setting for thermal transfer media is 567.
HelvC NugFont Co de 39 Setting the MSN for Intermec Media and Ribbon For direct thermal media, use the three-digit media sensitivity number located on the roll of media to set the media sensitivity number. You can also use the values from the tables in the next section. For thermal transfer media, you need to look in two places to determine the sensitivity number. The media sensitivity number on each roll of thermal transfer media or ribbon has an asterisk (*) in place of one of the digits.
HelvC NugFont Co de 39 Setting the MSN for Other Media and Ribbon If you are not using Intermec media and ribbon, or if you misplaced your packaging with the three digit-sensitivity number label on it, you can set an approximate sensitivity number. The first column of the Direct Thermal and Thermal Transfer Media Sensitivity Settings tables list the approximate sensitivity settings. To achieve acceptable print quality, enter the three-digit media sensitivity number (for example, 600).
HelvC NugFont Co de 39 Thermal Transfer Media and Ribbon Sensitivity Settings Approximate Sensitivity Settings Sensitivity Setting Thermal Transfer Media (Media/Ribbon Stock) 600 Medium 687 Duratran TTR Polyester/Premium-3 (Plastic) 683 Duratran TTR Polyester/Premium-2 677 Duratran Syntran/Premium-3/6 673 Duratran Syntran/Premium-2 637 European Polyethelene/Prem.
HelvC NugFont Co de 39 Adjusting the Print Darkness Use the print darkness adjust to fine-tune the darkness of print on your labels. The fine adjustments compensate for variations in the media (“lot to lot”), the printhead, or the printer. The darkness adjustment is similar to the dark adjust available on a copier. An increase in print darkness increases the energy to the printhead and results in darker print. A decrease in print darkness decreases the energy to the printhead and results in lighter print.
HelvC NugFont Co de 39 Adjusting the Label Gap Sensor The label gap sensor detects the gap between labels while they are being printed. The gap sensor automatically calibrates itself when you first turn on power to the printer. This adjustment compensates for manufacturing differences in label stock that may make it difficult for the gap sensor to detect the gap between labels. To adjust the label gap sensor 1. Turn the printer power off. 2. Turn the printer power on.
HelvC NugFont Co de 39 Communicating With the Printer Downloading is the universal term used to describe the transfer of information from the host to any connected peripheral device, such as your printer. When you transfer data from your printer to the PC or host, you are performing a process called uploading. You can use several methods to download information to your printer.
HelvC NugFont Co de 39 To print the test label 1. Start the PrintSet application software. 2. Click the Test Print button: 3. Select the Test Label option button. 4. Select either the Text or the Bar Code option button. If you select text, you can choose any font in the Select Printer Font list box. If you select bar code, you can choose any symbology in the Select Symbology list box. 5. Click the Print button. Your 7421 printer prints out a test label.
HelvC NugFont Co de 39 For example, if you choose to print a bar code with the Code 39 symbology, your printer prints out a label similar to this one: *0123456789* *0123456789* 7421U.031 Using the Printhead Loading Modes You can use two different printhead loading modes with the 7421 printer: Mirror Printing mode or Inverse Printing mode. If you select Mirror Printing mode, the printer reverses the order of the data that is loaded into the printhead.
HelvC NugFont Co de 39 To select Inverse or Mirror Printing mode 1. Start the PrintSet application software. 2. Click the Paper Handling button. 3. Select either the Enable Inverse Printing or the Enable Mirror Printing check box. 4. Click OK. 5. Download your change to the printer by pressing the button to send command updates to the attached printer.
HelvC NugFont Co de 39
3 Maintaining the Printer
This chapter contains cleaning procedures and a schedule detailing how often to perform maintenance procedures. You must clean the 7421 printer on a regular basis to keep it running at its highest performance level. It is very important to perform the maintenance procedures if you expose the printer to dirt or debris. Maintenance Schedule Clean your printer regularly to maintain the print quality of your labels and extend the life of your printer. This table contains suggestions for cleaning the printer.
Locating the Printer Parts You Need to Maintain Label taken sensor Printer cover Printhead Drive roller Peel-off bar Label mark sensor Label gap sensor 3-4 7421U.
Tools for Cleaning the Printer To clean the printer safely and effectively, use the following items: • Isopropyl alcohol • Cotton swabs • Clean lint-free cloth • Soapy water/mild detergent The following procedures explain how to access the printer parts and clean them without causing any harm to the printer or yourself. Warning Switch off the printer power and remove the power cord before cleaning any part of the printer.
Cleaning the Printhead In order for the printhead to provide good print quality, it must maintain close contact with the media. Therefore, cleaning media debris from the printhead is very important. Clean the printhead after every roll (1,800 inches or 46 m) of media or when necessary. Caution Do not use sharp objects such as knives or screwdrivers to scrape the printhead clean. Cleaning with sharp objects will damage the printhead.
Cleaning the Printhead Printhead 7421U.035 6. Wait 5 to 10 seconds for the print surface to dry. Replace the media and ribbon. 7. Lower the printhead assembly and lock it into the operating position by pressing down firmly on both sides of the printhead. 8. If you are finished cleaning, close the printer cover. Cleaning the Printer Covers Use a general purpose cleaner (soapy water/mild detergent) to clean the printer cover.
Cleaning the Drive Roller and Peel-Off Bar Cleaning the drive roller and peel-off bar preserves print quality by maintaining close contact between the media and the printhead. To clean the drive roller and peel-off bar 1. Turn the printer power off and remove the power cord. 2. Open the printer cover. 3. Open the printhead assembly by pulling the yellow release lever (on the left side of the printer) toward the front of the printer. Lift the printhead up into the full open position. 4.
Cleaning the Drive Roller and Peel-Off Bar Peel-off bar Drive roller 7421U.
Cleaning the Label Sensors Three label sensors on the printer require regular cleaning: • Label taken sensor • Label mark sensor • Label gap sensor To clean the label sensors 1. Turn the printer power off and remove the power cord. 2. Open the printer cover. 3. Open the printhead assembly by pulling the yellow release lever (on the left side of the printer) toward the front of the printer. Lift the printhead up into the full open position. 4.
Cleaning the Label Sensors Label taken sensor Label gap sensor Label mark sensor 7421U.
4 Troubleshooting
This chapter provides some hints for troubleshooting error messages that the printer sends to the host and problems you may experience with the printer. Troubleshooting Checklist You may have printer operation, print quality, or printer communications problems at some time during the life of your printer. It is easy to fix most of the errors and consequently not delay operation of the printer for very long. To troubleshoot your printer 1.
Printer Operation Problems If your printer is not operating correctly, try locating the problem in the table below. Symptom Possible Causes Solution No power or loss of power. You have damaged or disconnected the power cable. Make sure you have plugged the power cable into both the printer and a power source. Replace the cable if damaged. The Power light flashes red and printing stops. Printhead has overheated. Let the printer cool down. It will resume printing on its own.
Print Quality Problems If your labels are not being printed properly, check the following table to locate the symptom and correct the problem. Symptom Possible Causes Solution Blotches printing on labels. Dirty printhead. Clean the printhead. For help, see “Cleaning the Printhead” in Chapter 3. Printing is too light or too dark. Poor quality label or ribbon stock. Use only Intermec label and ribbon stock to ensure superior print quality and product performance. Incorrect media sensitivity setting.
Communication Problems If your printer is not receiving downloaded data, try the solutions in this table. Symptom Possible Causes Solution Printer does not communicate with the host. Incorrect communications parameters. Use PrintSet to make sure that you have the correct communications parameters set (such as baud rate). Damaged or incorrect I/O cable. Check the connections at both ends or replace the cable. See Appendix B for cable information.
4. Hold the Feed/Pause button down to momentarily suspend the test. The printer prints a software configuration test label. 5. If you press the Feed/Pause button again, the pitch label prints. To exit Data Line Print mode 1. Turn the printer power off. 2. Turn the printer power back on. Preventing Data Loss Several problems can cause data loss or communications problems on the printer. Data loss can result in printing errors or missing field data. Hardware handshaking involves the use of a hardware wire.
Your printer uses XON/XOFF protocol for software handshaking. When the input buffer is full, the printer transmits an XOFF character. This action alerts the host to the fact that the printer buffer is full and cannot receive any more data. When the printer is ready to receive more data, it sends the XON character. To check for communications problems 1. Check the cabling from the printer to the host system. 2. Check the interfacing of the devices that are communicating with the printer. 3.
A Printer Specifications
Printer Specifications This section describes the specifications for the 7421 printer.
Fonts and Graphics The printer contains 21 resident bitmap fonts and three outline fonts. You can use font ID 3 through 6 and 8 through 19 to download user-defined fonts. See Appendix C, “Character Sets,” for complete tables of all available fonts and their character sets. Media Specifications Roll 1,800 inches (46 m) Label Length 0.38 inch (10 mm) to 8.0 inches (203mm) Web Width 1.12 inches minimum (28 mm) 4.65 inches maximum (118 mm) Thickness 0.0059 inch minimum (0.15 mm) 0.010 inch maximum (0.
Printing Speed 2 inches per second (50.8 mm per second) Ribbon Specifications Roll 3,582 linear inches (91 m) Widths 1.33 inches (34 mm) 2.5 inches (64 mm) 3.29 inches (84 mm) 4.33 inches (110 mm) Diameter 1.39 inches maximum (35 mm) Printer Options This section contains a list of the options you can use with the printer along with a brief description. Consult your Intermec representative to order any option.
Bar Code Symbologies Supported The 7421 printer supports these bar code symbologies: • Codabar • Data Matrix • Code 2 of 5 • EAN • Code 11 • HIBC • Code 16K • Interleaved 2 of 5 • Code 39 • Maxicode • Code 49 • PDF417 • Code 93 • POSTNET • Code 128 • UPC • Code One A-6
B Communications Reference
About Communications The 7421 printer supports both serial and parallel communications. Using the parallel interface with an IEEE 1284 parallel interface cable (Part No. 590124) provides the best performance. Your printer has the following hardware and software requirements: • The host computer must use the American Standard Code for Information Exchange (ASCII) for data communications. • A serial port or a parallel port must be available on the host if you are connecting directly to the printer.
The printer returns its highest priority status when it receives a valid block ( data ) or when it receives the status request command . When the printer receives the status dump command (), the printer returns all active status. The printer status response time ranges from 30 ms to 100 ms depending on the complexity of the received message block. In the case of a transmission error, the printer responds with a and discards the entire message block.
XON/XOFF Protocol XON/XOFF protocol uses the ASCII characters (XON) and (XOFF) to start and stop the flow of data from the host to the printer. The printer does not restrict the message length for XON/XOFF protocol. That is, the printer processes information as it is being downloaded and stops when there is no more information. and are optional characters. However, if you send an STX, the printer ignores all other characters until you send an ETX.
Hardware Protocol The printer uses Ready/Busy and DTR (data terminal ready) of the RS-232C interface to indicate the printer’s status. You can configure Ready/Busy and DTR independent of each other and independent of the software protocol you select for the serial port. You can set each pin to one of these four settings: default, high, flow control, and Ready/Busy. When you set the pin to high, it stays high as long as the printer is powered up.
Note: Please use caution when replacing control characters with printable characters. You cannot replace one control character with more than one printable character.
Communications Boundaries The information below applies to all protocols that the printer supports. Parameter Maximum Capacity Message delay 9999 milliseconds Character delay 9999 milliseconds Message block size 255 characters (including STX and ETX characters) Unlimited block size for XON/XOFF RS-232 Serial Interface The printer supports serial communications with the RS-232 interface.
Pin Name Operation 3 Receive Data Input: Connect to transmit data pin of connected device. 2 Transmit Data Output: Connect to receive data pin of connected device. 6 Data Terminal Ready (DTR) Output: When you use a modem, connect to modem DTR pin. When using Intermec Standard Protocol, this pin indicates that the printer is switched on. When using XON/XOFF or hardware flow control, this pin indicates the printer mechanical status and the status of the printer input buffer.
RS-232 Cable for 9-pin to 9-pin (Part No. 590123) DB9 SOCKET DB9 PLUG 1 2 3 4 5 6 7 8 9 1 2 3 4 5 6 7 8 9 AT PRINTER Receive Data Transmit Data Data Terminal Ready Ground Data Set Ready Request to Send Clear to Send Ring Indicator +5V Transmit Data Receive Data AUX Ground Data Terminal Ready Clear to Send Request to Send Inactive 7421U.
C Character Sets
This chapter contains tables for the character sets that the 7421 supports. To select a character set, use PrintSet, your third-party software application, or the IPL command set. International Character Sets The following tables show which hex codes to download for international characters not available in the U.S. character set. To use the tables, find the hex code for the U.S. character that corresponds with the character in your language.
86XX Character Table This table shows the hex codes for the character sets that print if your printer is running under Emulation mode. 23 24 40 5B 5C 5D 5E 60 7B 7C 7D 7E U.S. ASCII # $ @ [ \ ] ^ ` { ¦ } ~ U.K.
IBM Translation Character Table If you are running your printer with IBM Translation enabled, use this table to find the right hex codes for the international character sets. 4F 7B 5B 7C 4A E0 5A 5F 79 C0 6A D0 A1 U.S. ASCII ¦ # $ @ ¢ \ ! ¬ ` { ¦ } ~ U.K.
15 07 08 ➝ 14 06 ➝ § 17 18 09 0A ➝ 19 1A 0B 0C 0D 0E 0F ▲ 1E ▼ 1F ▲ ¶ ➝ ♣ 05 ♥ ♦ 04 ➝ ♥ 03 ➝ 02 ▲ 01 ➝ 00 ➝ Code Page 850 Character Table 10 11 12 # $ % & ' ( ) ∗ + , - .
Extended Character Sets Each internal font in the 7421 has a different character set associated with it as shown in the following tables. The hex codes accompany each character.
Characters in Fonts c20 c21 c22 c25, c26, c28 c30-c41 8 point 12 point 20 point outline fonts monospace fonts ØØ Ø1 Ø2 Ø3 Ø4 Ø5 Ø6 Ø7 Ø8 Ø9 ØA ØB ØC ØD ØE ØE 1Ø 11 12 13 14 15 16 17 18 19 1A 1B 1C 1D 1E 1F 2Ø 21 22 23 24 25 26 27 28 29 2A 2B 2C 2D 2E 2F 3Ø 31 32 33 34 35 36 37 38 39 3A 3B 3C 3D 3E 3F 4Ø 41 42 43 44 45 46 47 48 49 4A 4B 4C 4D 4E 4F 5Ø 51 52 53 54 55 56 57 58 59 5A 5B 5C 5D 5E 5F 6Ø 61 62 63
Characters in Font c23 OCR A ØØ Ø1 Ø2 Ø3 Ø4 Ø5 Ø6 Ø7 Ø8 Ø9 ØA ØB ØC ØD ØE ØE 1Ø 11 12 13 14 15 16 17 18 19 1A 1B 1C 1D 1E 1F 2Ø 21 22 23 24 25 26 27 28 29 2A 2B 2C 2D 2E 2F 3Ø 31 32 33 34 35 36 37 38 39 3A 3B 3C 3D 3E 3F 4Ø 41 42 43 44 45 46 47 48 49 4A 4B 4C 4D 4E 4F 5Ø 51 52 53 54 55 56 57 58 59 5A 5B 5C 5D 5E 5F 6Ø 61 62 63 64 65 66 67 68 69 6A 6B 6C 6D 6E 6F 7Ø 71 72 73 74 75 76 77
Characters in Font c24 OCR B Size 2 ØØ Ø1 Ø2 Ø3 Ø4 Ø5 Ø6 Ø7 Ø8 Ø9 ØA ØB ØC ØD ØE ØE 1Ø 11 12 13 14 15 16 17 18 19 1A 1B 1C 1D 1E 1F 2Ø 21 22 23 24 25 26 27 28 29 2A 2B 2C 2D 2E 2F 3Ø 31 32 33 34 35 36 37 38 39 3A 3B 3C 3D 3E 3F 4Ø 41 42 43 44 45 46 47 48 49 4A 4B 4C 4D 4E 4F 5Ø 51 52 53 54 55 56 57 58 59 5A 5B 5C 5D 5E 5F 6Ø 61 62 63 64 65 66 67 68 69 6A 6B 6C 6D 6E 6F 7Ø 71 72 73 74 75 7
I Index
A adjustments darkness adjust control, 2-8 label gap sensor, 2-9 Advanced mode, international character sets, C-3 B bar code symbologies Codabar, A-6 Code 11, A-6 Code 128, A-6 Code 16K, A-6 Code 2 of 5, A-6 Code 39, A-6 Code 49, A-6 Code 93, A-6 Code One, A-6 Data Matrix, A-6 EAN, A-6 HIBC, A-6 Interleaved 2 of 5, A-6 Maxicode, A-6 PDF417, A-6 POSTNET, A-6 supported, A-6 UPC, A-6 battery pack option, A-5 boundaries, communication, B-8 C cable, RS-232 serial schematics, B-10 character sets Advanced mode,
configuring media sensitivity number, 2-3 printer, 2-3 covers, printer, cleaning, 3-7 cutter option, A-5 D Data Line Print, 4-6 entering, 4-6 using to test the operation of the printer, 4-6 using to troubleshoot printer, 4-6 data loss, preventing, 4-7 Data Matrix, A-6 defaults, resetting factory, 4-8 dimensions printer, A-3 drive roller, cleaning, 3-8 E EAN, A-6 electrical requirements external power supply, A-3 printer, A-3 Emulation mode, international character sets, C-4 environment, specifications, A-
M maintaining the printer, 3-3 maintenance schedule, 3-3 tools, 3-5 Maxicode, A-6 media faults, 1-5 loading fanfold, 1-16 loading for peel-off printing, 1-7 media sensitivity number changing with PrintSet, 2-4 description of, 2-3 finding, 2-3 optimizing with Intermec media and ribbon, 2-5 setting for other media and ribbon, 2-6 settings table direct thermal media, 2-6, 2-7 memory card, inserting, 1-20 expansion option, A-5 specifications printer, A-4 Mirror Printing mode, 2-12 selecting with PrintSet, 2-13
printer (continued) options, A-5 battery pack, A-5 cutter, A-5 memory expansion, A-5 printhead specifications, A-4 printing speed, A-5 ribbon specifications, A-5 specifications, A-3 printhead cleaning, 3-6 loading modes, using, 2-12 specifications, printer, A-4 printing peel-off, 1-7 test label, 2-11 printing speed, A-5 PrintSet using to adjust the print darkness, 2-8 using to change the media sensitivity number, 24 using to communicate with the printer, 2-10 using to select printhead loading mode, 2-13 pro
print quality problems, 4-5 printer operation problems, 4-4 U UPC, A-6 user-defined protocol, B-7 X XON/XOFF protocol, B-5 I-7