
User Manual


Chapter 1 — Using the PB50 Portable Label Printer
8 PB50 Portable Label Printer User’s Guide
•an AC power cord.
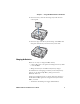
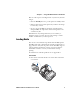
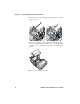
To charge the battery inside the PB50
1 Install the battery in the PB50. For help, see the previous
section, “Installing the Battery.”
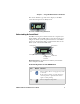
2 Connect the power supply to the DC power connector on the
printer.
3 Connect one end of the power cord to the power supply and
then plug the other end into an AC outlet.
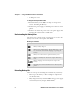
Understanding the Battery Icons
The easiest way to tell the status of your battery is to look at the
battery icons on the control panel of the PB50.
Extending Battery Life
Here are some tips for extending the overall life of your battery:
• Never expose the battery to direct sunlight or temperatures
over 40°C (104°F).
• Only charge the battery inside the PB50 using a power supply
or in the 4-bay battery charger (Model AC18).
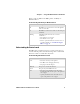
Battery Icon Status
Icon Status
Battery is fully charged.
Battery has a medium charge. You should be able to work
for several more hours before charging or replacing the
battery.
Battery is low. You need to replace the battery soon.
Battery is critically low. You need to replace the battery
now.
Battery charging error. You may need to replace the
battery.
External power connected and there is no battery in the
printer.