
User's Manual Part 3


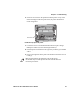
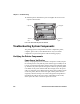

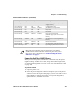
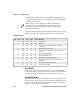
Table Of Contents
- Checking the Power Source
- Aligning the Printer Mechanism
- Troubleshooting System Components
- Understanding Diagnostic Information
- Communications Pin-Out Configurations
- Specifications
- Printer Dimensions
- Media Specifications
- Understanding the Fanfold Paper Page Layout
Chapter 6 — Troubleshooting
98 6822 Series 80-Column Printer User’s Manual
Checking the Power Source
Press any button on the printer control panel. If there is power, the power
indicator (green LED) turns on and the printhead moves to its starting
position. If the printer emits beeps and any of the other indicators light
up or flash, observe the number of beeps and indicator flashes and see
“Printer Failure Indicators” on page 102
If there is no reaction from the printer after you press a key on the
control panel, or only the green power light blinks, verify that the power
cables are properly connected between the printer mechanism and its
power source (internal battery, vehicle cable, or ac). If none of these
steps “wake” up the printer with the problem, then you need to return the
printer for service.
• Internal battery
Check the battery and its cable by installing into another known-
good printer.
• Vehicle cable
Attach the printer in question to another vehicle power cable.
• AC power
Plug the printer into another outlet.
Aligning the Printer Mechanism
If head jams occur, you may need to align the printer mechanism.
To align the printer mechanism
1 Open the printer top cover, then install a ribbon cartridge (see
page 15) and position the printhead to the far left toward the green
thumb wheel.