
User's Manual


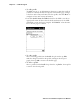


Table Of Contents
- Title
- Contents
- Before You Begin
- Chapter 1: Introduction
- Chapter 2: Pocket PC 2002
- Introduction
- Premium versus Professional Editions
- Where to Find Information
- Basic Skills
- Microsoft ActiveSync
- Microsoft Pocket Outlook
- Companion Programs
- Pocket Internet Explorer
- Getting Connected
- Chapter 3: Installing Applications
- Chapter 4: Network Support
- CORE
- Network Adapters
- Ethernet Communications
- 802.11b Communications
- Profiles
- Basic
- Security
- Advanced
- Certificates
- Import/Export
- Scan List
- Network Selection APIs
- Function Summary
- RadioConnect()
- RadioDisconnect()
- GetMac()
- GetBSSID()
- GetSSID()
- GetLinkSpeed()
- GetNetworkType()
- GetTXPower()
- GetNetworkMode()
- SetNetworkMode()
- AddWep()
- GetRSSI()
- GetAssociationStatus()
- GetWepStatus()
- GetAuthenticationMode()
- SetAuthenticationMode()
- SetChannel()
- EnableWep()
- GetPowerMode()
- SetSSID()
- isOrinoco()
- EncryptWepKeyForRegistry()
- SetRTSThreshold()
- GetRTSThreshold()
- ConfigureProfile()
- StartScanList()
- 802.11b Radio CORE Module
- WWAN Radio Options
- WAN Radio CORE Module
- Wireless Printing
- AutoIP/DHCP
- SNMP Configuration
- Chapter 5: Printer Support
- Chapter 6: Scanner Support
- Scanner Control and Data Transfer
- Automatic Data Collection COM Interfaces
- Multiple ADC COM Object Support
- How to Create and Use the ADC COM Interfaces
- 2D Imager Overview
- Create and Delete ADC COM Object Functions
- IADC Functions
- IBarCodeReaderControl Functions
- IS9CConfig Functions
- IS9CConfig::GetCodabar
- IS9CConfig::SetCodabar
- Codabar Default Settings
- Codabar Enumerations
- IS9CConfig::GetCode39
- IS9CConfig::SetCode39
- Code 39 Default Settings
- Code 39 Enumerations
- IS9CConfig::GetCode93
- IS9CConfig::SetCode93
- Code 93 Default Settings
- Code 93 Enumerations
- IS9CConfig::GetCode128
- IS9CConfig::SetCode128
- Code 128/EAN 128 Default Settings
- Code 128 Enumerations
- IS9CConfig::GetI2of5
- IS9CConfig::SetI2of5
- Interleaved 2 of 5 Default Settings
- Interleaved 2 of 5 Enumerations
- IS9CConfig::GetMatrix2of5
- IS9CConfig::SetMatrix2of5
- Matrix 2 of 5 Default Settings
- Matrix 2 of 5 Enumerations
- IS9CConfig::GetMSI
- IS9CConfig::SetMSI
- MSI Default Settings
- MSI Enumerations
- IS9CConfig::GetPDF417
- IS9CConfig::SetPDF417
- PDF 417 Default Settings
- PDF 417 Enumerations
- IS9CConfig::GetPlessey
- IS9CConfig::SetPlessey
- Plessey Default Settings
- Plessey Enumerations
- IS9CConfig::GetStandard2of5
- IS9CConfig::SetStandard2of5
- Standard 2 of 5 Default Settings
- Standard 2 of 5 Enumerations
- IS9CConfig::GetTelepen
- IS9CConfig::SetTelepen
- Telepen Default Settings
- Telepen Enumerations
- IS9CConfig::GetUpcEan
- IS9CConfig::SetUpcEan
- UPC/EAN Default Settings
- UPC/EAN Enumerations
- IS9CConfig2 Functions
- IS9CConfig2::GetCode11
- IS9CConfig2::SetCode11
- Code 11 Default Settings
- Code 11 Enumerations
- IS9CConfig2::GetCustomSymIds
- IS9CConfig2::SetCustomSymIds
- Custom Identifier Assignments
- Custom Identifier Default Settings
- Custom Identifier Example
- IS9CConfig2::GetGlobalAmble
- IS9CConfig2::SetGlobalAmble
- Postamble and Preamble Defaults
- IS9CConfig2::GetPDF417Ext
- IS9CConfig2::SetPDF417Ext
- PDF 417 Extended: Micro PDF 417 Default Settings
- IS9CConfig2::GetSymIdXmit
- IS9CConfig2::SetSymIdXmit
- Symbology ID Transmission Option
- IS9CConfig3 Functions
- AIM Symbology ID Defaults
- IImage Interface
- Data Collection Configuration
- Tethered Scanner
- Chapter 7: Programming
- Creating CAB Files
- FTP Server
- Full Screen
- Kernel I/O Controls
- Reboot Functions
- Remapping the Keypad
- Appendix A: Control Panel Applets
- Appendix B: Unit Manager
- Appendix C: Bar Codes
- Index

Network SupportChapter —4
86 700 Series Color Mobile Computer User’s Manual
Ethernet Communications
Follow the steps below to start Ethernet communications on the 700 Series
Computer. If your system does not c ontain an 802.11b radio, then
Ethernet networking using DHCP will be selected as the default.
When “Built-in Ethernet” is selected from the NDISTRY pop-up menu,
then the antenna shown to the left will appear in the System Tray. When
“No networking” is selected, then this icon will appear with a red “X”
above it.
From the 700 Series Computer, tap Start → Settings → the Connections
tab → Network Adapters to access the network connections for this unit.
Make the changes necessary for your network, then tap ok when finished.
Note: “LAN9000” is for Ethernet and ”802.11b Wireless LAN” is for
802.11b radios.