NetworX™ Series NX-1500E LED Keypad User Manual Downloaded from www.Manualslib.
Downloaded from www.Manualslib.
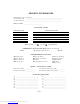
SECURITY SYSTEM NOTES Installing/Service Company _________________________________ For Service Call __________________________________________ Central Station ___________________________________________ Duress Code ____________________ FUNCTION CODES Function Code Controls Function This system is is not partitioned.
THIS MANUAL IS FURNISHED TO HELP YOU UNDERSTAND YOUR SECURITY SYSTEM AND BECOME PROFICIENT IN ITS OPERATION. ALL USERS OF YOUR SECURITY SYSTEM SHOULD READ AND FOLLOW THE INSTRUCTIONS AND PRECAUTIONS IN THIS BOOKLET AND, IF POSSIBLE, PRACTICE ON THE KEYPAD CONTROL WHILE YOUR PROFESSIONAL INSTALLER IS ON SITE. FAILURE TO DO SO COULD RESULT IN THE SECURITY SYSTEM NOT WORKING PROPERLY. THIS BOOKLET SHOULD BE KEPT IN AN ACCESSIBLE LOCATION FOR THE LIFE OF THE SECURITY SYSTEM.
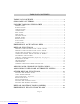
TABLE OF CONTENTS TABLE OF CONTENTS .......................................................3 GLOSSARY OF TERMS ......................................................4 UNDERSTANDING THE LIGHTS ......................................5 ARMED LIGHT................................................................................ 5 BYPASS LIGHT............................................................................... 5 CANCEL LIGHT...............................................................................
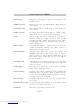
GLOSSARY OF TERMS Abort Delay An option that allows a delay in reporting to the central station. Authority Level The level of access an individual has when using an alarm panel. Central Station The location where alarm data is sent during an alarm report. Chime Feature An option that allows the keypad to sound a dingdong whenever an entry/exit door is opened. Codes Can be either User Codes (relating to a person) or Function Codes (a toggle switch to turn specific functions on/off).
Quick Arm An option that allows you to turn on (ARM) the security system by pressing either the [STAY] or [EXIT] key on the keypad control (for ARMING only) as programmed by the installing company. User Code A four- (4) or six- (6) digit entry code used to arm or disarm the system. UNDERSTANDING THE LIGHTS ARMED LIGHT The armed light is “on” when the system is armed. The armed light is “off” when it is disarmed. The armed light will flash when there has been an alarm during the previous arm cycle.
INSTANT LIGHT The instant light is “on” when there is no delay on your entry/exit door(s). Any time the instant light is “on” and the exit delay has expired, the opening of an entry/exit door will produce an immediate alarm. The instant light can be toggled on or off by pressing the [Stay] key while the system is armed. When the instant light is “off”, the entry/exit door(s) is delayed. POWER LIGHT The power light is on if the primary power is on.
EMERGENCY ACTIVATION KEYS NOTES: You must hold these keys for 2 seconds to activate these functions. Your system may not be programmed for these activation keys (see page 1). You should press these keys only in an emergency situation that requires response by emergency personnel. If your system is programmed for these functions, the following reports can be sent. Fire Key – This key can activate the fire alarm when pressed for two seconds.
Step 2 • Enter your 4 or 6 digit user code to arm the system. • The armed and exit lights will illuminate. • You may now leave the building. NOTE: The exit light will flash rapidly for the last 10 seconds of the exit delay as a warning to the user that the exit time is about to expire. The user may wish to disarm and rearm the system if more time is needed. ARMING YOUR SYSTEM IN THE “STAY” MODE STAY is used when the user is inside the premise and wants protection around the perimeter.
USING THE QUICK ARM (Optional, see page 1) The Quick Arm feature may be used if it is enabled. Quick Arm will allow the user to arm the security system in the AWAY mode by pressing the [EXIT] key, or arm in the STAY mode by pressing the [STAY] key. This feature is used for ARMING ONLY, and will not disarm the security system. This is ideal for a maid or baby sitter code, etc.
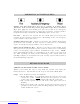
NX-1500E LED Keypad includes NX-1508E and NX-1516E ARMED Light is "on" when armed, "off" when disarmed. Flashes to indicate a previous alarm. READY Light is "on" when the system is ready to arm, flashes if ready to "force arm". POWER Light is "on" when AC power is present, flashes to indicate a low battery condition. INSTANT Light is "on" when there is no entry delay. SERVICE Light is "on" to indicate a trouble condition with your system.
BYPASSING ZONES If you wish to bypass one or more zones, this must be done while the system is in the disarmed state. The following steps are used for bypassing zones: Step 1 Press the [BYPASS] key. Step 2 Enter user code, if required (optional). The bypass light flashes. Step 3 Enter 1 or 2 digits indicating the zone you wish to bypass, i.e. press the [1] key for zone 1, press [1]-[2] for zone 12. Step 4 Press the [BYPASS] key again.
ADDING AND CHANGING USER CODES Your system must be Disarmed to change user codes. Step 1 Press [r]-[5]-[“Master Arm/Disarm” Code]. NOTE: For partitioned systems, someone changing the code of another person must have access to all or more partitions than the user being changed. Step 2 The ready light will flash. Step 3 Enter the 2 digit “user number” (always enter 2 digit such as [0][3] for user 3, or [5]-[2] for user 52).
You may toggle (turn on/off) the authority level by pressing the number for that authority level. LIGHT AUTHORITY LEVELS IF LIGHT 8 IS OFF 1 Reserved 2 Arm Only 3 Arm Only After Closing Time 4 Master Arm/Disarm (can program other codes) 5 Arm/Disarm 6 Bypass Zones 7 Open / Close Reporting If this light is on, this code is programmed as a function code. Do not change! Press [#] - [#] to exit. 8 (Note: Do not change if on.) Step 5 Press the [r] key. The ready light will flash.
OTHER KEYPAD FUNCTIONS SETTING THE KEYPAD TONE Step 1 Press [r]-[0]. Keypad is now in the “Adjust Tone” mode. Step 2 Pressing the [1] key will make the keypad sounder go to higher tones, pressing the [2] key will make the keypad sounder go to lower tones. Step 3 When the desired tone is reached, press the [#] key to set this tone and exit from the “Adjust Tone” mode. CHANGE PARTITION – Optional Step 1 Press [r]-[1]. Step 2 Press a NUMBER key between 1 and 8 to change partitions momentarily.
RESET FUNCTION This function is used to reset Smoke Detectors, Zone Troubles, and Zone Tampers. Your system must be Disarmed to use the Reset function. Step 1 Step 2 Press [r]-[7]. Resets have now been performed. If the keypad begins beeping, the reset did not execute properly. Enter your code to silence the keypad. Wait a few minutes and repeat step 2 to attempt another reset. If the keypad still beeps after repeated attempts, please contact your installer.
Time 12:00 Midnight 1:00 AM 2:00 AM 3:00 AM Hour Code Time Hour Code Time Hour Code 00 8:00 AM 08 4:00 PM 16 01 02 03 09 10 11 5:00 PM 6:00 PM 7:00 PM 17 18 19 4:00 AM 04 12 8:00 PM 20 5:00 AM 6:00 AM 7:00 AM 05 06 07 9:00 AM 10:00 AM 11:00 AM 12:00 Noon 1:00 PM 2:00 PM 3:00 PM 13 14 15 9:00 PM 10:00 PM 11:00 PM 21 22 23 SETTING THE KEYPAD LIGHTING Step 1 Press [r]-[9]-[1]. The service light will flash.
3 ZONE LOW BATTERY - Press the [3] key. The zone light(s) will illuminate showing which zone(s) has a low battery. This only applies to wireless zones. Press the [#] key to return to the 1 of 8 service lights. 4 ZONE LOSS OF SUPERVISION - Press the [4] key and the zone light(s) will illuminate showing which zone(s) has loss of supervision. This only applies to wireless zones. Press [#] key to return to the 1 of 8 service lights.
Beeps for 1 second or emits a “ding-dong” sound for the “Chime” feature. Beeps during an exit delay; beeps rapidly for the last 10 seconds of an exit delay; and beeps 1 second at the end of the exit delay. Pulses when the armed status changes and the AC power is off. Pulses when the armed status changes and any zone(s) are bypassed. Pulses when the armed status changes and a low battery is detected. Pulses when the armed status changes and a Tamper condition is detected.
warning fire detection is best achieved by the installation of fire detection equipment in all rooms. This equipment should be installed in accordance with the National Fire Protection Association's Standard 72. For additional information write the National Fire Protection Association, Batterymarch Park, Quincy, MA 02269.The following are examples of evacuation plans. A plan unique to your home or business should be drawn and memorized by each occupant. Page 20 Downloaded from www.Manualslib.
SYSTEM NOTES Page 21 Downloaded from www.Manualslib.
NX1500E SERIES USER’S MANUAL NX1500EUC04 REV C (DEC 2004) Downloaded from www.Manualslib.