
User Manual User guide
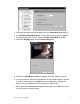
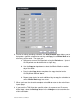
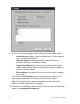
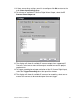
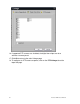
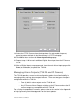
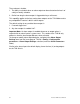
Table Of Contents
- Chapter 1 TVN 20 System Basics
- Chapter 2 TVN Advanced Topics
- HDD Configuration & Management
- Account Management (Users)
- Advanced Camera Settings
- Exception Parameters – System Health Monitoring
- Video Loss
- Remote Record & Video Download
- Additional Network Settings
- Remote Update
- Serial Port Settings – RS-232 & RS-485
- Log Files
- Appendix A Troubleshooting
- Appendix B TVN 20 Specifications
- Appendix C TVN 20 IP Camera Capacities
- Appendix D TVN 20 Supported IP Cameras
- Appendix E TVN 20 USB Archive Options
- Appendix F TruVision Device Finder
- Appendix GGlossary of Terms
- Appendix HWarranty and Support
TruVision NVR 20 User Manual 75
2. Select the desired camera to configure from the Channel No drop down list
3. If the Enabled Video Mask option is accessible, then the camera supports
the feature within the TVN 20. Click the Enable Video Mask checkbox
4. Select the Settings button from the Area settings box
5. Click on the Start Draw checkbox to enable setting the video mask area.
6. Using your mouse, click and drag a box for the area to be masked. Release
the mouse when you have completed your masking region. Repeat this
process for each additional area in the camera’s field of view.
7. When you have completed defining your mask areas, Press OK to return to
the main page for video masking.