
User Manual User guide
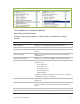
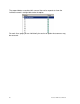
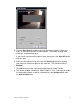
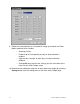
Table Of Contents
- Chapter 1 TVN 20 System Basics
- Chapter 2 TVN Advanced Topics
- HDD Configuration & Management
- Account Management (Users)
- Advanced Camera Settings
- Exception Parameters – System Health Monitoring
- Video Loss
- Remote Record & Video Download
- Additional Network Settings
- Remote Update
- Serial Port Settings – RS-232 & RS-485
- Log Files
- Appendix A Troubleshooting
- Appendix B TVN 20 Specifications
- Appendix C TVN 20 IP Camera Capacities
- Appendix D TVN 20 Supported IP Cameras
- Appendix E TVN 20 USB Archive Options
- Appendix F TruVision Device Finder
- Appendix GGlossary of Terms
- Appendix HWarranty and Support
TruVision NVR 20 User Manual 71
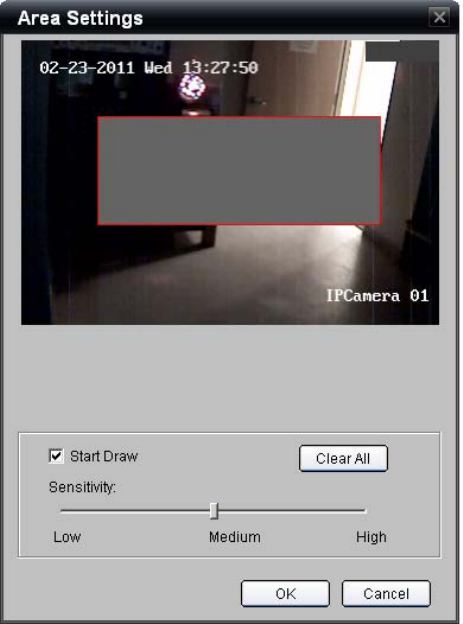
5. Click the Start Draw checkbox and using your mouse select a single area
that is in the area of concern for video tamper. The feature will only allow
creating a single detection area.
If you are not satisfied with the drawn area, please press the Clear All button
and start over.
6. Select the desired sensitivity level from the Sensitivity control by clicking
your mouse at the desired point on the slider bar. The standard setting is
Medium.
7. Click OK to return to the main configuration page for Video Tamper.
8. The default enabled schedule for Video Tamper is 7/24. If you want to enable
the feature based upon a specific schedule press the Settings button from
the Arm Schedule area.