
User Manual User guide
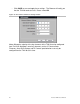
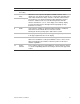
Table Of Contents
- Chapter 1 TVN 20 System Basics
- Chapter 2 TVN Advanced Topics
- HDD Configuration & Management
- Account Management (Users)
- Advanced Camera Settings
- Exception Parameters – System Health Monitoring
- Video Loss
- Remote Record & Video Download
- Additional Network Settings
- Remote Update
- Serial Port Settings – RS-232 & RS-485
- Log Files
- Appendix A Troubleshooting
- Appendix B TVN 20 Specifications
- Appendix C TVN 20 IP Camera Capacities
- Appendix D TVN 20 Supported IP Cameras
- Appendix E TVN 20 USB Archive Options
- Appendix F TruVision Device Finder
- Appendix GGlossary of Terms
- Appendix HWarranty and Support
52 TruVision NVR 20 User Manual
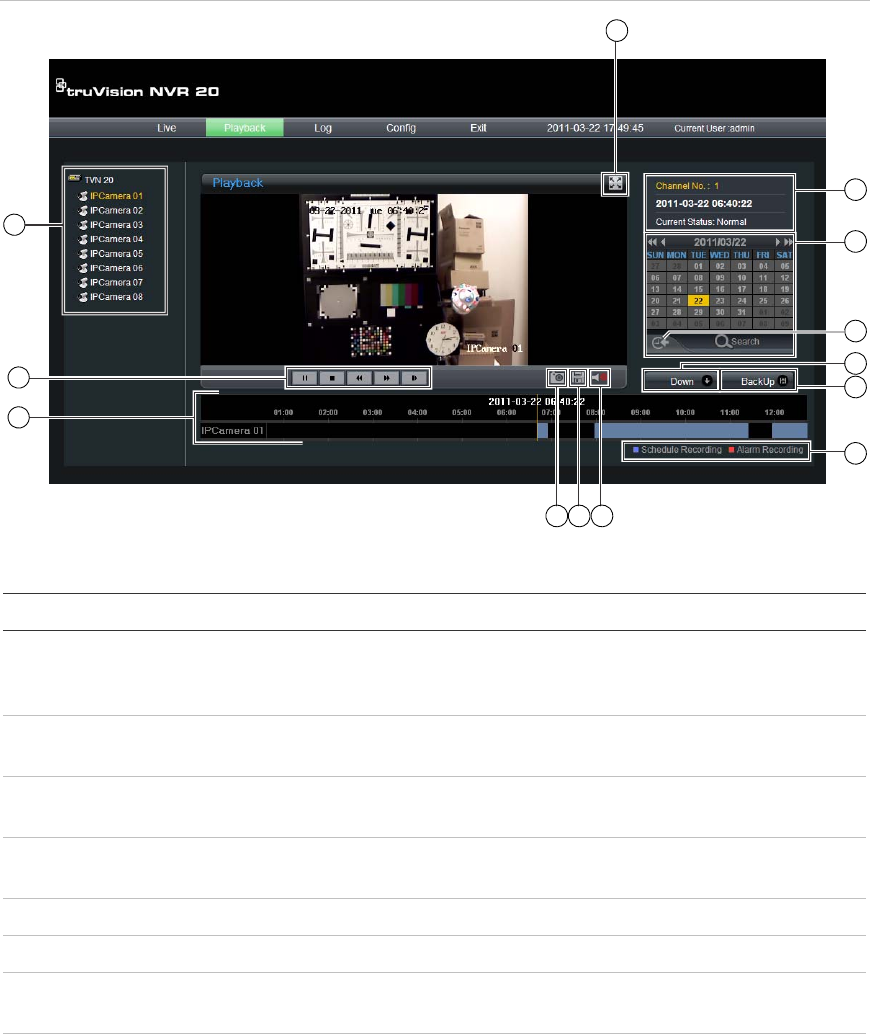
Playback Browser Page
Figure 31: Playback Browser Page
13
8
9
12
11
10
7
4 5 6
2
3
1
Table 5: Playback Browser features
Item Name Description
1. Connection
Tree
The left hand panel shows the configured IP cameras on the TVN 20.
Clicking on an individual camera’s arrow icon will load it into the current
display window.
2. Playback
Controls
Play/Pause, Stop, Frame Reverse, Frame Advance, Fast Forward
3. Video
Timeline
A graphical display of the selected video
4. Snapshot Takes a snapshot of the currently highlight camera and saves it to the
local browser PC.
5. Save Saved the selected video to the HDD.
6. Audio Displays a Volume control slider if audio is available.
7. Expand
Screen
The display can be expanded to screen by pressing the Expand button
in the upper right hand corner of the display.
8. Recording
Mode LEDs
Indicates a Scheduled Recording of Alarm Recording. Schedule
Recording (Time-lapse) video is in blue and Motion or Alarm Input
recording is in Red.