
User Manual User guide
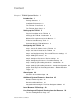
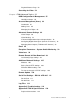

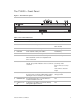
Table Of Contents
- Chapter 1 TVN 20 System Basics
- Chapter 2 TVN Advanced Topics
- HDD Configuration & Management
- Account Management (Users)
- Advanced Camera Settings
- Exception Parameters – System Health Monitoring
- Video Loss
- Remote Record & Video Download
- Additional Network Settings
- Remote Update
- Serial Port Settings – RS-232 & RS-485
- Log Files
- Appendix A Troubleshooting
- Appendix B TVN 20 Specifications
- Appendix C TVN 20 IP Camera Capacities
- Appendix D TVN 20 Supported IP Cameras
- Appendix E TVN 20 USB Archive Options
- Appendix F TruVision Device Finder
- Appendix GGlossary of Terms
- Appendix HWarranty and Support
TruVision NVR 20 User Manual iii
Content
Chapter 1 TVN 20 System Basics 1
Introduction 1
Package Contents 1
Installation Environment 2
The TVN 20 – Front Panel 3
The TVN 20 – Back Panel 4
Setting up the TVN 20 5
Physical Installation of the TVN 20 6
Setting up the TVN 20 - Introduction 6
Minimum PC requirements for the Browser 7
IP Device Auto-Discovery Tools 8
Understanding the TVN 20 Browser 8
Configuring the TVN 20 13
Step 1: Set the IP Address for the TVN 20 13
Step 2: Set Video Format for the TVN 20 14
Step 3: Set Daylight Savings Time and NTP Server Settings 17
Step 4: Adding IP Cameras 19
Step 5: Configure IP Camera - Device Settings 21
Step 6: Configuring IP Camera - Resolution Settings 24
Step 7: Setting Up Recording Schedules - Introduction 27
Step 8: Setting Up Recording Schedules - Sample Configuration 30
Step 9: Final Steps for Recording Schedules – Motion Detection
Trigger 34
Alarm Inputs 40
Select the desired Alarm Input 40
Additional System Elements - Overview 45
Remote Firmware Update 47
RS-232 and RS-485 Ports 47
Integration with Interlogix’s TruVision Navigator Software 47
Local Browser PC Settings 49
Live Viewing and Playback Viewing from the Browser 50
The Live Viewing Browser Page 50