
User Manual User guide
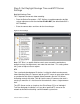
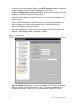
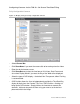
Table Of Contents
- Chapter 1 TVN 20 System Basics
- Chapter 2 TVN Advanced Topics
- HDD Configuration & Management
- Account Management (Users)
- Advanced Camera Settings
- Exception Parameters – System Health Monitoring
- Video Loss
- Remote Record & Video Download
- Additional Network Settings
- Remote Update
- Serial Port Settings – RS-232 & RS-485
- Log Files
- Appendix A Troubleshooting
- Appendix B TVN 20 Specifications
- Appendix C TVN 20 IP Camera Capacities
- Appendix D TVN 20 Supported IP Cameras
- Appendix E TVN 20 USB Archive Options
- Appendix F TruVision Device Finder
- Appendix GGlossary of Terms
- Appendix HWarranty and Support
18 TruVision NVR 20 User Manual
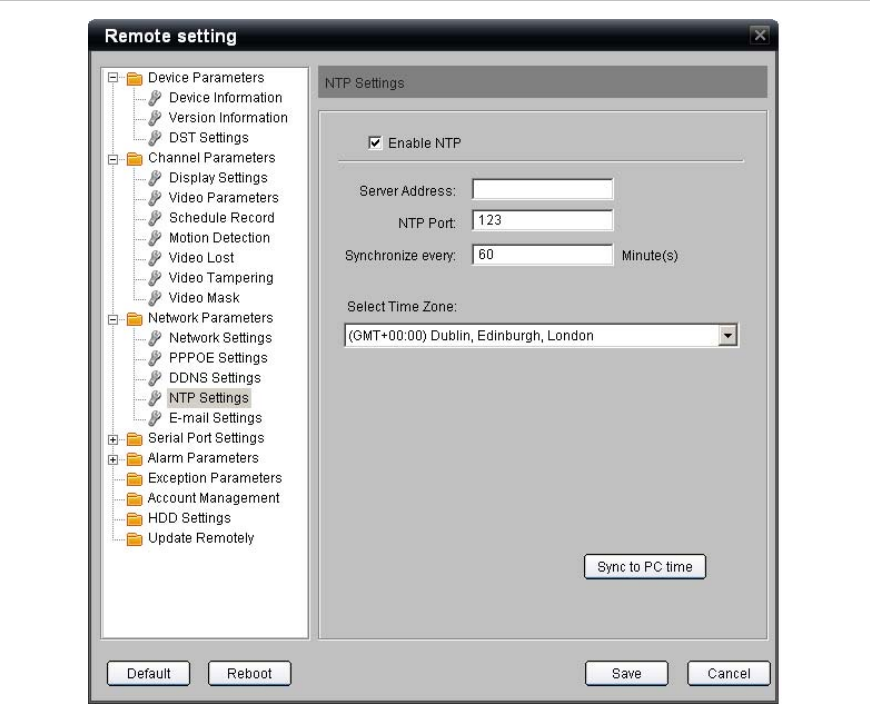
• From the Device Parameters Folder select NTP Settings element, in order to
enable and point the TVN 20 to the appropriate time server.
• Select the Enable NTP checkbox to establish an NTP server that the TVN 20
will point to. (Default setting is NOT checked)
• Enter the Server Address for the NTP Server; this may be an IP address or a
Domain Name.
• Enter the NTP Port address; most NTP Servers use the default port of 123.
• Set the frequency of time synchronization for the TVN 20 with the NTP
Server, the default is every 60 minutes.
• From the drop down list select the time zone where the TVN 20 resides, the
default is (GMT+00:00) Dublin, Edinburgh, London.
Figure 10: NTP Settings
• Sync to PC time will perform a time-synch between the PC of the connected
Browser and the TVN 20 using the PC’s time. The time synchronization is
only when the button is pushed. This should only be used if NTP is not