
User Manual User guide
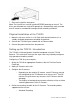
Table Of Contents
- Chapter 1 TVN 20 System Basics
- Chapter 2 TVN Advanced Topics
- HDD Configuration & Management
- Account Management (Users)
- Advanced Camera Settings
- Exception Parameters – System Health Monitoring
- Video Loss
- Remote Record & Video Download
- Additional Network Settings
- Remote Update
- Serial Port Settings – RS-232 & RS-485
- Log Files
- Appendix A Troubleshooting
- Appendix B TVN 20 Specifications
- Appendix C TVN 20 IP Camera Capacities
- Appendix D TVN 20 Supported IP Cameras
- Appendix E TVN 20 USB Archive Options
- Appendix F TruVision Device Finder
- Appendix GGlossary of Terms
- Appendix HWarranty and Support
TruVision NVR 20 User Manual 5
Setting up the TVN 20
Installing the Hard Drives
Caution: Do not insert or remove drives with the TVN 20 powered on.
Note: This unit contains electrostatic-sensitive components. Before handling the
hard drives, make sure you are properly grounded to avoid ESD damage.
1. Unpack the TVN 20 box.
2. Unpack the TVN 20 HDD box.
Note: HDDs in the shipping box are pre-mounted with their rail kits/caddy.
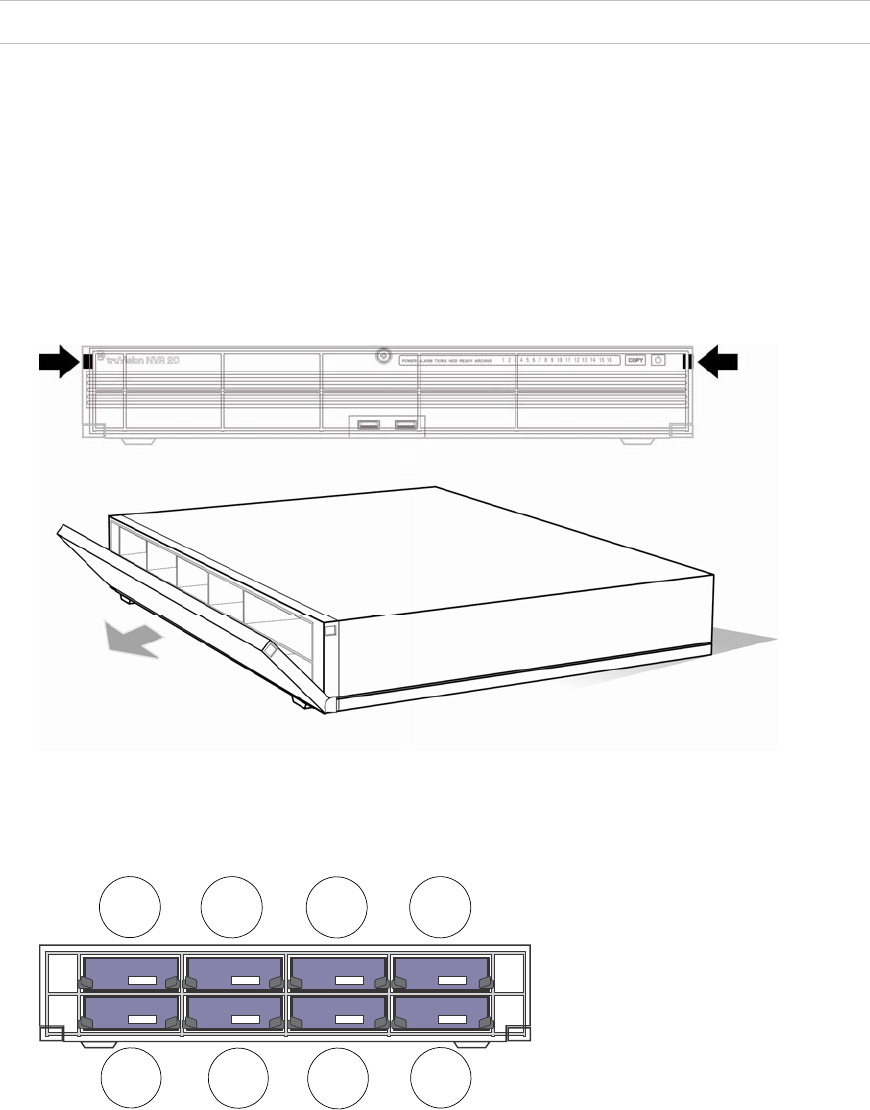
3. Use the key provided in the accessories box to unlock the front panel.
4. Press the latches on both sides of the front panel to open it.
5. Install the hard drives per the schematic below. The first drive in position
number 1, the second in position number 2, and so on. Continue to install all
the hard drives in numerical order.
1
2
3
5
6
7
8
4
6. Insert a Hard Drive into one of the hard drive bays until it has fully seated into
position. Repeat with the rest of the hard drives.