
User Manual User guide
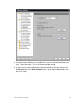
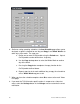
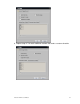
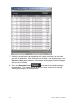

Table Of Contents
- Chapter 1 TVN 20 System Basics
- Chapter 2 TVN Advanced Topics
- HDD Configuration & Management
- Account Management (Users)
- Advanced Camera Settings
- Exception Parameters – System Health Monitoring
- Video Loss
- Remote Record & Video Download
- Additional Network Settings
- Remote Update
- Serial Port Settings – RS-232 & RS-485
- Log Files
- Appendix A Troubleshooting
- Appendix B TVN 20 Specifications
- Appendix C TVN 20 IP Camera Capacities
- Appendix D TVN 20 Supported IP Cameras
- Appendix E TVN 20 USB Archive Options
- Appendix F TruVision Device Finder
- Appendix GGlossary of Terms
- Appendix HWarranty and Support
96 TruVision NVR 20 User Manual
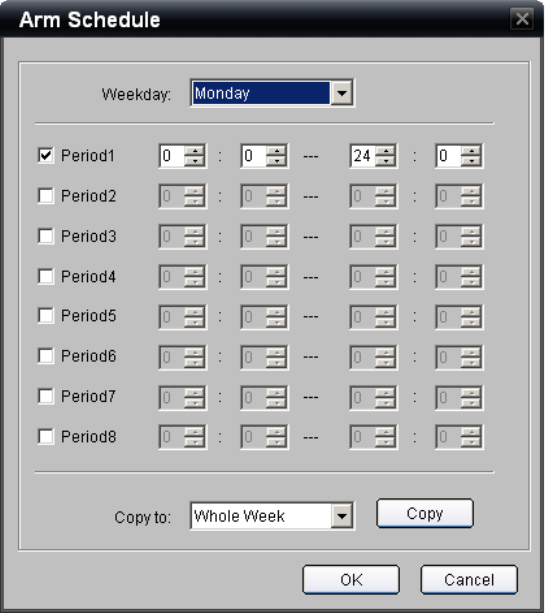
6. Similar to setting recording schedules, the Arm Schedule page allows you to
designate a specific schedule for one day and Copy it to a Whole Week or to
other days of the week. The steps are:
a. Define one or more On/Off periods using the Period rows. Up to 8
On/Off periods can be defined for a single day.
b. Use the Copy to drop-down to select the Whole Week or another
day of the week.
c. Pressing the Copy button completes the copy function for the
On/Off periods defined above.
d. Repeat steps 6a-6c for each additional day to copy the schedule to
unless Whole Week copy was used.
7. When you have the schedule complete select Ok to return to the main Video
Lost page.
8. If you want the TVN 20 to take specific actions in response to a video lost
event, select the Settings button in the Linkage area to customize the event
notification.