
Quick Start Guide
ManualsBrandsIntelligent Automation ManualsComputers & AccessoriesARGUS Guardian is a fence-mounted, RF-based perimeter intrusion detection system. This system uses a network of unattended wireless sensors to create a wireless trip wire along a perimeter to provide early warnings against intrusions.


Page | 16
© 2018 Intelligent Automation, Inc.
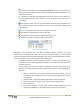
If a particular node does have a valid GPS fix, the on-screen location of the node can be updated
according to the latest fix provided by the GPS. To do so, first bring up the Node Configuration Window,
either by clicking the node in the Map View or by right clicking the node in the Node Manager panel and
selecting ‘Properties’. Then click the ‘Reset Location’ button. A prompt will be displayed to confirm that
the user wishes to update the node’s position to the latest GPS fix (see Figure 17). If no GPS fix is
available, an error message will be displayed to the user. Alternately, the GPS positions of one or more
nodes may be refreshed by selecting the desired nodes in the Node Manager panel and then clicking the
satellite icon near the top of the Node Manager panel (see Figure 16).
Figure 17: Node Configuration Window - 'Reset Location' result
4.6 Link Configuration
The process of Link Configuration involves specifying which links the user wishes to monitor. Since the
hardware may ‘see’ several viable links per node and cannot automatically determine which links may
be of interest to the user, the user must manually configure the active links. There are multiple methods
available for configure the links.
4.6.1 Link Configuration Window
For relatively simple deployments (a handful of nodes), the most straightforward method for configuring
links is to click on each link to make them active/inactive as desired. Within the Map View, simply click
on a link between two nodes to pop up the Link Configuration Window (see Figure 20). Within this
window, the link can be set to Active or Inactive by selecting the appropriate radio button. Also, this
window gives the option for the user to provide a textual link description (e.g., ‘North link’) that, if
provided, will be used in any alert indications.