
Intel Matrix Storage Manager 8.x User Guide


36
ver7.0 / User's Manual
RAID M
i
g
r
a
t
i
on
Warn
i
ng
:
This operation will delete all existing data from the additional hard drive or drives and
the data cannot be recovered. It is critical to backup all important data on the additional
drives before proceeding. The data on the source hard drive, however, will be preserved.
Warn
i
ng
:
It is very important to note which disk is the source drive (the one containing all of
the information to be migrated). On a RAID-Ready system, this can be determined by noting
the port the single hard drive is attached to a note during POST. You can also use the Intel®
Matrix Storage Manager before the additional disks are installed to verify the port and serial
number of the drive that contains the data.
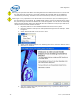
1. Physically add two or three additional SATA hard drives to the system.
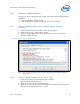
2. Boot into Windows* and open the Intel® Matrix Storage Console. Example: Refer
to Figure 3.
3. Select
Advanced
Mode from the View menu.
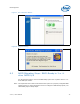
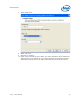
4. Select Create
RAID Volume
from
Existing
Hard Drive from the
Actions
menu.
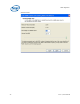
5. Click Next to continue.
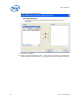
6. Type in a volume name and press the <Enter> key, or press the <Enter> key to
accept the default name.