
Intel Server RAID Q1 2009 boot camp training lab workbook


Intel
®
Server RAID Boot Camp Training Q1 2009
A: Preparing for the lab
1. Clear RAID configuration
a. Run ClearVD.bat file located on the desktop to clear partition information from the RAID
array that may have been left behind from other labs.
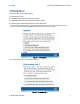
b. Open the Intel
®
RAID Web Console 2 by clicking the shortcut on the desktop.
c. Select Intel
®
RAID Controller SRCSATAWB.
d. On the menu, select Operations -> Configuration –> Clear Configuration
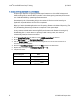
2. Create RAID 5 array
a. Launch Configuration Wizard by selecting Operations -> Configuration –> Configuration
Wizard on the menu.
b. Select Manual Configuration and click Next.
c. Select all six drives on the Unconfigured Drives list and click Add, and then click Accept.
d. Set RAID Level to RAID 5.
e. Set Disk Cache Policy to Disabled.
f. Do not change other settings. Click Accept and then click Next.
g. Click Finish.
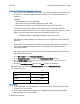
3. Disable Background Initialization
We need to disable Background Initialization, so that it does not interfere with our performance
measurements.
a. On the Logical tab, select Virtual Disk 0.
b. On the Operations tab, select Set Virtual Disk Properties.
c. Set Background Initialization to Disabled.
d. Click Go and confirm the change.
e. Open Group Operations -> Show Progress. If Background Initialization is already running, click
Abort. Click Close.
4. Disable Patrol Read and Consistency Check
We need to disable Patrol Read and Consistency Check, so that they do not interfere with our
performance measurements.
a. On the Physical tab, select Intel RAID® Controller SRCSATAWB.
b. Go to the Operations tab.
c. Select Set Patrol Read Properties.
d. Set Operation Mode to Disabled.
e. Click Go.
f. Select Schedule Consistency Check.
g. Set Run Consistency Check to Disabled.
h. Click Go.
5. Run ClearVD.bat file located on the desktop to clear partition information from the new
virtual disk.
If there is partition information left on the HDDs from previous configuration, IOmeter will not be
able to use this drive.
6 © 2009
Intel Corporation