
Service Guide


Hardware Installations and Upgrades
Intel
®
Server System P4000IP and Intel
®
Workstation System P4000CR Service Guide 89
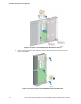
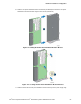
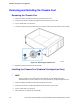
5. Secure the foot by inserting screw through the rubber foot (see letter B).
6. Repeat the above steps until all four feet are installed.
Figure 123. Installing the Chassis Feet
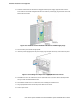
7. Put chassis in the upright position.
8. Reconnect all peripheral devices and the AC power cable to the server. Power up the server.
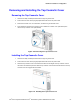
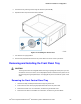
Removing and Installing the Front Panel Tray
CAUTION
The front panel is NOT hot swappable. Before removing or replacing the control panel, you must
first take the server out of service, turn off all peripheral devices connected to the system, turn off
the system by pressing the power button, and unplug the AC power cord from the system or wall
outlet.
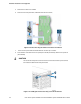
Removing the Front Control Panel Tray
1. Observe the safety and ESD precautions at the beginning of this book.
2. Power down the server and unplug all peripheral devices and the AC power cable.
3. Remove the chassis cover. For instructions, see “Removing the Chassis Cover”.
4. Remove the front bezel if it is installed. For instructions, see “Removing the Front Bezel”.