
System Service Guide

Hardware Installations and Upgrades
30 Intel
®
Server System R1000JP Family Service Guide
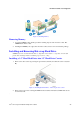
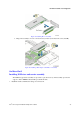
Figure 39. Installing Hard Disk Drive – Removing the screws
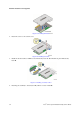
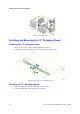
3. Install the 3.5” hard disk drive using the same four screws as shown (see letter D).
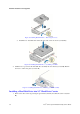
Figure 40. Installing Hard Disk Drive – assembling 3.5” HDD
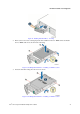
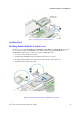
4. With the lever open, insert the hard disk drive assembly into the chassis (see letter E). Push in
the lever to lock it into place (see letter F).
Figure 41. Installing Hard Disk Drive – Inserting 3.5" HDD assembly
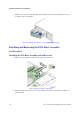
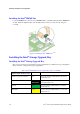
Installing a Hard Disk Drive into 2.5" Hard Drive Carrier
1. Remove the drive carrier by pressing the green button (letter A) and slide the carrier out (letter
B).