MicroJack EYES Pro Digital Video Surveillance System User’s Manual 300AAA9K/400/0404
MicroJack User’s Manual EYES Pro/MP2016/MP3000/MP5000 MicroJack User’s Manual EYES Pro/MP2016/MP3000/MP5000 FCC NOTICE This device has been tested and found to comply with the limits for a Class A digital device, pursuant to Part 15 of the FCC Rules. These limits are designed to provide reasonable protection against harmful interference in a commercial, industrial or business environment.
MicroJack User’s Manual EYES Pro/MP2016/MP3000/MP5000 MicroJack User’s Manual EYES Pro/MP2016/MP3000/MP5000 3.3 Special Consideration ........................................................33 Table of Contents CHAPTER 4 SYSTEM CONFIGURATION AND OPERATION .......... 34 CHAPTER 1 INTRODUCTION ....................................................... 1 4.1 System Configuration ........................................................34 1.1 Manual Conventions ...................................................
MicroJack User’s Manual EYES Pro/MP2016/MP3000/MP5000 MicroJack User’s Manual EYES Pro/MP2016/MP3000/MP5000 E-Map ..................................................................84 6.3.1 Center Management....................................... 116 Load / Close Network Server ..................................85 6.3.2 Playback....................................................... 119 System Configuration.............................................85 6.3.3 PTZ Control ...........................
MicroJack User’s Manual EYES Pro/MP2016/MP3000/MP5000 MicroJack User’s Manual EYES Pro/MP2016/MP3000/MP5000 Chapter 1 Introduction 1.2 Video Card Specification 4 ports Welcome to the realm of MicroJack. MicroJack EYES Pro /MP2016/ MP2016/MP3000/MP5000, composed of one 32-bit PCI video capture card, works as a digital video surveillance system. It allows you to capture true color images and real-time videos from 4/8/16 camera input(s) simultaneously.
MicroJack User’s Manual EYES Pro/MP2016/MP3000/MP5000 MicroJack User’s Manual EYES Pro/MP2016/MP3000/MP5000 • 1 / 2 / 4 MicroJack Video Card(s) for EYES Pro • 1/2 MicroJack Video Card(s) and 1/3 daughter card(s) for MP2016/MP3000/MP5000 • MicroJack EYES Pro/MP2016/MP3000/MP5000 Software CD (Including Driver, Application Software, and User’s Manual) • MicroJack EYES Pro/MP2016/MP3000/MP5000 User’s Manual • Optional external I/O Box and 15-pin D-type Connector Cable Hard disk 40 GB of free hard disk space
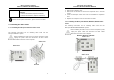
MicroJack User’s Manual EYES Pro/MP2016/MP3000/MP5000 Modem MicroJack User’s Manual EYES Pro/MP2016/MP3000/MP5000 1. Remove the computer cover. 2. Remove the I/O brackets for the four PCI expansion slots. Save the screws. 3. Insert the MicroJack video cards into the available PCI expansion slots. 4. Replace the computer cover and reconnect all cables.
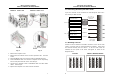
MicroJack User’s Manual EYES Pro/MP2016/MP3000/MP5000 MP3016 Video card MicroJack User’s Manual EYES Pro/MP2016/MP3000/MP5000 1.6 Connecting the MicroJack Video Cards MP2016 Video card Up to four cameras can be connected to each MicroJack video card one camera per BNC terminal.
MicroJack User’s Manual EYES Pro/MP2016/MP3000/MP5000 MicroJack User’s Manual EYES Pro/MP2016/MP3000/MP5000 Cameras need to be installed according to the numerical order displayed on the diagrams above. Whether you have one, two, three or four video cards, the pattern is the same - cameras will be installed from left to right starting with the top row for EYES Pro and from top to bottom beginning with the left-most column for MP2016/MP3000/MP5000. Sensor Input Specification 1.
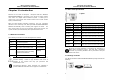
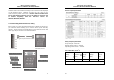
MicroJack User’s Manual EYES Pro/MP2016/MP3000/MP5000 MicroJack User’s Manual EYES Pro/MP2016/MP3000/MP5000 CONTACT RATINGS Sensor Inputs Contact Arrangement 1 Form C (SPDT) max. Switch Power max. Switch voltage max. Switch current 125VA 125VAC 2A Contact Resistance External sensors such as infrared sensors, smoke detectors, proximity sensors, door sensors, etc., can be attached to the MicroJack EYES Pro/ MP2016/MP3000/MP5000’s input-signal connectors on the External I/O Box.
MicroJack User’s Manual EYES Pro/MP2016/MP3000/MP5000 MicroJack User’s Manual EYES Pro/MP2016/MP3000/MP5000 Chapter 2 Driver Installation 2. Select Search for the best driver for your device. (Recommended) and then click the Next button. 3. Choose Specify a location and click the Browse button to find the drivers in the [driver] folder of the EYES Pro /MP2016/MP3000 /MP5000 Software CD. Click the Next button. 4. The Add Hardware Wizard will find ARGUS.inf from the folder you specified.
MicroJack User’s Manual EYES Pro/MP2016/MP3000/MP5000 MicroJack User’s Manual EYES Pro/MP2016/MP3000/MP5000 5. (For Windows 98SE only) Insert the Windows 98SE CD-ROM to start installing the driver. 6. Click the Finish button to complete the installation of video driver. 7. Next you need to install the audio driver. Click the Next button to proceed. 8. Select Search for the best driver for your device. (Recommended) and click the Next button. 9. Select Specify a location and click the Next button.
MicroJack User’s Manual EYES Pro/MP2016/MP3000/MP5000 MicroJack User’s Manual EYES Pro/MP2016/MP3000/MP5000 2.2 Installing the Driver in Windows 2000 11. Click the Finish button to complete the audio driver installation and reboot your PC. After you have properly installed the video card in your computer, power on your computer and start Windows 2000. 1. The first time you install the video card, you will see the Found New Hardware Wizard.
MicroJack User’s Manual EYES Pro/MP2016/MP3000/MP5000 4. You‘ll be prompted to enter or browse the location of the video card driver. Set the right path and click the OK button. 5. The system will find argus.inf from the folder you specified. Click the Next button to continue. 6. MicroJack User’s Manual EYES Pro/MP2016/MP3000/MP5000 7. The system will soon show that it has finished the video driver installation. Click the Finish button. 8. Next you need to install the audio driver.
MicroJack User’s Manual EYES Pro/MP2016/MP3000/MP5000 MicroJack User’s Manual EYES Pro/MP2016/MP3000/MP5000 10. Check Specify a location and click the Next button. 13. Click the Yes button to proceed with the installation. 11. You‘ll be prompted to enter or browse the location of the MicroJack video card driver. Set the right path and click the OK button. 14. Click the Finish button to complete the installation and reboot your PC. 12.
MicroJack User’s Manual EYES Pro/MP2016/MP3000/MP5000 MicroJack User’s Manual EYES Pro/MP2016/MP3000/MP5000 2.3 Installing the Driver in Windows XP 3. After the installation finished, click the Finish button. 4. You need to continue installing the audio driver. Select Install the software automatically (recommended) and click the Next button. 5. Because the audio capture uses the same driver as the video capture, the system will find the video driver you just installed and start installing.
MicroJack User’s Manual EYES Pro/MP2016/MP3000/MP5000 6. MicroJack User’s Manual EYES Pro/MP2016/MP3000/MP5000 After the installation finished, click the Finish button. 2.4 Remove Your Video Card Driver While removing your video card driver, you need to follow the steps described below. For EYES Pro, you need to take the procedures (1~14) once for each video card. For MP3000, you are asked to repeat the procedures 4 times; for MP2016/MP5000 8 times at most.
MicroJack User’s Manual EYES Pro/MP2016/MP3000/MP5000 MicroJack User’s Manual EYES Pro/MP2016/MP3000/MP5000 Chapter 3 Software Installation 3. The system will then start preparing to install the MicroJack EYES Pro/MP2016/MP3000/MP5000 application software. 4. Click the Next button to continue. Read the License Agreement and click the Yes button if you accept it; otherwise click the No button to exit the setup program. 3.
MicroJack User’s Manual EYES Pro/MP2016/MP3000/MP5000 6. Enter your Name, Company Name, and the Serial No. (printed on the CD cover) and click the Next button. The name you enter here will be used as the System Manager when operating the software. 7. Choose the components you need and then designate the destination folder for the software to be installed. Click the Next button to continue. 8.
MicroJack User’s Manual EYES Pro/MP2016/MP3000/MP5000 MicroJack User’s Manual EYES Pro/MP2016/MP3000/MP5000 3.2 Product Update 12. After the installation finishes, you can choose to create a shortcut of EYES Pro/MP2016/ MP3000/MP5000 program and click the Next button. Contact your distributors to obtain the latest software of MicroJack EYES Pro/MP2016/MP3000/MP5000 system. After you successfully download the file, follow the procedures below to update your software. 13.
MicroJack User’s Manual EYES Pro/MP2016/MP3000/MP5000 MicroJack User’s Manual EYES Pro/MP2016/MP3000/MP5000 Chapter 4 System Configuration and Operation 3.3 Special Consideration Defrag Your Hard Disk Files on your hard disk will unavoidably become fragmented. Fragmentation occurs when the operating system must split files into parts and fit each part into different free segment of the hard disk to make full use of the hard disk space.
MicroJack User’s Manual EYES Pro/MP2016/MP3000/MP5000 MicroJack User’s Manual EYES Pro/MP2016/MP3000/MP5000 EYES Pro/MP2016/MP3000/MP5000 Main Screen Alarm & Relay Status Click the Network Status System Configuration button to enter the configuration dialog. You need to first set up your surveillance system before you start using it.
MicroJack User’s Manual EYES Pro/MP2016/MP3000/MP5000 MicroJack User’s Manual EYES Pro/MP2016/MP3000/MP5000 2. System Minimum Space Next you need to provide the minimum space for hard disk recycling. During hard disk recycling, the newly recorded files will overwrite the old ones. This way the system will not run out of hard disk space to save the recorded videos. The system will start hard disk recycling when the hard disk free space is less than a user-defined number.
MicroJack User’s Manual EYES Pro/MP2016/MP3000/MP5000 MicroJack User’s Manual EYES Pro/MP2016/MP3000/MP5000 AutoScan: This function allows you to view each camera image in numerical sequence under 1-Cam Display mode. Check AutoScan to enable this function and define the scan interval from 1 to 60 seconds (defaults 3 seconds). When in this function is enabled, you need to return to the main menu and click function. During AutoScan, you can click 6.
MicroJack User’s Manual EYES Pro/MP2016/MP3000/MP5000 MicroJack User’s Manual EYES Pro/MP2016/MP3000/MP5000 A. Check Enable to activate UPS meanwhile the Vendor as well as Model of your UPS will show up in the individual boxes if your UPS is completely connected to. B. Determine a limited value for capacity to shutdown your computer. The value is ranged between 10 and 90%. It is unavailable to be set lower than 10% or higher than 90%. Cameras Double-click configure.
MicroJack User’s Manual EYES Pro/MP2016/MP3000/MP5000 3. MicroJack User’s Manual EYES Pro/MP2016/MP3000/MP5000 Settings for the image properties are configured for the designated card, which may also connect to other cameras. That means, the settings you make for this camera will apply to other cameras that connect to the same card. Figure 1. Enable Check Enable to enable this camera for monitoring. If a camera is not enabled, the image from this camera will show as Figure 1 (gray scale) on the screen.
MicroJack User’s Manual EYES Pro/MP2016/MP3000/MP5000 MicroJack User’s Manual EYES Pro/MP2016/MP3000/MP5000 2. Audio Click Audio to enter the audio page as below. Detection Sensitivity You can click to test the volume of your current environment as a reference when adjusting the sensitivity. The system defaults the sensitivity to 30%. 3. Properties You can set the length of time for the system to continue recording the audio once activated. The system defaults to 5 seconds.
MicroJack User’s Manual EYES Pro/MP2016/MP3000/MP5000 MicroJack User’s Manual EYES Pro/MP2016/MP3000/MP5000 Beep upon detected motion: By checking Beep upon detected motion, you can enable the alarm to start beeping once motion detected. You can do an Monitoring In this section you can configure how the cameras perform monitoring/recording and the related properties. Double-click on Monitoring and choose the camera you want to configure.
MicroJack User’s Manual EYES Pro/MP2016/MP3000/MP5000 MicroJack User’s Manual EYES Pro/MP2016/MP3000/MP5000 4. Motion Detection Mask Sensors Mask Mask a specific area to leave the rest area for the motion detection. A. First check Mask in the Enable field to edit the mask area. B. Check Show Mask to make masked area visible. C. To add or cut any masked areas, simply click Add or Cut, and Double-click on Sensors to list the sensors already been configured.
MicroJack User’s Manual EYES Pro/MP2016/MP3000/MP5000 3. MicroJack User’s Manual EYES Pro/MP2016/MP3000/MP5000 1. Test You can test the sensor immediately after you install it. , and if the test area turns red, it indicates the sensor is 4. Enable Check Enable box to activate the previous setting. 5. Update Click this button to update the setting. 6. Restore In the No. field, you can see the relay number. In the Name field, you can set the name for the relay. Click Closed/ON.
MicroJack User’s Manual EYES Pro/MP2016/MP3000/MP5000 MicroJack User’s Manual EYES Pro/MP2016/MP3000/MP5000 For sensors, select High (Closed/ON) or Low (Open/OFF) to be the event condition. Note that for the alarm to be triggered, both event conditions for the camera and the sensor have to be met. Alarms Double-click on Alarm to list the alarm already been configured. You may right-click the mouse on Alarm to add a new alarm up to 64 alarms.
MicroJack User’s Manual EYES Pro/MP2016/MP3000/MP5000 MicroJack User’s Manual EYES Pro/MP2016/MP3000/MP5000 Call Out: If you have a voice modem installed, you can make the system to call out to landline/mobile phone or pager (maximum 5 sets in total) once an alarm is triggered. Follow the following instructions. clicking or phone information, click to add this number to the table. A. Check Call Out to enable this function. c. Select Dial next line if busy or Dial All.
MicroJack User’s Manual EYES Pro/MP2016/MP3000/MP5000 MicroJack User’s Manual EYES Pro/MP2016/MP3000/MP5000 Networking Click Networking to enter the networking setup page. Provide information for each field. • SMTP Server: The domain name of your mail server or IP address. (eg. microjack.com.tw) • From: The sender’s email address. • To: The receiver’s email address. Use “;” (semicolon) to separate each email address. • Cc: The email address to which you want to send a copy.
MicroJack User’s Manual EYES Pro/MP2016/MP3000/MP5000 2. 3. MicroJack User’s Manual EYES Pro/MP2016/MP3000/MP5000 5. Transmitting Cameras Here you can select cameras allowed for remote monitoring. Dynamic DNS In case a dynamic server is severed, please register a domain name with the IP address: ddns.dss.com.tw on line. Refer to Appendix B for the further information. Enable WebCam Server Check here to enable WebCam Server for remote monitoring.
MicroJack User’s Manual EYES Pro/MP2016/MP3000/MP5000 MicroJack User’s Manual EYES Pro/MP2016/MP3000/MP5000 2. Scheduler Click Scheduler to enter the setup page for scheduler. Schedule Recording You can schedule for monitoring, recording, or enabling network server by date or by weekday. Depending on your needs, after you set all the schedules, you can only enable the ones you currently need and disable the rest, which might be used later.
MicroJack User’s Manual EYES Pro/MP2016/MP3000/MP5000 MicroJack User’s Manual EYES Pro/MP2016/MP3000/MP5000 4. Task If the time of the schedule you set for a task overlaps with the time of an existing schedule for the same task, the system will give you a warning message below. In short, the time of 2 schedules for the same task cannot overlap. Here you can select the task you’re scheduling for.
MicroJack User’s Manual EYES Pro/MP2016/MP3000/MP5000 MicroJack User’s Manual EYES Pro/MP2016/MP3000/MP5000 11. Table Click This table lists all the schedules you have set. You can arrange the order of the schedules by clicking different buttons. Click to view all the scheduled tasks. Click Server. Click to view each camera’s schedules for the task Record. to view all schedules for the task Monitor.
MicroJack User’s Manual EYES Pro/MP2016/MP3000/MP5000 MicroJack User’s Manual EYES Pro/MP2016/MP3000/MP5000 1. Backup Double-click on There are three ways to backup your files: Backup to view two backup methods: Move: Simply move files from their original folders to the destination folders you assigned in the Location field. Manual Backup and Schedule Backup. Click either to enter the setup page for each backup method. Copy: Copy files to the destination you assigned in the Location field.
MicroJack User’s Manual EYES Pro/MP2016/MP3000/MP5000 MicroJack User’s Manual EYES Pro/MP2016/MP3000/MP5000 You can set the schedule backup by date or by weekday by selecting By Date or By Weekday. Schedule Backup Click By Date: If you set the schedule backup by date, you can key in the date to enter the setup page for schedule backup. Depending on your needs, after you set all the schedules, you can only enable the ones you currently need and disable the rest, which might be used later.
MicroJack User’s Manual EYES Pro/MP2016/MP3000/MP5000 MicroJack User’s Manual EYES Pro/MP2016/MP3000/MP5000 system will backup on 2003/03/01 and 2003/03/04. So if you want the system to perform backup on the exact dates you scheduled, simply input “0” as the number of days before scheduled dates. 6. Camera Select the cameras whose files you want to backup. Check Audio to backup the sound files from the selected cameras. 7.
MicroJack User’s Manual EYES Pro/MP2016/MP3000/MP5000 MicroJack User’s Manual EYES Pro/MP2016/MP3000/MP5000 Edit If you don’t have an image of map in hand or need to modify the image, click Edit button to bring out the bmp. or jpg. programs to create an one or revise it. 3. Arrange Cameras, Sensors, and Relays To add a new event, drag the button of Camera, Sensor, or Relay in the left side field and drop in the desired position of the map. The buttons not be set up will be disabled.
MicroJack User’s Manual EYES Pro/MP2016/MP3000/MP5000 3. MicroJack User’s Manual EYES Pro/MP2016/MP3000/MP5000 Delete Load / Stop Network Server To delete a user, select that user and click Delete. 4. 5. 6. Update System Configuration V V V V You can update a user’s information by selecting that user, key in the latest information, and click Update.
MicroJack User’s Manual EYES Pro/MP2016/MP3000/MP5000 MicroJack User’s Manual EYES Pro/MP2016/MP3000/MP5000 V V V V 4.2 System Operation V V V V This section describes how to operate EYES Pro/MP2016/MP3000/ MP5000 surveillance system.
MicroJack User’s Manual EYES Pro/MP2016/MP3000/MP5000 MicroJack User’s Manual EYES Pro/MP2016/MP3000/MP5000 4-Camera Display 8 EYES Pro/MP3008/MP5008 1-Camera Display, 8 EYES Pro/MP3008/MP5008 provides 4-Camera Display, Camera Enlarged Display, Display, 8-Camera Display, Screen Display and Click this button to split the screen into a 4-camera display. The screen will first display cameras 1~4. Click it again changes the display to cameras 5~8.
MicroJack User’s Manual EYES Pro/MP2016/MP3000/MP5000 MicroJack User’s Manual EYES Pro/MP2016/MP3000/MP5000 12-Camera Display 1-Camera Enlarged Display Click this button to split the screen into a 12-camera display. The screen will first display the camera 1~12. Click it again changes the display to camera 5~16. Further clicking will change the display to cameras 9~4, 13~8, 1~12, and so on. See the following sequence. Click this button to split the screen into a 1-camera enlarged display.
MicroJack User’s Manual EYES Pro/MP2016/MP3000/MP5000 MicroJack User’s Manual EYES Pro/MP2016/MP3000/MP5000 … Focus Camera The number on each button represents the camera number. buttons show the status ( enabled / E-Map These disabled) of each camera. Under all display modes, when you click any of the camera number from the focus camera buttons, that particular camera will be switched to the first camera in display.
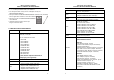
MicroJack User’s Manual EYES Pro/MP2016/MP3000/MP5000 MicroJack User’s Manual EYES Pro/MP2016/MP3000/MP5000 Icon Color Status Yellow Normal Icon Color Status Yellow Normal Red Activated Yellow Normal Log Viewer Camera Blue Video Loss Green Motion Detection Camera Camera Sensor Sensor Relay Relay 4. Log viewer allows you to playback log files from single channel as well as from 4/9/16 channels simultaneously. All the functions here will be introduced in operational order.
MicroJack User’s Manual EYES Pro/MP2016/MP3000/MP5000 MicroJack User’s Manual EYES Pro/MP2016/MP3000/MP5000 1. Select Display Mode B. Play When you enter this page, first select the display mode by clicking (1 Channel), (4 Channels), (16 Channels). Click the Playback button to play files from start to end. You can also manually drag the slide bar in the directly to (9 Channels), and the frame you want to play and click the Playback button.
MicroJack User’s Manual EYES Pro/MP2016/MP3000/MP5000 7. Zoom Click 8. MicroJack User’s Manual EYES Pro/MP2016/MP3000/MP5000 B. Click / Print & Save Print or the camera no. button to select the camera no. which is switchable during searching. C. Select the required recorded file from the Video Table list and click Close to hide the window. D.
MicroJack User’s Manual EYES Pro/MP2016/MP3000/MP5000 MicroJack User’s Manual EYES Pro/MP2016/MP3000/MP5000 Event Search Searches the recorded files by the alarm condition and action within a specified period of time. To make the function workable, complete the following steps: A. Click Event Search and the playback control panel will turn into the condition search panel as follows: G. Select the desired recorded files and click OK to hide Event Table.
MicroJack User’s Manual EYES Pro/MP2016/MP3000/MP5000 MicroJack User’s Manual EYES Pro/MP2016/MP3000/MP5000 Intelligent Search Searches the recorded files by Mask Area and Search Interval within a specified period of time. To enable this function, complete the steps below: A. Click Intelligent Search and the playback control panel will be replaced by the search condition setting panel such as the following window: G. Select the desired file and click OK to hide Intelligent Table.
MicroJack User’s Manual EYES Pro/MP2016/MP3000/MP5000 MicroJack User’s Manual EYES Pro/MP2016/MP3000/MP5000 Focus PTZ Controller Press the + and – buttons any time during surveillance to increase/decrease the focal length to get a clearer image. When you click this button, the PTZ control interface will pop up and allows you to control your PTZ cameras. Click this button again to hide this interface.
MicroJack User’s Manual EYES Pro/MP2016/MP3000/MP5000 MicroJack User’s Manual EYES Pro/MP2016/MP3000/MP5000 Status Monitoring Alarm / Relay /Sensor Status The PTZ camera will run AutoPan based on your preset position settings. For example, if is chosen and the Dwell/Speed of preset position 1 and 2 are 3 seconds/30 ° per second and 6 seconds/90°per second.
MicroJack User’s Manual EYES Pro/MP2016/MP3000/MP5000 MicroJack User’s Manual EYES Pro/MP2016/MP3000/MP5000 The red dot next to the camera/sensor number indicates that the event condition for this particular camera/sensor has been met. The green dot indicates no event occurs. And the blue dots means the video signal is too weak or the video cable has been disconnected (video loss.) The list below lists all events in time order. Network Status This area presents you the current network status.
MicroJack User’s Manual EYES Pro/MP2016/MP3000/MP5000 MicroJack User’s Manual EYES Pro/MP2016/MP3000/MP5000 Chapter 5 Using the WebCam Exit / Re-login EYES Pro/MP2016/MP3000/MP5000 When you want to exit or re-login the system, click to enter the logout screen below: You can monitor images from the MicroJack EYES Pro/MP2016/ MP3000/MP5000 server using Internet Explorer browser. The MicroJack EYES Pro/MP2016/MP3000/MP5000 system has built in HTTP protocol and web server services.
MicroJack User’s Manual EYES Pro/MP2016/MP3000/MP5000 b. MicroJack User’s Manual EYES Pro/MP2016/MP3000/MP5000 Click Custom Level button to pup up the following dialog. Check Enable or Prompt radio button both in Download signed ActiveX controls and Download unsigned ActiveX controls. Click OK to save the setting. 3. Load Network Server Click at the bottom of the main menu to enable the networking function. 5.
MicroJack User’s Manual EYES Pro/MP2016/MP3000/MP5000 MicroJack User’s Manual EYES Pro/MP2016/MP3000/MP5000 When the remote transmitting cameras are more than the split display Chapter 6 RemoteManager to switch the screen to display the following number, you can click cameras. For example, the server has assigned camera 1, 2, 3, 5, 7, 10, 13, and 16, in total 8 cameras for remote transmission. 6.
MicroJack User’s Manual EYES Pro/MP2016/MP3000/MP5000 MicroJack User’s Manual EYES Pro/MP2016/MP3000/MP5000 If a camera is disconnected to the server or the signal from the server is disconnected to the local camera, the image will show as above on the screen. The signal will be picked up at an interval of one minute until it is received.
MicroJack User’s Manual EYES Pro/MP2016/MP3000/MP5000 6.2.1 MicroJack User’s Manual EYES Pro/MP2016/MP3000/MP5000 User Management 6.2.2 Storage Configuration User Management provides the easy management to safeguard the system from the unidentified users. Only the root is authorized to configure this section. To achieve the setting, complete the following steps: 1. Click User Management.
MicroJack User’s Manual EYES Pro/MP2016/MP3000/MP5000 MicroJack User’s Manual EYES Pro/MP2016/MP3000/MP5000 Safety Quota: Once the hard disk starts recycling, the system won’t stop until the hard disk free space becomes more than a user-defined number, say 6000MB (default value). Safety quota should be at least 5550 MB more than the minimum space you assigned. 6.2.3 6.2.4 Schedule Recording The function allows you to plan the recording schedule by date or weekday for all the channels.
MicroJack User’s Manual EYES Pro/MP2016/MP3000/MP5000 MicroJack User’s Manual EYES Pro/MP2016/MP3000/MP5000 4. Click to confirm the time setting. A settled time will appear on the right blank box. Click Delete to delete the previous time setting. 5. Set the Start and End time by the up and down arrows in Time field. 6. Check the desired cameras to be involved into the schedule in Camera field. 7.
MicroJack User’s Manual EYES Pro/MP2016/MP3000/MP5000 MicroJack User’s Manual EYES Pro/MP2016/MP3000/MP5000 6.2.8 6.3 Operating the RemoteManager Alarm Control It is available to choose the server and decide to enable or disable the corresponding alarms. 1. Click Alarm Control to see the window for alarm status. 2. To enable an alarm, simply click on in the Status column and change the status to . 3. 6.3.
MicroJack User’s Manual EYES Pro/MP2016/MP3000/MP5000 MicroJack User’s Manual EYES Pro/MP2016/MP3000/MP5000 Before arranging center manager section, please make sure RemoteView server enabled in networking section of System Configuration. 5. To offer the complete information, finish the steps below: 1. Click Center Manager button and the following window appears: 2. 3. The following pop-up window of Add Server will show the Server Name automatically if the IP Address is correct and has been connected.
MicroJack User’s Manual EYES Pro/MP2016/MP3000/MP5000 6.3.2 MicroJack User’s Manual EYES Pro/MP2016/MP3000/MP5000 3. Highlight the file you want to review and use the buttons below to control the video playback. Playback Once in the playback mode, users can view log files recorded in the local/remote hard disks. Click this button and select the kind of file you want for playback: Local Playback or Remote Playback. Playback Click this button to playback the selected file.
MicroJack User’s Manual EYES Pro/MP2016/MP3000/MP5000 MicroJack User’s Manual EYES Pro/MP2016/MP3000/MP5000 Backup When you review the log files, you can click this button to save the files onto your local disk. Remote Playback 1. Select Remote Playback to configure the further setting 3. Refer to the 2~3 steps in the previous Local playback section to view the files. 4. Back to the main menu by clicking Time Determine a start time and the duration (up to 60 minutes) by clicking on the arrows.
MicroJack User’s Manual EYES Pro/MP2016/MP3000/MP5000 6.3.3 MicroJack User’s Manual EYES Pro/MP2016/MP3000/MP5000 PTZ Control Once you have installed a PTZ camera, the functional utility will help you to exert the control on the surveillance. To enable the function, follow with the steps below: 1. Click PTZ Control to show the following window: Preset Position Setup Each PTZ camera can set 16 preset positions.
MicroJack User’s Manual EYES Pro/MP2016/MP3000/MP5000 MicroJack User’s Manual EYES Pro/MP2016/MP3000/MP5000 Dwell (Sec) During AutoPan, this button determines the time for the camera to stay (1~60 seconds) at one position before rotating to the next position. Rotation Speed (deg/s) You can set the speed (5~255 deg/s) by the left and right arrows at which the camera rotates from its current position to the next preset position.
MicroJack User’s Manual EYES Pro/MP2016/MP3000/MP5000 MicroJack User’s Manual EYES Pro/MP2016/MP3000/MP5000 Appendix A Remote Login with an Modem-to-Modem Connection B. Select Communication and click . The Communication dialog box will show up. Check the box next to Dial-up Server and click the OK button. C. Click the OK button in the Add/Remove Programs Properties dialog box and the system will start to install the Dial-up Server.
MicroJack User’s Manual EYES Pro/MP2016/MP3000/MP5000 D. MicroJack User’s Manual EYES Pro/MP2016/MP3000/MP5000 After finished installing the Dial-up Server, you need to enable the Dial-up Server. Go to StartÆProgramsÆAccessoriesÆCommunications and click F. to set the login password and then click to change the server type. Select PPP from the drop-down menu and then click the OK button to finish the ISDN setup for the server end. Dial-up Networking. You will enter the window below. 2. Client: A. E.
MicroJack User’s Manual EYES Pro/MP2016/MP3000/MP5000 B. MicroJack User’s Manual EYES Pro/MP2016/MP3000/MP5000 Provide the server’s telephone number, including the area code, and click the Next button to finish creating the new connection. A.2 Windows 2000 1. Server: A. Go to StartÆProgramsÆAccessoriesÆCommunications Wizard. Click the Next button. and click Network and Dialup Connections.
MicroJack User’s Manual EYES Pro/MP2016/MP3000/MP5000 C. MicroJack User’s Manual EYES Pro/MP2016/MP3000/MP5000 Select the ISDN device you’re using and click the Next button. E. Select users allowed to connect to this computer from the list or click to create new users. For each user, to set the user’s password, which is click required when the user login the server. After you finish, click the Next button to continue. D. Select Allow virtual private connections and click the Next button. F.
MicroJack User’s Manual EYES Pro/MP2016/MP3000/MP5000 MicroJack User’s Manual EYES Pro/MP2016/MP3000/MP5000 G. Check the boxes next to Allow callers to access my local area network and Specify TCP/IP addresses. Set the From IP as 192.168.55.1 and the To IP as 192.168.55.2. Click the OK button and then click the Next button in the Network Connection Wizard. H. 2. Client: A. Go Click the Finish button to complete the ISDN setup for the server end.
MicroJack User’s Manual EYES Pro/MP2016/MP3000/MP5000 C. MicroJack User’s Manual EYES Pro/MP2016/MP3000/MP5000 Provide the server’s telephone number, including the area code, and click the Next button. E. Click the Finish button to complete the connection setup. F. Go back to the Network and Dial-up Connections window and double-click the connection you just created. In the dialog box, enter any User name and the Password set in step E of the server’s ISDN setup procedure.
MicroJack User’s Manual EYES Pro/MP2016/MP3000/MP5000 MicroJack User’s Manual EYES Pro/MP2016/MP3000/MP5000 A.3 Windows XP 1. C. Select Accept incoming connections and click the Next button. D. Select the ISDN device you’re using and click the Next button. Server: A. Go to StartÆProgramsÆAccessoriesÆCommunications and click New Connection Wizard. Click the Next button. B. Select Set up an advanced connection and click the Next button.
MicroJack User’s Manual EYES Pro/MP2016/MP3000/MP5000 E. MicroJack User’s Manual EYES Pro/MP2016/MP3000/MP5000 Select Allow virtual private connections and click the Next button. G. Make sure that Internet Protocol (TCP/IP) is selected and click to enter the Incoming TCP/IP Properties dialog box. F. Select users allowed to connect to this computer from the list or click to create new users. H. For each user, click to set the user’s password, which is required when the user login the server.
MicroJack User’s Manual EYES Pro/MP2016/MP3000/MP5000 I. 2. MicroJack User’s Manual EYES Pro/MP2016/MP3000/MP5000 Click the Finish button to complete the ISDN setup for the server end. Client: A. Go to StartÆProgramsÆAccessoriesÆCommunications and click New Connection Wizard. Click the Next button. 143 144 B. Select Connect to the Internet and click the Next button. C. Select Set up my connection manually and click the Next button.
MicroJack User’s Manual EYES Pro/MP2016/MP3000/MP5000 MicroJack User’s Manual EYES Pro/MP2016/MP3000/MP5000 D. Select Connect using a dial-up modem and click the Next button. E. Enter the name of this connection and click the Next button. 145 146 F. Provide the server’s telephone number, including the area code, and click the Next button. G. Enter any User name and the Password set in step F of the server’s ISDN setup procedure. Click the Next button to continue.
MicroJack User’s Manual EYES Pro/MP2016/MP3000/MP5000 H. MicroJack User’s Manual EYES Pro/MP2016/MP3000/MP5000 Appendix B Registering Domain Name on DDNS Server Click the Finish button to complete the connection setup. DDNS (Dynamic Domain Name Service), a data query service chiefly used on Internet for translating hostnames into Internet addresses. It is allowed the remote clients intelligently search dynamic servers without any previous enquiring for servers’ Internet addresses.
MicroJack User’s Manual EYES Pro/MP2016/MP3000/MP5000 3. User Information Please provide the following user information, Host Name, Password, E-mail, Company, and Country to complete the registration procedures. Note that Host Name and Domain Name (ex: microjack.dss.com.tw) are the replacement for Internet address while a remote client tends to search a dynamic server in RemoteManager 6.3.1.