
Frozen Dessert Maker User Manual
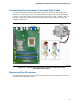

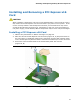
Table Of Contents
- Intel® Desktop Board DG35EC Product Guide
- Revision History
- Preface
- Contents
- 1 Desktop Board Features
- 2 Installing and Replacing Desktop Board Components
- Before You Begin
- Installation Precautions
- Installing the I/O Shield
- Installing and Removing the Desktop Board
- Installing and Removing a Processor
- Installing and Removing Memory
- Installing and Removing a PCI Express x16 Card
- Connecting the Diskette Drive Cable
- Connecting the IDE Cable
- Connecting Serial ATA (SATA) Cables
- Connecting to the Internal Headers and Connectors
- Connecting to the Onboard Audio System
- Connecting Chassis Fan and Power Supply Cables
- Setting the BIOS Configuration Jumper
- Clearing Passwords
- 3 Updating the BIOS
- A Error Messages and Indicators
- B Regulatory Compliance
Installing and Replacing Desktop Board Components
37
To install a DIMM, follow these steps:
1. Observe the precautions in "Before You Begin" on page 25.
2. Turn off all peripheral devices connected to the
computer. Turn off the computer
and disconnect the AC power cord.
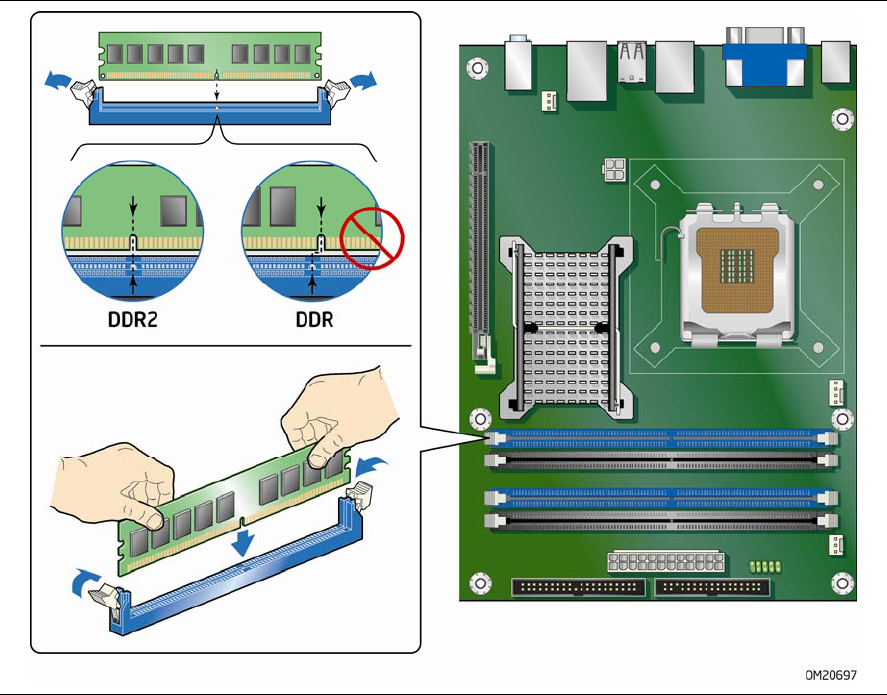
3. Remove the computer’s cover and locate the DIMM sockets (see Figure 17).
Figure 17. Installing a DIMM
4. Make sure the clips at either end of the DIMM socket(s) are pushed outward to the
open position.
5. Holding the DIMM by the edges, remove it from its anti-static package.
6. Position the DIMM above the socket. Align the small notch at the bottom edge of
the DIMM with the keys in the socket (see inset in Figure 17).
7. In
sert the bottom edge of the DIMM into the socket.
8. When the DIMM is inserted, push down on the top edge of the DIMM until the
retaining clips snap into place. Make sure the clips are firmly in place.
9. Replace the computer’s cover and reconnect the AC power cord.