Intel® Management Engine BIOS Extension (Intel® MEBX) User’s Guide User’s Guide For systems based on Intel® 7 Series/C216 Chipset Family December 2011 Revision 1.
INFORMATION IN THIS DOCUMENT IS PROVIDED IN CONNECTION WITH INTEL® PRODUCTS. NO LICENSE, EXPRESS OR IMPLIED, BY ESTOPPEL OR OTHERWISE, TO ANY INTELLECTUAL PROPERTY RIGHTS IS GRANTED BY THIS DOCUMENT.
Contents 1 Introduction .........................................................................................................8 1.1 Intel® Management Engine (Intel® ME) and Intel® Management Engine BIOS Extension (Intel® MEBX) Overview ...................................................................................................8 1.2 Scope of document ...............................................................................8 1.3 Target Audience ...........................................
3.8 Intel® Small Business Technology Configuration ....................63 3.8.1 Manageability Feature Selection .....................................65 3.8.2 Restore Factory Settings ....................................................66 3.9 4 Intel® MEBX CPU Replacement Flow ............................................
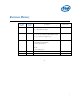
Figures Intel® MEBX Configuration User Interface Main Menu ......................14 Intel® ME Platform Configuration ........................................................16 Change Intel® ME Password .................................................................17 Local FW Update Settings ....................................................................18 Power Control .......................................................................................19 Idle Timeout .............................
Figure 32: Change Active State of Hash ..............................................................57 Figure 33: View Hash details................................................................................58 Figure 34: Exit confirmation.................................................................................59 Figure 35: Intel® Standard Manageability Configuration .....................................60 Figure 36: Intel® Standard Manageability Configuration menu ...........................
Revision History Document Number Revision Number 1.0 Description 1. 3.5.3 Update user consent description. Revision Date December 2011 2. 3.8 Update SBA new changes. 0.8 1. 3.4.3.2 Correct idle time out unit. August 2011 2. 3.5.8.6.1 Give valid string for PID and PPS example. 3. 3.5.8.7.4 Remove un-support process 0.7 Add May 2011 3.8 Small Business Manageability. 3.9 CPU replacement flow Modify 3.4.2 Local FW update 0.6 Technical review version April 2011 0.
Introduction 1 Introduction 1.1 Intel® Management Engine (Intel® ME) and Intel® Management Engine BIOS Extension (Intel® MEBX) Overview The Intel® Management Engine (Intel® ME) is an isolated and protected computing resource. The Intel ME provides the following IT management features independent of the installed OS: Intel® Active Management Technology (Intel® AMT 8.0), allowing improved management of corporate assets.
Introduction Note: 1.4 Readers should have a basic understanding of networking and computer technology terms, such as TCP/IP, DHCP, IDE, DNS, Subnet Mask, Default Gateway and Domain Name. Explanation of these terms is beyond the scope of this document.
Introduction 1.
Client System Requirements 2 Client System Requirements The client system referred to in this document is based on the Intel® 7 Series Chipset Family/Intel® PCH platform, and is managed by Intel Management Engine. The following firmware and software requirements are required to be installed and set up before the Intel Management Engine can be configured and run in the client system: SPI flash device programmed with Intel AMT 8.
Client System Requirements 12
Intel® ME Manageability Features Intel® ME Manageability Features 3 The Intel MEBX menu for digital office SKUs provides platform level configuration options for the IT-administrator to configure the behavior of the Intel ME platform. The behavior includes platform configuration such as individual feature enable/disable and power configurations. The following section provides the details on each Intel MEBX configuration option and the constraints, if any, for a given option.
Intel® ME Manageability Features 4. [Esc] means exit current setting page. 3.2 Intel® MEBX Main Menu Figure 1: Intel® MEBX Configuration User Interface Main Menu The options displayed in the main menu can vary depending on OEM implementation decisions. The main menu selections are: MEBx Login Intel ME General Settings Intel® AMT Configuration MEBx Exit Note: Intel MEBX will display only detected options.
Intel® ME Manageability Features 3.3 Change Intel® ME Password The default password is “admin” and is configured identically on all newly deployed platforms. When an IT administrator first enters the Intel MEBX configuration menu with the default password, he or she must change the default password before any feature can be used. The new Intel MEBX password must meet the following requirements for strong passwords: 1. Password Length: At least 8 characters, and no more than 32. 2.
Intel® ME Manageability Features The Intel® MEBX main menu changes to the Intel® ME Platform Configuration page. This page allows the IT administrator to configure the specific functionality of the Intel® ME, such as password, power Control, etc. Figure 2: Intel® ME Platform Configuration 3.4.1 Change Intel® ME Password Under the Intel® ME Platform Configuration menu, 1. Select ‘Change ME Password’. 2. Press Enter to change password.
Intel® ME Manageability Features The Intel ME New Password prompt is displayed as in Figure 3. Figure 3: Change Intel® ME Password 1. At the Intel® ME New Password prompt, enter your new password. (Please be aware of the password policies and restrictions mentioned in section 3.3) 2. At the Verify Password prompt, re-enter your new password. Your password is now changed. 3.4.2 Local FW Update Under Intel® ME Platform Configuration, 1. Select ‘Local FW Update’. 2. Press Enter to select.
Intel® ME Manageability Features Figure 4: Local FW Update Settings Intel® ME Firmware Local Update provides the capability to allow or prevent firmware local update in the field. When the “Enabled” option is selected, the ITadmin is able to update the Intel® ME firmware locally via the local Intel Management Engine interface or via the local secure interface.
Intel® ME Manageability Features 3.4.3 Power Control Under Intel® ME Platform Configuration, 1. Select ‘Power Control’. 2. Press Enter. The Intel® ME Platform Configuration screen changes to the Intel® ME Power Control screen. Figure 5: Power Control To comply with ENERGY STAR* and EUP LOT6 requirements, the Intel ME can be turned off in various sleep states. The Intel ME Power Control menu configures the Intel ME platform power related policies.
Intel® ME Manageability Features 3.4.3.1 Intel® ME ON in Host Sleep States Under Intel ME Power Control, 1. Select ‘Intel ME ON in Host Sleep States’. 2. Press Enter to select. The following options can be selected: - Mobile: On in S0 – Power Package 1 - Mobile: On in So, ME Wake in S3, S4-5 –Power Package 2 Table 1: Supported Power Packages Power Package 1 2 S0 ON ON S3 OFF ON /ME WoL S4/S5 OFF ON/ ME WoL The selected power package determines when the Intel ME is turned ON.
Intel® ME Manageability Features 3.4.3.2 Idle Time Out Under Intel® ME Power Control, 1. Select ‘Idle Time Out’. 2. Press Enter to type timeout value . Figure 6: Idle Timeout This setting is used to enable the Intel ME Wake on and to define the Intel ME idle timeout in M3 state. The value should be entered in minutes. The value indicates the amount of time that the Intel ME is allowed remain idle in M3 before transitioning to the M-off state.
Intel® ME Manageability Features 1. Select ‘Intel® AMT Configuration’. 2. Press Enter. The Main Menu changes to the Intel® AMT Configuration screen. Figure 7: Intel® AMT Configuration 3.5.1 Manageability Feature Selection Under the Intel® AMT Configuration screen, 1. Select ‘Manageability Feature Selection’. 2. Press Enter to select. 3. A message is displayed: [Caution] Disabling reset network settings including network ACLs to factory default. System resets on MEBx exit. Continue: (Y/N).
Intel® ME Manageability Features - Disabled - Enabled When the Manageability Feature Selection is enabled, the Intel ME manageability feature menu will be shown. Leaving it disabled means that manageability will not be enabled. 3.5.2 SOL/IDER/KVM Under the Intel® AMT Configuration (with Intel AMT enabled), 1. Select ‘SOL/IDER/KVM’. 2. Press Enter. The Intel® AMT Configuration changes to the SOL/IDER/KVM screen.
Intel® ME Manageability Features Note: SOL, IDER, KVM here are just for enabling CAPABILITY. User still needs to use other tools like AMT SDK to execute features. 3.5.2.1 Username and Password Under the SOL/IDER/KVM screen, 1. Select ‘Username and Password’. 2. Press Enter to select. The following options can be selected: - Disabled - Enabled This option provides the user authentication for SOL/IDER session. If Kerberos* is used, this option should be set to DISABLED.
Intel® ME Manageability Features Note: disabling SOL does not remove this feature but just blocks it from being used. 3.5.2.3 IDER Under the SOL/IDER/KVM screen, 1. Select ‘IDER’. 2. Press Enter to select. The following options can be selected: - Disabled - Enabled IDE-R allows an Intel AMT managed client to be booted by a management console from a remote disk image. If the client system does not support IDE-R, this value cannot enable it.
Intel® ME Manageability Features 3.5.2.5 Legacy Redirection Mode Under the SOL/IDER/KVM screen, 1. Select ‘Legacy Redirection Mode’. 2. Press Enter to select. The following options can be selected: - Disabled- legacy redirection Mode is disabled. (default) - Enabled- the port is left open at all times when redirection is enabled in the Intel MEBX. It is the same as what used to be SMB mode in previous projects. Old (before Intel AMT 6.
Intel® ME Manageability Features • Using Serial Over LAN specifically to redirect BIOS screens and OS Boot text screens Under the Intel® AMT Configuration, 1. Select ‘User Consent’. 2. Press Enter. The Intel® AMT Configuration changes to the User Consent Configuration screen. Figure 9: User Consent 3.5.3.1 User Opt-in Under the User Consent Configuration screen, 1. Select ‘User Opt-in’.
Intel® ME Manageability Features 2. Press Enter to select. The following options can be selected: - None - User consent is not required. - KVM - Local User Consent is required for a remote computer to establish KVM Remote Control session. - All - Local User Consent is required for all features listed above. NOTE: When using Host Based Configuration, Client Control Mode will override this setting and behave as if the “ALL” option has been selected.
Intel® ME Manageability Features 3.5.4 Password Policy Under the Intel® AMT Configuration screen, 1. Select ‘Password Policy’. 2. Press Enter to select. The following options can be selected: - Default Password Only – The Intel MEBX password can be changed through the network interface if the default password has not been changed yet. - During Setup and Configuration – The Intel MEBX password can be changed through the network interface during the setup and configuration process but at no other time.
Intel® ME Manageability Features The Intel® AMT Configuration screen changes to the Intel® ME Network Setup page. Figure 10: Intel® ME Network Setup 3.5.5.1 Intel® ME Network Name Settings Under the Intel® ME Network Setup menu, 1. Select ‘Intel® ME Network Name Settings’. 2. Press Enter. The Intel® ME Network Setup menu changes to the Intel® ME Network Name Settings page.
Intel® ME Manageability Features Figure 11: Intel® ME Network Name Settings 3.5.5.1.1 Host Name Under the Intel® ME Network Name Settings menu, 1. Select ‘Host Name’. 2. Press Enter to edit. A host name can be assigned to the Intel AMT machine. This will be the hostname of the Intel AMT enabled system. 3.5.5.1.2 Domain Name Under the Intel® ME Network Name Settings menu, 1. Select ‘Domain Name’. 2. Press Enter to edit. A domain name can be assigned to the Intel AMT machine.
Intel® ME Manageability Features 3.5.5.1.3 Shared/Dedicated FQDN Under the Intel® ME Network Name Settings menu, 1. Select ‘Shared/Dedicated FQDN’. 2. Press Enter to select. The following options can be selected: - Dedicated- The FQDN domain name is dedicated to ME. - Shared- The FQDN domain name is shared with the Host. This setting determines whether the Intel ME Fully Qualified Domain Name (FQDN) (i.e. the "HostName.
Intel® ME Manageability Features 3.5.5.1.5 Periodic Update Interval Note: This option is only available when Dynamic DNS Update is enabled. Figure 12: Periodic Update Interval Defines the interval at which the firmware DDNS Update client will send periodic updates. It should be set according to corporate DNS scavenging policy. Units are minutes. A value of 0 disables periodic update. The value set should be equal or greater than 20 minutes. The default value for this property is 24 hours 1440 minutes.
Intel® ME Manageability Features 3.5.5.1.6 TTL Note: This option is only available when Dynamic DNS Update is enabled. Figure 13: TTL TTL (Time-to-live) here is a period of time that determines how long the record should not be scavenged in DNS server when dynamic DNS update is enabled. This setting allows configuring the TTL time in seconds and should be greater than zero. The default value is 15 min. 1. Select ‘TTL’. 2. Press Enter to edit . 3.5.5.
Intel® ME Manageability Features 1. Select ‘TCP/IP Settings’. 2. Press Enter. The Intel Network Setup menu changes to the TCP/IP Settings page. Figure 14: TCP/IP Settings Wired LAN IPV4 Configuration Under the TCP/IP Settings, 1. Select ‘Wired LAN IPV4 Configuration’. 2. Press Enter. The TCP/IP Settings menu changes to the Wired LAN IPV4 Configuration page.
Intel® ME Manageability Features Figure 15: Wired LAN IPV4 Configuration 3.5.5.2.1 DHCP Mode Under the Wired LAN IPV4 Configuration, 1. Select ‘DHCP Mode’. 2. Press Enter to select. The following options can be selected: ENABLED - If DHCP Mode is enabled, TCP/IP settings will be configured by a DHCP server. No additional steps are required. DISABLED - If DHCP mode is disabled, the following static TCP/IP settings are required for Intel AMT.
Intel® ME Manageability Features different than host IP address (unless in shared static IP mode, which is out of MEBx User Guide scope). Please check following sessions 3.5.5.2.3 ~ 3.5.5.2.7. Note: Static IP and subnet mask are mandatory. Figure 16: DHCP Mode Disabled 3.5.5.2.2 IPv4 Address Under the Wired LAN IPV4 Configuration, 1. Select ‘IPv4 Address’. 2. Press Enter to edit.
Intel® ME Manageability Features 3.5.5.2.3 Subnet Mask Address Under the Wired LAN IPV4 Configuration, 1. Select ‘Subnet Mask Address’. 2. Press Enter to edit. 3.5.5.2.4 Default Gateway Address Under the Wired LAN IPV4 Configuration, 1. Select ‘Default Gateway Address’. 2. Press Enter to edit. 3.5.5.2.5 Preferred DNS Address Under the Wired LAN IPV4 Configuration, 1. Select ‘Preferred DNS Address’. 2. Press Enter to edit. 3.5.5.2.6 Alternate DNS Address Under the Wired LAN IPV4 Configuration, 1.
Intel® ME Manageability Features Figure 17: Activate Network Access Activate Network Access causes the Intel ME to transition to the POST provisioning state if all required settings are configured. Without Activating Network Access, ME will not be able to connect to the network. Note: Power policy will change to PP2 after activating if the default power policy is set to PP1. 3.5.7 Unconfigure Network Access Under the Intel® AMT Configuration menu, 1. Select ‘Unconfigure Network Access’. 2.
Intel® ME Manageability Features 3.5.7.1 Partial Unprovision - AMT Full Unprovisioning 3.5.7.2 3.5.7.3 3.5.7.
Intel® ME Manageability Features Figure 18: Unconfigure Network Access 3.5.8 Remote Setup and Configuration Under Intel® AMT Configuration, 1. Select ‘Remote Setup and Configuration’. 2. Press Enter. The Intel® AMT Configuration screen changes to the Intel® Automated Setup and Configuration screen. Note: The following list is displayed when Intel® AMT is in pre-provision mode.
Intel® ME Manageability Features Figure 19: Intel® Automated Setup and Configuration 3.5.8.1 Current Provisioning Mode Under Intel Automated Setup and Configuration, 1. Select ‘Current Provisioning Mode’. 2. Press Enter.
Intel® ME Manageability Features Figure 20: Current Provisioning Mode Current Provisioning Mode – Displays the current provisioning TLS Mode: None, PKI, or PSK. 3.5.8.2 Provisioning Record Under Intel Automated Setup and Configuration, 1. Select ‘Provisioning Record’. 2. Press Enter.
Intel® ME Manageability Features Figure 21: Provisioning record Provisioning Record – Displays the system’s provision PSK/PKI record data. If the data has not been entered, the Intel MEBX displays a message stating “Provision Record not present”. If the data is entered, the Provision record will display the following: 44 TLS provisioning mode – Displays the current configuration mode of the system: None, PSK or PKI. Provisioning IP – The IP address of the setup and configuration server.
Intel® ME Manageability Features option 15 and compare this suffix to the FQDN in the Configuration Server's client certificate. A value of 1 indicates that the DNS Suffix was configured and the firmware matched it against the DNS Suffix in the Configuration Server's client certificate.
Intel® ME Manageability Features 2. Press Enter to edit. FQDN of the provisioning server mentioned in the certificate (PKI only). This is also the FQDN of the server that AMT sends hello packets to both PSK and PKI 3.5.8.5 RCFG Under Intel® Automated Setup and Configuration, 1. Select ‘RCFG’. 2. Press Enter. The Intel® Automated Setup and Configuration screen changes to the Intel® Remote Configuration screen.
Intel® ME Manageability Features 3.5.8.5.1 Start Configuration Under the Intel® Remote Configuration screen, 1. Select ‘Start Configuration’. 2. Select Y to activate remote configuration or N to exit without change. Figure 23: Activate RCFG If Remote Configuration is not activated, Remote configuration cannot occur. 3.5.8.6 TLS PSK Under Intel® Automated Setup and Configuration, 1. Select ‘TLS PSK’. 2. Press Enter.
Intel® ME Manageability Features Figure 24: Intel TLS PSK Configuration screen This submenu contains the settings for TLS PSK configuration settings. 3.5.8.6.1 Set PID and PPS Under the Intel® Remote Configuration screen, 1. Select ‘Set PID and PPS’. 2. Press Enter to edit PID. 3. Edit PPS. Setting the PID/PPS will cause a partial unprovision if the setup and configuration is “In-process”. The PID and PPS should be entered in the dash format. (Ex.
Intel® ME Manageability Features Note- A PPS value of ‘0000-0000-0000-0000-0000-0000-0000-0000’ will not change the setup configuration state. If this value is used, the setup and configuration state will remain ‘Not-started’. If an invalid entry is attempted, an error message will be displayed. 3.5.8.6.2 Delete PID and PPS Under the Intel® Remote Configuration screen, 1. Select ‘Delete PID and PPS’. 2. Press Enter. 3. Press Y to delete or N to exit without change.
Intel® ME Manageability Features 3.5.8.7 TLS PKI Under Intel® Automated Setup and Configuration, 1. Select ‘TLS PKI’. 2. Press Enter. The Intel® Automated Setup and Configuration screen changes to the Intel® Remote Configuration screen. Figure 26: Intel Remote Configuration 3.5.8.7.1 Remote Configuration Under the Intel® Remote Configuration screen, 1. Select ‘Remote Configuration’. 2. Press Enter to select.
Intel® ME Manageability Features - Disabled- remote configuration is disabled. Only ‘Remote Configuration’ item are visible. - Enabled- remote configuration is enabled, this will show additional fields. Enabling/Disabling Remote configuration will cause a partial un-provision if the setup and configuration server is “In-process”. 3.5.8.7.2 PKI DNS Suffix Under the Intel® Remote Configuration screen, 1. Select ‘PKI DNS Suffix ’. 2. Press Enter to edit. Key Value will be maintained in the EPS. 3.5.8.
Intel® ME Manageability Features Figure 27: Manage Hashes Selecting this option will enumerate the hashes in the system and display the Hash Name and the active and default state. The Manage Certificate Hash screen provides keyboard controls for managing the hashes on the system. The following keys are valid when in the Manage Certificate Hash menu: 3.5.8.7.4 Escape key – exits from the menu Insert key – adds a customized certificate hash to the system.
Intel® ME Manageability Features Figure 28: Adding a new hash name To add a customized certificate hash: Enter the hash name (up to 32 characters). When you press ‘Enter’, you are prompted to select the algorithm of hash being used for PKI provisioning. The supported hash algorithms are SHA1 ONLY. After selecting desired Hash Algorithm, you are prompted to enter the certificate hash value.
Intel® ME Manageability Features Figure 29: Add Hash - certificate The Certificate hash value is a hexadecimal number (for SHA-1 it is 20 bytes). If the value is not entered in the correct format, the message “Invalid Hash Certificate Entered - Try Again” is displayed. When you press ‘Enter’, you are prompted to set the active state of the hash.
Intel® ME Manageability Features Figure 30: Add Hash - active Your response sets the active state of the customized hash as follows: 3.5.8.7.5 Yes – The customized hash will be marked as active. No (Default) – The customized hash will added to the EPS but will not be active Deleting a hash Note: A certificate hash that is set to Default cannot be deleted. When the Delete key is pressed in the Manage Certificate Hash screen, the following screen is displayed.
Intel® ME Manageability Features Figure 31: Deleting a hash This option allows deleting of the selected certificate hash. 56 Yes – Intel MEBX sends the firmware a message to delete the selected hash. No – Intel MEBX does not delete the selected hash, and returns to Remote Configuration.
Intel® ME Manageability Features 3.5.8.7.6 Changing the Active State When the ‘+’ key is pressed in the Manage Certificate Hashes screen, the following screen is displayed as seen in the following screen. Figure 32: Change Active State of Hash Answering Y toggles the active state of the currently selected certificate hash. Setting a hash as active indicates that the hash is available for use during PKI provisioning. 3.5.8.7.
Intel® ME Manageability Features Figure 33: View Hash details The details of the selected certificate hash are displayed to the user and include the following: 3.6 hash name certificate hash data active and default states Exit Under the Main Menu, 1. Select ‘Exit’. 2. Press Enter.
Intel® ME Manageability Features Figure 34: Exit confirmation To exit MEBx, select “Y”, else select “N” 3.7 Intel® Standard Manageability Configuration For platforms supporting Intel® Standard Manageability (e.g Q77 with non-vPro configuration and Q75), instead of Intel® AMT Configuration, the option of Intel® Standard Manageability Configuration will be displayed in MEBx setup menu.
Intel® ME Manageability Features Figure 35: Intel® Standard Manageability Configuration The menu under Intel® Standard Manageability Configuration is the same as that displayed in Intel® AMT Configuration.
Intel® ME Manageability Features Figure 36: Intel® Standard Manageability Configuration menu In the menus of SOL/IDER/KVM and “User Consent”, the KVM-related options are removed as KVM feature is not supported by Intel® Standard Manageability.
Intel® ME Manageability Features Figure 37: SOL/IDER/KVM Menu under Intel® Standard Manageability Configuration 62
Intel® ME Manageability Features Figure 38: User Opt-in options under Intel® Standard Manageability Configuration 3.8 Intel® Small Business Technology Configuration The “Intel® Small Business Advantage” has been defined beginning with ME8 platforms. Its features and capabilities shall be contained in the 5MB FW Image and its software. The Intel® Small Business Advantage disables out-of-band network access and provides key in-band features targeted for small business usages.
Intel® ME Manageability Features Figure 39: Main page of Intel® Small Business Technology Under the Intel MEBX main menu, 1. Select ‘Intel® Small Business Technology Configuration’. 2. Press Enter. The following message is displayed: ‘Acquiring Small Business Technology Configuration…’. The Intel® MEBX main menu changes to the Intel® Small Business Technology Configuration page.
Intel® ME Manageability Features Figure 40: Intel® Small Business Technology Configuration 3.8.1 Manageability Feature Selection Under the Intel® Small Business Technology Configuration screen, 1. Select ‘Manageability Feature Selection’. 2. Press Enter to select. 3. A message is displayed: [Caution] Disabling reset network settings including network ACLs to factory default. System resets on MEBx exit. Continue: (Y/N). Press Y to change setting or N to cancel.
Intel® ME Manageability Features 3.8.2 Restore Factory Settings Under the Intel® Small Business Technology Configuration menu, 4. Select ‘Restore Factory Settings’. 5. Press Enter to select. The following options can be selected: - Full Unprovision Note: When installing Intel® Small Business Advantage Software onto a vPro capable system, the MEBx menus will not display the Intel® Small Business Technology menu.
Intel® ME Manageability Features The scenarios that result in Intel® MEBX displaying CPU Replacement related message to End User are: 1) When CPU Type was Downgraded, e.g. from CORE (vPro eligible) CPU to PENTIUM CPU or from Core (Non-vPro eligible) CPU to CELERON CPU. In this scenario Intel® ME FW will request End User Approval since Intel® ME FW feature set strongly relies on plugged in CPU TYPE.
Intel® ME Manageability Features d. PENTIUM CPU changed to Core (Non-vPro eligible) CPU e. PENTIUM CPU changed to CORE (vPro eligible) CPU f. Core (Non-vPro eligible) CPU changed to CORE (vPro eligible) CPU Figure 41 represents message that will be exposed to End User whenever CPU Replacement took place downgrading CPU capabilities. This message will not be shown if replaced CPU has the same capabilities as the old one (e.g. changing PENTIUM capable CPU to another PENTIUM capable CPU).
Intel® ME Manageability Features whole ME infrastructure (kernel and all applications) based on modified CPU type. Note*: Two resets may be observed. The 2nd reset will occur if some AMT features (SOL/IDER/KVM) get disabled when a vPro CPU is replaced with a non-vPro CPU and this information has to synced with BIOS. Please refer to Appendix C for different causes to global reset.
Intel® ME Manageability Features Appendix A: Changes to Configuration Modes In Intel AMT 5.0 and under, there were two operational modes – SMB and Enterprise. In Intel AMT 6.0 and above, their functionality has been integrated to provide the same functionality previously available in Enterprise mode. The new configuration options are “Manual Setup and Configuration” available for SMB customers and “Automatic Setup and Configuration. Figure 42: Configuration Modes Setting Intel® AMT 5.
Intel® ME Manageability Features 5. Choose “y” in the confirmation message. 6. Exit the Intel MEBX.
Intel® ME Manageability Features Appendix B: Changes to Redirection Protocols Before Intel AMT 6, firmware had the small/medium business (SMB) and the enterprise (ENT) provisioning modes. ENT was inherently more secure than SMB, which was meant to be more open and easy, but less secure. This change had an effect on the redirection protocols. Before Intel AMT 6: SMB: redirection ports were left open and Intel ME was listening constantly to the ports.
Intel® ME Manageability Features If “legacy redirection mode” is set to disabled, the ports are closed and the console needs the extra command to open/close the ports in order to connect. The user can go into Intel MEBx, or use a USB key to set this setting. If the USB key is a legacy one prepared by an SMB console, Intel MEBx automatically sets the legacy redirection mode to Enabled. Since SMB configuration required manual touch anyway, this poses no customer issue.
Intel® ME Manageability Features Appendix C: Global Reset from MEBx Several MEBx configuration options require a global reset after they have been edited by the user. The reset is flagged while in the MEBx UI and passed back to BIOS to perform the reset request. The MEBx UI has to keep track of which configuration options require a global reset after exiting MEBx. Multiple techniques are used to ensure the global reset flow is entered correctly.
Intel® ME Manageability Features These global resets happen when BIOS execute MEBx binary during post. In these cases MEBx will pass the global reset flag to BIOS to perform global reset without going through MEBx User Interface.
Intel® ME Manageability Features Appendix D: PID-PPS Checksum The PID and PPS are made up of ASCII codes of some combination of characters – capital alphabet characters (A–Z), and numbers (0–9). • The PID is an eight character entry of the form: XXXX-XXXC (where "C" is the CRC (Cyclic Redundancy Check) of the preceding characters) and is sent in the open.
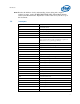
Intel® ME Manageability Features Appendix E: Intel® MEBX Options Being Reflected in the Firmware Below is the list of MEBx options which will be reflected in FW when saved. Note: Those settings are located in data region of the FW, and, when saved, FW will look at the saved settings and run the corresponding execution when necessary.
Intel® ME Manageability Features Option 78 Reflected in the firmware Subnet Mask Address Upon Exiting Intel MEBX Default Gateway Address Upon Exiting Intel MEBX Preferred DNS Address Upon Exiting Intel MEBX Alternate DNS Address Upon Exiting Intel MEBX Current Provisioning Mode Upon Exiting Intel MEBX Provisioning Record None Provisioning Server IPV4/IPV6 Upon Exiting Intel MEBX Provisioning Server IPV4/IPV6 Upon Exiting Intel MEBX Provisioning Server FQDN Upon Exiting Intel MEBX Start