
Enabling Hardware Accelerated Playback for Fedora* 16


Enabling Hardware Accelerated Video Decode on Intel
®
Atom™ Processor D2000 and N2000 Series under Fedora 16
October 2012 AN
Order Number: 509577-003US 7
Intel
®
Atom™ D2000/N2000
— pixman >= 0.22.0
— gcc >= 4.5.1
— libdrm >= 2.4.25
3. Build and install MPlayer on the target machine. The MPlayer is patched to use
VA-API based hardware acceleration for video decoding instead of using the CPU for
video decode.
4.0 Step-by-Step Instructions
4.1 Cedar Trail Platform Preparation
1. Ensure that the board has DDR memory installed (minimum of 1 GB
recommended).
2. Connect a VGA or HDMI monitor to the board.
This study was done with a VGA and HDMI monitor, however other displays
supported by the Cedar Trail platform and driver can also be used such as: LVDS,
DP or eDP.
3. Connect a USB keyboard and a mouse to the board.
4. Connect a hard disk drive to the board.
5. Connect a DVD player to the board using a SATA cable.
6. Connect the power supply to the board.
4.2 Fedora 16 Installation on Cedar Trail Target Platform
Follow the steps below to install the Linux Fedora 16, 32-bit (i686) OS on the Cedar
Trail target board.
1. Disconnect the LAN cable during the installation to prevent Fedora 16from going
online and updating the packages and causing the wrong kernel version to be
installed on the system.
2. Turn ON the power supply connected to the target board.
3. Power on the board. (On most systems this would typically require momentarily
pushing the Power-On button.)
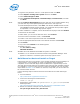
4. You should now see the boot menu on the VGA/HDMI monitor as seen below:
“No boot device has been detected, please press any key to reboot!”
5. Insert the Fedora 16 i686 DVD in the DVD player.
6. Press Enter. The Fedora OS installation begins on the hard disk drive.
7. Select Install new system or Upgrade from the menu. Select Test the Media
before installation.
8. When the Fedora 16 menu appears, click Next.
9. Select English as the installation language.
10.Select U.S.English for the keyboard.
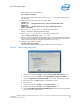
11.Select Basic Storage Devices and then click Next.
12.Select Fresh Installation to start a new installation (note that the old data will be
lost).
13.Use the default (localhost.localdomain) host name and then click Next.
14.Select your time zone and then click Next.