
User's Guide


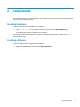

Table Of Contents
- Getting started
- Components
- Network connections
- Connecting to a wireless network
- Connecting to a wired network
- Using HP MAC Address Pass Through to identify your computer on a network (select products only)
- Navigating the screen
- Using touchpad and touch screen gestures
- Tap
- Two-finger pinch zoom
- Two-finger slide (touchpad and precision touchpad)
- Two-finger tap (touchpad and precision touchpad)
- Three-finger tap (touchpad and precision touchpad)
- Four-finger tap (touchpad and precision touchpad)
- Three-finger swipe (touchpad and precision touchpad)
- Four-finger swipe (precision touchpad)
- One-finger slide (touch screen)
- Using an optional keyboard or mouse
- Using an on-screen keyboard (select products only)
- Using touchpad and touch screen gestures
- Entertainment features
- Using a camera (select products only)
- Using audio
- Using video
- Connecting a DisplayPort device using a USB Type-C cable (select products only)
- Connecting a Thunderbolt device using a USB Type-C cable (select products only)
- Connecting video devices using an HDMI cable (select products only)
- Discovering and connecting wired displays using MultiStream Transport
- Discovering and connecting to Miracast-compatible wireless displays (select products only)
- Using data transfer
- Managing power
- Using Sleep and Hibernation
- Shutting down (turning off) the computer
- Using the Power icon and Power Options
- Running on battery power
- Running on external power
- Security
- Protecting the computer
- Using passwords
- Setting passwords in Windows
- Setting passwords in Computer Setup
- Managing a BIOS administrator password
- Using DriveLock Security Options
- Windows Hello (select products only)
- Using antivirus software
- Using firewall software
- Installing software updates
- Using HP Client Security (select products only)
- Using HP Device as a Service (select products only)
- Using an optional security cable (select products only)
- Using a fingerprint reader (select products only)
- Maintenance
- Backing up, restoring, and recovering
- Computer Setup (BIOS), TPM, and HP Sure Start
- Using HP PC Hardware Diagnostics
- Specifications
- Electrostatic discharge
- Accessibility
- Index

1 Getting started
After you set up and register the computer, HP recommends the following steps to get the most out of your
smart investment:
TIP: To quickly return to the computer Start screen from an open app or the Windows desktop, press the
Windows key on your keyboard. Pressing the Windows key again returns you to the previous screen.
● Connect to the internet—Set up your wired or wireless network so that you can connect to the internet.
For more information, see Network connections on page 22.
● Update your antivirus software—Protect your computer from damage caused by viruses. The software
is preinstalled on the computer. For more information, see Using antivirus software on page 56.
● Get to know your computer—Learn about your computer features. See Components on page 3 and
Navigating the screen on page 28 for additional information.
● Find installed software—Access a list of the software preinstalled on the computer:
Select the Start button.
‒ or –
Right-click the Start button, and then select Apps and Features.
● Back up your hard drive—Create recovery discs or a recovery USB ash drive to back up your hard drive.
See Backing up, restoring, and recovering on page 63.
● Access HP Support Assistant app—For quick online support, open the HP Support Assistant app (select
products only). HP Support Assistant optimizes computer performance and resolves problems using the
latest software updates, diagnostic tools, and guided assistance. Type support in the taskbar search
box, and then select
HP Support Assistant. Then select Support.
1