
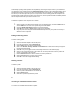
User Manual


NOTE: For information about connecting to an ad hoc using a profile, refer to Create an Ad Hoc
Profile using the Profile Wizard.
1. Connect using an ad hoc profile. Refer to Creating a New Profile for details. Select an ad hoc profile
from the Profile List and click the Connect button. This method uses a pre-defined ad hoc profile
created by the Profile Wizard. The ad hoc profile is displayed in the Profile List. When joining an ad
hoc network, the transmit channel established by the first computer is used. This channel may be
different than the one selected when the ad hoc profile was created by the Profile Wizard.
2. Join a one-time ad hoc session without a profile. Refer to Starting an Ad Hoc (peer-to-peer)
Connection below for details. This method does not use a pre-defined profile. To connect to any ad
hoc network, use the Scan button to scan for any ad hoc networks, enter the password (SSID), then
click the Connect button to connect. To end the session, click the Close button to end the session.
Start an Ad Hoc Network
Refer to Starting an Ad Hoc (peer-to-peer) Connection below for details.
● This method uses your computer's SSID to establish the ad hoc network for other users to connect
to.
● When you are the originator of an ad hoc network, all other users must use the channel and SSID.
Ending an Ad Hoc Session
To end an ad hoc session, click the Close button. After the session is ended, an attempt is made to re-
connect to the last profile used from the Profile List.
Creating an Ad Hoc Profile Using the Profile Wizard
The following describes how to create a new ad hoc profile using the Profile Wizard and connect to an ad hoc
network. You can also connect to a network, by using the Scan button.
1. From the General page, select the wireless adapter on the left side pane.
2. Click the Networks tab.
3. Click the Add button.
4. Enter the profile name in the text box.
5. Enter a network name (SSID) in the text box.
6. Select Ad Hoc for the operating mode.
7. Click the Configure TCP/IP and VPN settings check box and click the Next button to access the
TCP/IP and VPN settings. If these settings are not required, leave the box unchecked and proceed
to step 11.
8. Click the Next button to select the WEP security settings.
9. Click the Password protect this profile checkbox and click Next button to access the Password
Protection settings. Click Finish after the password information has been entered. If this option is
not required, leave the box unchecked and proceed to step 11.
10. Click OK to save the profile settings and return to the Networks page.
11. Set the Transmit channel from the Adapter tab: Channel 7 is the default transmit channel.
Unless the other computers in the ad hoc network use a different channel, there is no need to