
User's Manual


2 SETUP AND
Installation
9
recommended for easier observation).
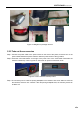
Step 4: After charging, screw down the screw cap of charge pipe, put the charge pipe back and install the
coverplate.
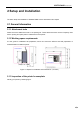
Figure 2.7 Position of charging inlet and method to charge
2.2.5 Install the printing buildplate
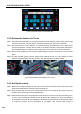
Step 1: In the "Axis" interface, click the key "Home XYZ".
Step 2: Select the option "100mm" in the "Move steps" above, then click "Z↓" (no more than 3 times) and
adjust the printing buildplate to a position convenient for the installation of printing buildplate.
Step 3: Install the printing buildplate according to the direction as shown on the label on printing buildplate,
make the four magnet blocks on the glass be placed into the corresponding magnet holes, and
gently press the four magnet blocks with hand to confirm the magnet blocks are fully placed in the
magnet holes.
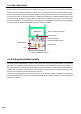
Figure 2.8Buildplate descending method
1
2
3