
User's Manual


2 SETUP AND INSTALLATION
8
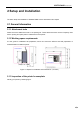
Figure 2.5 Power switch and startup button
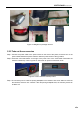
2.2.3 Release the fixation of XY axis
Step 1: Press the round start button on the right of the panel to shut down the printer. Gently pull the right
side of the front door, open the printer's front door, and then open the top door upwards;
Step 2: The fixed block on X axis guideway is used for ensuring the steadiness of the nozzle device
during transportation. Unscrew the two bolts on the fixed block with a 4mmsocket head wrench
(the socket head wrench is placed in the accessory box box) to take off the X axis fixed block;
Step 3: On the linear guideway on the left side, upwards drag the buckle to take out the Y axis left fixed
block;
Step 4: In power-off state, gently push the printing head towards the left on X axis direction to leave
sufficient operating space, and take out the Y axis right fixed block by same method.
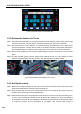
Figure 2.6 Positions of fixed blocks on XY axis
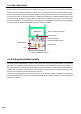
2.2.4 Add liquid coolant
Step 1: Remove the charge coverplate on the back of the machine with 2mm socket head wrench (the
2mm socket head wrench is placed in the accessorybox).
Step 2: It can be seen that one end of the charge pipe is fixed on a support by the buckle. Press the
buckle to pull out one end of the liquid adding pipe.
Step 3: Unscrew the screw cap of charge pipe and insert funnel (the funnel is in the spare accessory box).
There is a scale observation window on the left side of the charging inlet. Inject 750~950ml of
liquid coolant via the funnel (it is suggested to add water-free liquid coolant for automobile engine
to reduce the erosion and the generation of incrustation, and colored liquid coolant is
1
2