
User Manual
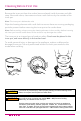
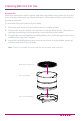
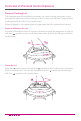
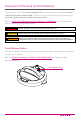
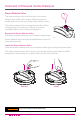
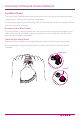
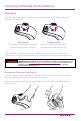
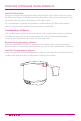
Table Of Contents
- IMPORTANT SAFEGUARDS
- Special Cord Set Instructions
- Initial Setup
- Product, Parts and Accessories
- Control Panel
- Smart Program Settings
- Reset Smart Programs to Factory Default Settings
- Adjust and Save Custom Temperatures
- Reheat Food or Keep Warm for Long Periods
- Status Messages
- Cleaning Before First Use
- Overview of Pressure Control Features
- Steam Release Valve
- Anti-Block Shield
- Sealing Ring
- Float Valve
- Condensation Collector
- Depressurizing the Cooker (Venting Methods)
- 10-Minute NR
- Initial Test Run (Water Test)
- Smart Programs: Non Air Frying
- Sauté
- Slow Cook
- Sous Vide
- Sous Vide Cooking Guidelines
- Smart Programs: Air Frying
- Bake
- Roast
- Broil
- Dehydrate
- Smart Program Overview
- Cooking Time Chart
- Care and Cleaning
- Troubleshooting
- Warranty

29
Overview of Pressure Control Features
Float Valve
The oat valve provides a visual indication of pressure within the cooker and
appears in 2 positions.
The oat valve and silicone cap work together to seal in pressurized steam.
These parts must be installed before use and should be cleaned after each use.
Remove the Float Valve from the Lid
Place one nger on the at top of oat valve, then turn the lid over. Detach the
silicone cap from the bottom side of the oat valve.
Remove the oat valve from the top of the lid. Do not discard the oat valve or
silicone cap.
Pressurized
The oat valve has visibly popped
up above the surface of the lid.
Depressurized
The oat valve has descended
and the top is ush with the lid.
Top Bottom
DANGER
While the oat valve is up, contents of cooker are under extreme pressure. Do not
attempt to remove the lid. All pressure must be released, and oat valve must be
down. Refer to Depressurizing the Cooker (Venting Methods) for information on
releasing pressure. Failure to follow these instructions may result in property
damage and/or personal injury.