
User Manual

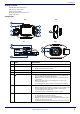
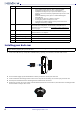
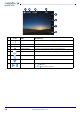
Table Of Contents

www.insigniaproducts.com
6
Recording an emergency video
An emergency recording automatically starts when the G-Sensor registers an impact. Emergency recordings create
protected (locked) files that are not overwritten by continuous loop recording. In addition, to make sure that important
footage isn’t lost surrounding an incident, adjacent video clips are locked if the incident happens within 30 seconds of the
beginning or end of a clip.
You can manually start and stop an emergency video.
• When your dash cam is turned on, press the OK button to start recording. Press this button again to stop recording.
Taking photos
• Press the (up) button to enter camera mode. Press the button or the camera icon to take a photo.
Downloading files to a computer
You can transfer files from your dash cam to a computer.
1 Remove the MicroSD memory card from your dash cam and insert it into a card reader on your computer. The memory
card appears as a mobile hard disk device in your list of files.
2 Download the files to your computer into a directory you can easily find.
3 On your computer, right-click the device, then select Eject from the option list that appears.
4 Remove the card and put it back in your dash cam.
Menu options and settings
Note: You can also connect the USB cable from the dash cam directly to your computer and access the MicroSD card files.
MENU OPTION SETTING
Menu Set Resolution Selects the camera resolution. You can select:
• 1080p Front / 1080p Rear
• 1080p Front / 720p Rear
• 720p Front / 720p Rear
Screen display Sets what is displayed on-screen. You can select:
• Front to display the video outside your vehicle.
• Rear to display the video inside your vehicle.
• PIP (picture-in-picture) to display the front video with
a small window that displays the rear video.
PIP is the default setting.
Loop recording Sets the time when the recording loop ends. You can select
1min, 3mins, or 5mins.
When the memory card is full, your dash cam deletes the
oldest recordings to make room for new recordings. Your
dash cam does not automatically delete emergency
recordings. You must delete these recordings manually.
Microphone setup Turns the microphone On or Off.
Exposure Sets the white balance according to the available light. You
can select a setting between –2.0 and +2.0. The default
setting is +0.
Infrared lamp Illuminates images in dark environments, such as night or
low light situations. You can select On, Off, or Auto.
Stamp setup Turns the date and time stamp On or Off. If you select On,
the date and time appear on the bottom of the screen.
You can also turn on the input feature and enter identifying
information, such as name, nickname, or make and model of
a vehicle.
Language Sets the OSD language. You can select English, Français, or
Español.
Time setup Sets the current date and time. Use the
and buttons to
select a number, then press the OK button to lock your
selection and move to the next number field. When you
finish, press the OK button to save your entry.
The date and time is part of the file name for each recording.
Driver ID setting Lets you enter the vehicle license plate number. Use the
and
buttons to select a number, then press the OK button
to lock your selection and move to the next number field.
When you finish, press the OK button to save your entry.
This information is stored as part of the time stamp.