
User's Manual


Technical Document
<Tag Here>
Indyme Solutions, Inc. 8295 Aero Place San Diego, CA 92123 USA +1.858.268.0717 +1.800.829.6141 Page 4 of 5
Menu-7: Clone Mode
Allows the help button to broadcast the Netcode to other GSF help buttons. All help buttons and access
points must have the same Netcode to communicate.
After entering the Programming Menu;
Press the SET button seven times for Menu-7, RESET once to save.
The assurance LED will flash seven times to indicate Menu-7 was selected.
The assurance LED will now flash a cadence of 4-pause, 4-ƉĂƵƐĞĞƚĐdŚĞhelp button will stay
in Clone mode for 5-minutes or until the RESET button, is pressed.
Menu-8: Frequency Plan Mode
Assigns the designated frequency spectrum to the help button. All help buttons and access points must
have the same Frequency Plan to communicate.
After entering the Programming Menu;
Press the SET button eight times for Menu-8, RESET once to save.
The assurance LED will flash eight times to indicate Menu-8 was selected.
Press the SET button to select a Frequency Plan: <1, 2, 3 or 4>, RESET once to save.
The assurance LED will flash to indicate the selected Frequency Plan.
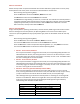
The four Frequency Plans are as follows;
x FP01 Europe -868.175MHz
x FP02 USA/Australia -918.000MHz
x FP03 USA/Australia -918.100MHz
x FP04 USA/Australia/Singapore -920.000MHz
Installation
The CB914 help button ships with Velcro strips and double-sided tape. To mount the help button,
thoroughly clean the mounting surface with alcohol, removing all dirt from the mounting surface. Using
the desired mounting adhesive, place one piece on the back of the help button. Remove the protective
backing from the adhesive press the help button firmly into position ʹ typically located near a register or
telephone at a checkout counter or service desk.
1. Identify all programming characteristics before you begin programming or installation.
x Frequency Plan
x Netcode
x Help button Addresses
x Help button Modes
2. Program the required parameters into the CB951 Access Points first.
3. Set the corresponding Frequency Plan on each of the help buttons.
4. Use the first CB951 Access Point to clone the Netcode to all of the help buttons. This will ensure the
same Netcode is being assigned to all devices. You may also clone the Netcode from a known
working help button to all other help buttons. . The Netcode cannot be cloned from a help button to
an access point.
5. Program the Alarm Address and Mode of each help button.
6. Install the help button in accordance with store policy, Indyme work order and/or Americans with
Disabilities Act guidelines where applicable.
The CB914 Help button uses one 2/3A 3-volt lithium battery. Always use the same type of battery for
optimum performance. DO NOT use rechargeable batteries in the help button. To replace the batteries,
remove the 2-philips screws from the back cover. Remove the old battery from the battery holder.
Install the new 2/3A 3-volt lithium battery and replace the cover. The help button does not lose the
programmed characteristics when the batteries are removed.