
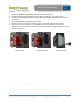
Installation Instructions

Indyme Solutions, Inc.⬧ 8295 Aero Place ⬧ San Diego, CA 92123 USA +1.858.268.0717 ⬧ +1.800.829.6141 Page 3 of 6
Technical Document
430773-01
Rev. 5
rapidly for approximately 3 seconds and then it will exit Menu-2. If no Netcode is received
within 5 minutes, the help button will exit Menu-2.
Menu-3: Operating Mode
Assigns the help button operating characteristics; Operating Modes will vary by help button type, below
are the default modes for this help button.
After entering the Programming Menu;
Press the SET button three times for Menu-3, RESET once to select.
The assurance LED will flash three times to indicate Menu-3 was selected.
Press the SET button to select a Help button Operating Mode: <1, 2, …>, RESET once to save.
The assurance LED will flash to indicate the selected Operating Mode.
• Mode 1 - Standard 3-min timeout, No Reset
Press the SET button to trigger the alarm state; the LED will flash for 3 minutes, then extinguish
with no reset sent. The RESET button will send a reset signal for the active channel.
• Mode 2 – Reset only
Press the SET button to send a RESET, no Attention LED
• Mode 3 – Demo mode
Does not require infrastructure, no RF sent, Attention LED set to 60 seconds.
Menu-7: Clone Mode
Allows the help button to broadcast the Netcode to other GSF help buttons. All help buttons and access
points must have the same Netcode to communicate.
After entering the Programming Menu;
Press the SET button seven times for Menu-7, RESET once to select.
The assurance LED will flash seven times to indicate Menu-7 was selected.
The assurance LED will now flash a cadence of 4-pause, 4-pause… etc. The help button will stay
in Clone mode for 5-minutes or until the RESET button, is pressed.