
User Guide


T
T
h
h
e
e
P
P
h
h
a
a
t
t
B
B
o
o
y
y
a
a
n
n
d
d
O
O
t
t
h
h
e
e
r
r
C
C
o
o
n
n
t
t
r
r
o
o
l
l
l
l
e
e
r
r
s
s
75
2. Setting Up Your Controller.
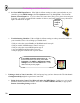
a. Get a MIDI Cable and Plug in your Controller. Look on the back of your computer. If you see
two or three round, 5-pin connectors labeled "MIDI", then you're in business. If not, look for a 15-
pin trapezoidal joystick port. If you have the round connectors, you need a cable to go from
"MIDI Out" on your controller to "MIDI In" on your computer. If you only have a game
controller connection, you'll need a special cable that has two round MIDI plugs at one end and a
trapezoidal plug at the other. Both these types of cables should be available at any music store
specializing in keyboards and synthesizers (but if you ask for them in a computer store, you may
just get blank looks.)
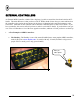
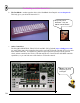
b. Turn on the Controller and Start Up FL Studio. If you have a PhatBoy, make sure the power
switch is set to mode "III". If you have a DrehBank, hold down the "Bank 1" button when you
plug in the power cable. For the MC-505, make sure the MIDI mode is set to MODE 2 (Shift 12,
Edit TxRx = Mode2). Try turning the knobs on your controller. If everything is ok, you should
see a little red "Midi" light flash beside the Hint Bar of FL Studio every time you turn a knob. If
that works, great! You can skip steps c to e. If not, read on my friend.
The Little
Red Light
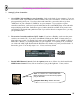
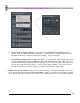
c. Enable MIDI Remote Control. Check the Options menu to see if there is a check mark beside
MIDI Remote Control. If not, click on it and see if you get the light now. If not, read on.
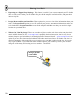
Sam: Yo, check it out. I need a cable with
MIDI connections on one end and a joystick
plug on the other.
Computer Store Guy: What's mee dee?
hERETIC