
User's Manual

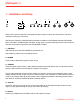
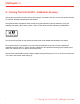
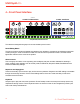
Table Of Contents
- Contents
- Introduction
- 1 – Installation and Setup
- 2 – Turning The Unit On/Off - Calibration Process
- 3 – Overview
- 4 – Front Panel Interface
- 4.1 – Home Display
- 4.2 – Sound Editing Matrix
- 4.2.1 – Oscillators (OSC)
- 4.2.2 - Mixer (MIX)
- 4.2.3 – Filters (FILTER)
- 4.1.4 – LFOs (LFO)
- 4.2.5 – Envelopes (FILTER ENV - AMP ENV)
- 4.2.6 – Modulation Matrix (MATRIX)
- 4.2.6 – Effects (FX)
- 4.2.7 – Effects Type List And Parameters
- 4.2.8 – Other Sound Editing Shortcuts
- 5 – Global Controls
- 5.1 – Presets
- 5.1.1 – The Edit Preset Menu
- 5.1.2 - Store a Preset
- 5.1.3 – Recall Preset
- 5.1.4 – Rename Preset
- 5.1.5 – Initialize A Preset
- 5.1.6 – Compare Preset
- 5.1.7 – Demo
- 5.2 – Setup
- 5.2.1 – Master Tuning
- 5.2.2 – MIDI
- 5.2.3 – Sync
- 5.2.4 – Keyboard
- 5.3 – Song
- 5.4 – Arpeggiator
- 5.5 – Sequencer
- 5.5.1 – ALT(ernative) Editing button
- 5.6 – Voice Mode: Assign System
- 6 – FAQ and Troubleshooting
- 7 – Support

UNO Synth Pro
2 – Turning The Unit On/O - Calibration Process
7
2 – Turning The Unit On/Off - Calibration Process
UNO Synth Pro powers on as soon as the power supply is connected to the unit. The unit can then be powered
on and off by pressing and holding the HOLD Button.
Once powered ON it automatically starts the first tuning and capacitance sensing calibration. During the
calibration the display will first show a static “UNO,” the FW version and then a blinking “CALIBRATION.”
CALIBRATION
FW V 1.0.0
The unit will then be ready for use and the last used preset will be loaded and indicated on the display.
Do not press buttons or put objects on the unit during the calibration as this will incorrectly calibrate the
capacitance sensing system. In case of incorrect calibration of the capacitance sensing system, please power
off the unit, and then turn it on again to repeat the process.
Various noises and calibration sounds might be audible during the startup of the unit, so we recommend turning
your system volume down while starting up.