
Manual

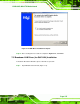

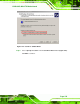
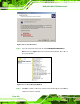

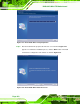

Table Of Contents
- 1 Introduction
- 2 Detailed Specifications
- 3 Unpacking
- 4 Connector Pinouts
- 4.1 Peripheral Interface Connectors
- 4.2 Internal Peripheral Connectors
- 4.2.1 Fan Connectors
- 4.2.2 Front Panel Connector
- 4.2.3 Digital Input/Output Connector
- 4.2.4 IDE Connector
- 4.2.5 LCD Backlight Connector
- 4.2.6 LVDS LCD connector
- 4.2.7 Power Connector
- 4.2.8 14-Pin Serial Port Connectors
- 4.2.9 10-Pin Serial Port Connectors
- 4.2.10 SATA Drive Connectors
- 4.2.11 SPDIF Connector
- 4.2.12 Internal USB Connectors
- 4.3 External Interface Connectors
- 5 Installation
- 6 AMI BIOS
- 7 Driver Installation
- A BIOS Options
- B DIO Interface
- C Watchdog Timer

KINO-9453 Mini-ITX Motherboard
Page 161
7.6 Realtek AC`97 Audio Driver (ALC655) Installation
To install the Realtek AC `97 audio driver, please follow the steps below.
7.6.1 BIOS Setup
Step 1: Enter the BIOS setup. To do this, reboot the system and press DEL during POST.
Step 2: Go to the Southbridge Configuration menu. Set the Audio Controller option to
[AC`97]. See Section
6.7.2 for details.
Step 3: Press F10
to save the changes and exit the BIOS setup. The system reboots.
Step 0:
7.6.2 Driver Installation
Step 1: Insert the CD that came with the package.
Step 2: From the main driver menu, navigate to X:\4-AUDIO\ALC655\A3.84 (or other
appropriate OS). X:\ represents the system CD drive. A new window appears
showing the folder contents.
Step 3: Double-click the WDM_A384.exe file to begin the driver installation process.
Step 4: Once you double click the WDM_A384.exe icon, the install shield wizard for the
audio driver starts. See
Figure 7-22.
Figure 7-22: AC`97 Audio Driver Install Shield Wizard Starting
Step 5: The Realtek Audio Setup prepares the install shield to guide you through the
rest of the setup process.