
Manual

HDC-502E SDK (Windows)
Page 22
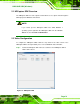
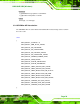
Step 2: Enable and configure the device settings by clicking the Device # (0, 1) buttons.
The device number is decided by which port the device is installed.
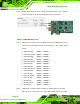
Figure 2-2: HDC-502E Device Ports
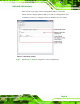
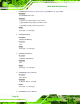
Step 3: Click the Device # button. The Encoding window appears (
Figure 2-3). Choose
the video input format which depends on the video device. The available options
include:
1920x1080 (60p) (6000kps – 20000kps)
1920x1080 (59.94p) (6000kps – 20000kps)
1920x1080 (50p) (6000kps – 20000kps)
1920x1080 (60i) (6000kps – 20000kps)
1920x1080 (59.94i) (6000kps – 20000kps)
1920x1080 (50i) (6000kps – 20000kps)
1440x1080 (60i) (5000kps – 20000kps)
1440x1080 (59.94i) (5000kps – 20000kps)
1440x1080 (50i) (5000kps – 20000kps)
1280x720 (60p) (4000kps – 20000kps)
1280x720 (59.94p) (4000kps – 20000kps)
1280x720 (50p) (4000kps – 20000kps)
720x480 (60i) (2000kps – 10000kps)
720x480 (59.94i) (2000kps – 10000kps)
720x480 (50i) (2000kps – 10000kps)
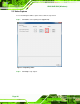
Step 4: Configure the encoding settings, including encoding file directory (click Ref
button to choose the directory), rate control (CBR or VBR) and video encoding