
User Manual


AFL2-W10A-N28 Panel PC
Page 32
NOTE:
When purchasing the cabinet/rack installation bracket, make sure it is
compatible with both the AFL2-W10A-N28 flat bezel panel PC and the
rack/cabinet into which the AFL2-W10A -N28 is installed.
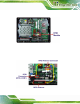
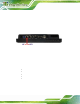
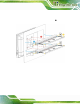
Step 1: Slide the rear chassis of the AFL2-W10A-N28 flat bezel panel PC through the
rack/cabinet bracket until the frame is flush against the front of the bracket
(
Figure 3-17).
Figure 3-17: The Rack/Cabinet Brack et
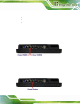
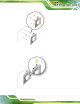
Step 2: Align the panel mounting bracket screw holes with the VESA mounting holes on
the rear of the panel PC.
Step 3: Secure the two rack mounting brac kets to the rear of the panel PC by inserting
the four retention screws into the VESA mounting holes (
Figure 3-18
n
).
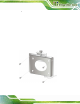
Step 4: Insert the rack mounting clamps into the holes of the rack mounting brackets
(
Figure 3-18
o
). There are a total of 4 rack mounting clamps for
AFL2-W10A-N28.
Step 5: Tighten the screws that pa ss through the rack mounting clamps until the plastic
caps at the front of all the screws are firmly secured to the panel.