
User guide


AFL2-17A/AB-H61
Page 122
Figure 7-7: Removing the WLAN card
Step 9: Install a new WLAN card by inserting the card into the slot at an angle
Step 10: Push the WLAN card down until the spring retainer clips lock into place.
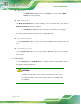
Step 11: Connect the main (1) and auxiliary (2) antennas. The main antenna is indicated
with a strip of black electrical tape. See Figure 7-8.
NOTE:
To ensure the WLAN module functions correctly, please make sure the
WLAN antennas are attached in the proper configuration.
Figure 7-8: Attaching the Antennas