
Instruction Manual

AFL2-08A-N26
Page 34
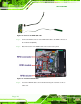
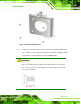
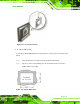
Step 3: Slide the flat bezel panel PC through the hole until the frame is flush against the
panel.
Step 4: Align the panel mounting bracket screw holes with the VESA mounting holes on
the rear of the panel PC.
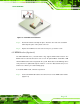
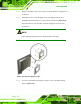
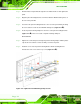
Step 5: Secure the two panel mounting brackets to the rear of the panel PC by inserting
the four retention screws into the VESA mounting holes (Figure 4-13
).
Step 6: Insert the panel mounting clamps into the holes of the panel mounting brackets
(Figure 4-13
). There are a total of 4 panel mounting clamps for
AFL2-08A-N26.
Step 7: Tighten the screws that pass through the panel mounting clamps until the plastic
caps at the front of all the screws are firmly secured to the panel.
Step 8: Install the covers into the panel mounting bracket. Each mounting bracket
includes two side covers and one top cover (Figure 4-13
).
Figure 4-13: Tighten the Panel Mounting Clamp Screws