
Owner's manual


Table Of Contents
- 42AFL-xxA-N270 Series Flat Panel PC
- 1 Introduction
- 2 Detailed Specifications
- 3 Unpacking
- 4 Installation
- 4.1 Anti-static Precautions
- 4.2 Installation Precautions
- 4.3 Preinstalled Components
- 4.4 Installation and Configuration Steps
- 4.5 Removing the Back Cover
- 4.6 CF Card Installation
- 4.7 HDD Installation (AF-12A-N270 Only)
- 4.8 AT/ATX Mode Selection
- 4.9 Jumper Settings
- 4.10 Mounting the System
- 4.11 Bottom Panel Connectors
- 5 System Maintenance
- 6 AMI BIOS Setup
- 7 Software Drivers
- A System Specifications
- B Safety Precautions
- C BIOS Configuration Options
- D Watchdog Timer
- E Hazardous Materials Disclosure
- F Index
AFL-xxA-N270 Series Panel PC
Page 19
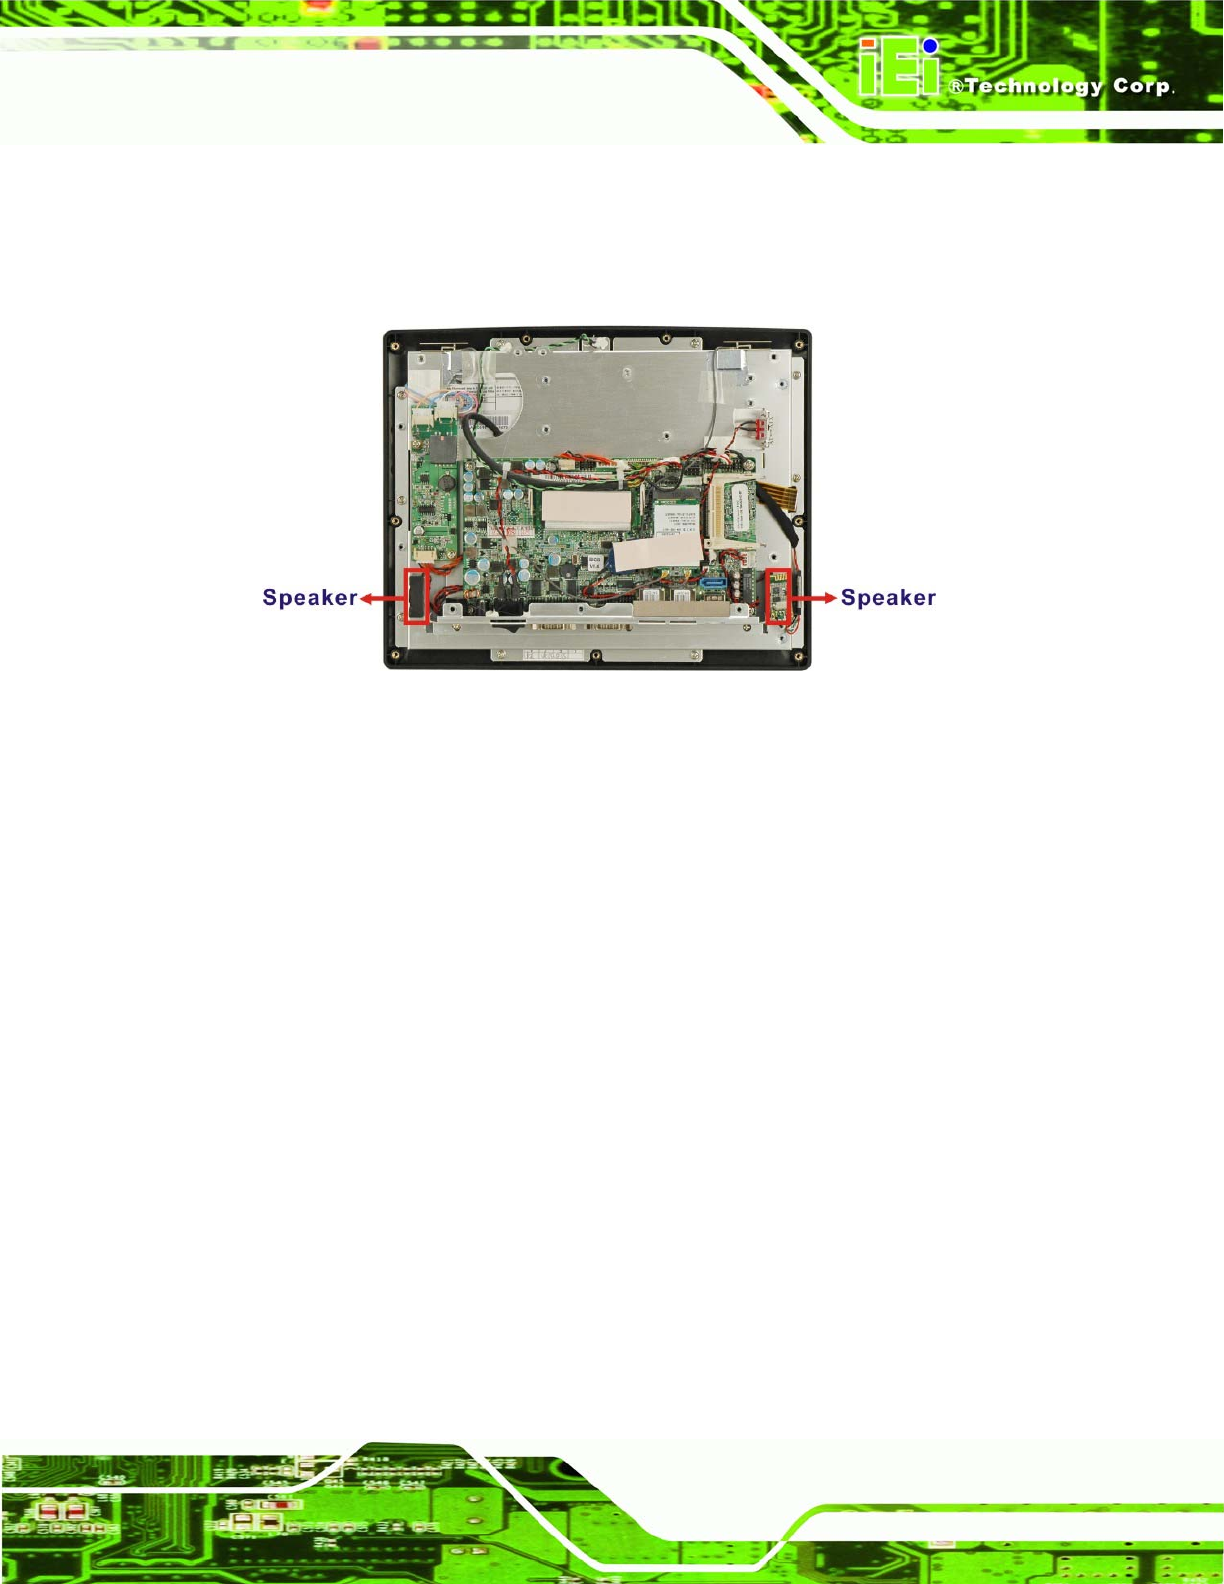
2.6.2 Stereo Speakers
Two internal 1.5 W stereo speakers on the sides of the AFL-xxA-N270 are interfaced to
the system through a Philips TDA1517p integrated class-B dual output amplifier.
Figure 2-11: Stereo Speakers
2.7 System Power
2.7.1 Power Mode
The system can be run in the AT power mode or the ATX power mode. Both these power
modes are described below.
2.7.1.1 ATX Power Mode (Default)
With the ATX mode selected, the AFOLUX AFL-xxA-N270 panel PC goes in a standby
mode when it is turned off. The panel PC can be easily turned on via network or a power
switch in standby mode. Remote power control is perfect for advertising applications
since the broadcasting time for each panel PC can be set individually and controlled
remotely. Other possible application includes
Security surveillance
Point-of-Sale (POS)
Advertising terminal