
User's Manual
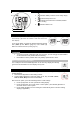


2. After 3 seconds, cali sensor displays, then press middle (2) button, add sensor displays
on the screen.
3. Follow step 2 in the top section.
NOTE You can pair all sensors with the watch at a time.
REMOVE A SENSOR DEVICE
You can remove the sensor from the watch. Remove one sensor at a time.
1. In SENSOR setup mode, press top (1) button to enter. When you see add sensor
display, press middle (2) button, remove sensor displays.
2. Press top (1) button to enter.
3. Toggle middle (2) button to select the sensor you want to remove.
4. Press top (1) button again to confirm the deletion and Done displays on the screen.
5. After 3 seconds, the screen automatically displays other paired sensor icon.
6. Follow step 3 in this section, or press bottom (3) button to exit.
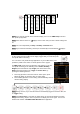
START EXERCISING
With your desired profile downloaded onto the watch, you can start exercising and review
exercise data records on the watch or uploading them to the application, which can
systematically manage and analyze your records.
IMPORTANT You need to pair sensor with the watch if necessary before starting exercising,
such as paring a bike pod for cycling. If without pairing, the exercise profile does not work to
collect data.
RUNNING PROFILE
SETUP
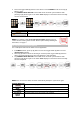
You can do running setup on the watch. In RUNNING mode, press top (1) button to enter,
and the paired sensor icons display on the screen. Press bottom (3) button to skip and then
press middle (2) button to enter setup mode. The setup mainly includes the following parts:
Lap (page )
Interval (page )
Rest (page )
HR Zone (page )
NOTE If there is no sensor being paired, no sensor displays on the screen.
NOTE Before you start exercise, allow the watch a few seconds to search for sensor(s) first.
This is to ensure you can receive comprehensive calculations (such as your lap, calorie, heart
rate and speed) during exercise. But if you start exercise without sensor(s) search, you will
only receive heart rate readings.