
Installation Instructions
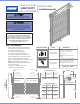


OPENING
LEFT
GUIDE
RIGHT
GUIDE
DOOR
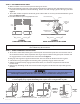
FLANGE ON
TENSIONER
PAWL
BEGINNING BOTTOM
BAR POSITION
NOTCH
TENSIONER BRACKET
GUIDE
LOCKING
TAB
FLOOR
TENSIONER
RATCHET
WHEEL
DOOR POSITION ON FLOOR
FIGURE 2
GUIDE TO BRACKET INSTALLATION
FIGURE 3
A. Make sure floor is clean in order to prevent damage to curtain.
B. On inside of building, place left guide on floor perpendicular to opening with guide bottom close to the
left jamb and the top toward inside of building. Do the same with the right guide to the right jamb. See
figure 2.
C. Place door on floor at top of and between guides. Rotate door as necessary to locate bottom bar against
floor. See figures 2 and 3.
D. Distribute hardware parts to appropriate areas.
POSITION DOOR AND PARTS
STEP 2:
A. At tensioner end of door, lift flange on tensioner pawl until end of the pawl clears the tensioner ratchet
wheel. Rotate bracket in order to position short leg end upward. Release flange on pawl and allow end
to engage with the nearest tooth on the ratchet wheel. See figure 3.
B. Bring top end of guide in alignment with bracket and insert hooks on bracket into slots in guide.
C. Slide bracket and guide together until locking tab in guide fully engages notch in bracket.
D. If locking tab does not fully engage with bracket notch, use a hammer and punch to bend tab into
bracket notch.
GUIDES TO BRACKETS INSTALLATION
STEP 3:
E. Repeat steps 3B through 3D for non-tension bracket and guide. The bracket will require being held in
position.
NOTE: Brackets, tensioner, spring(s) and curtain mounted latch are pre-assembled to the
door at the factory. Do not remove.
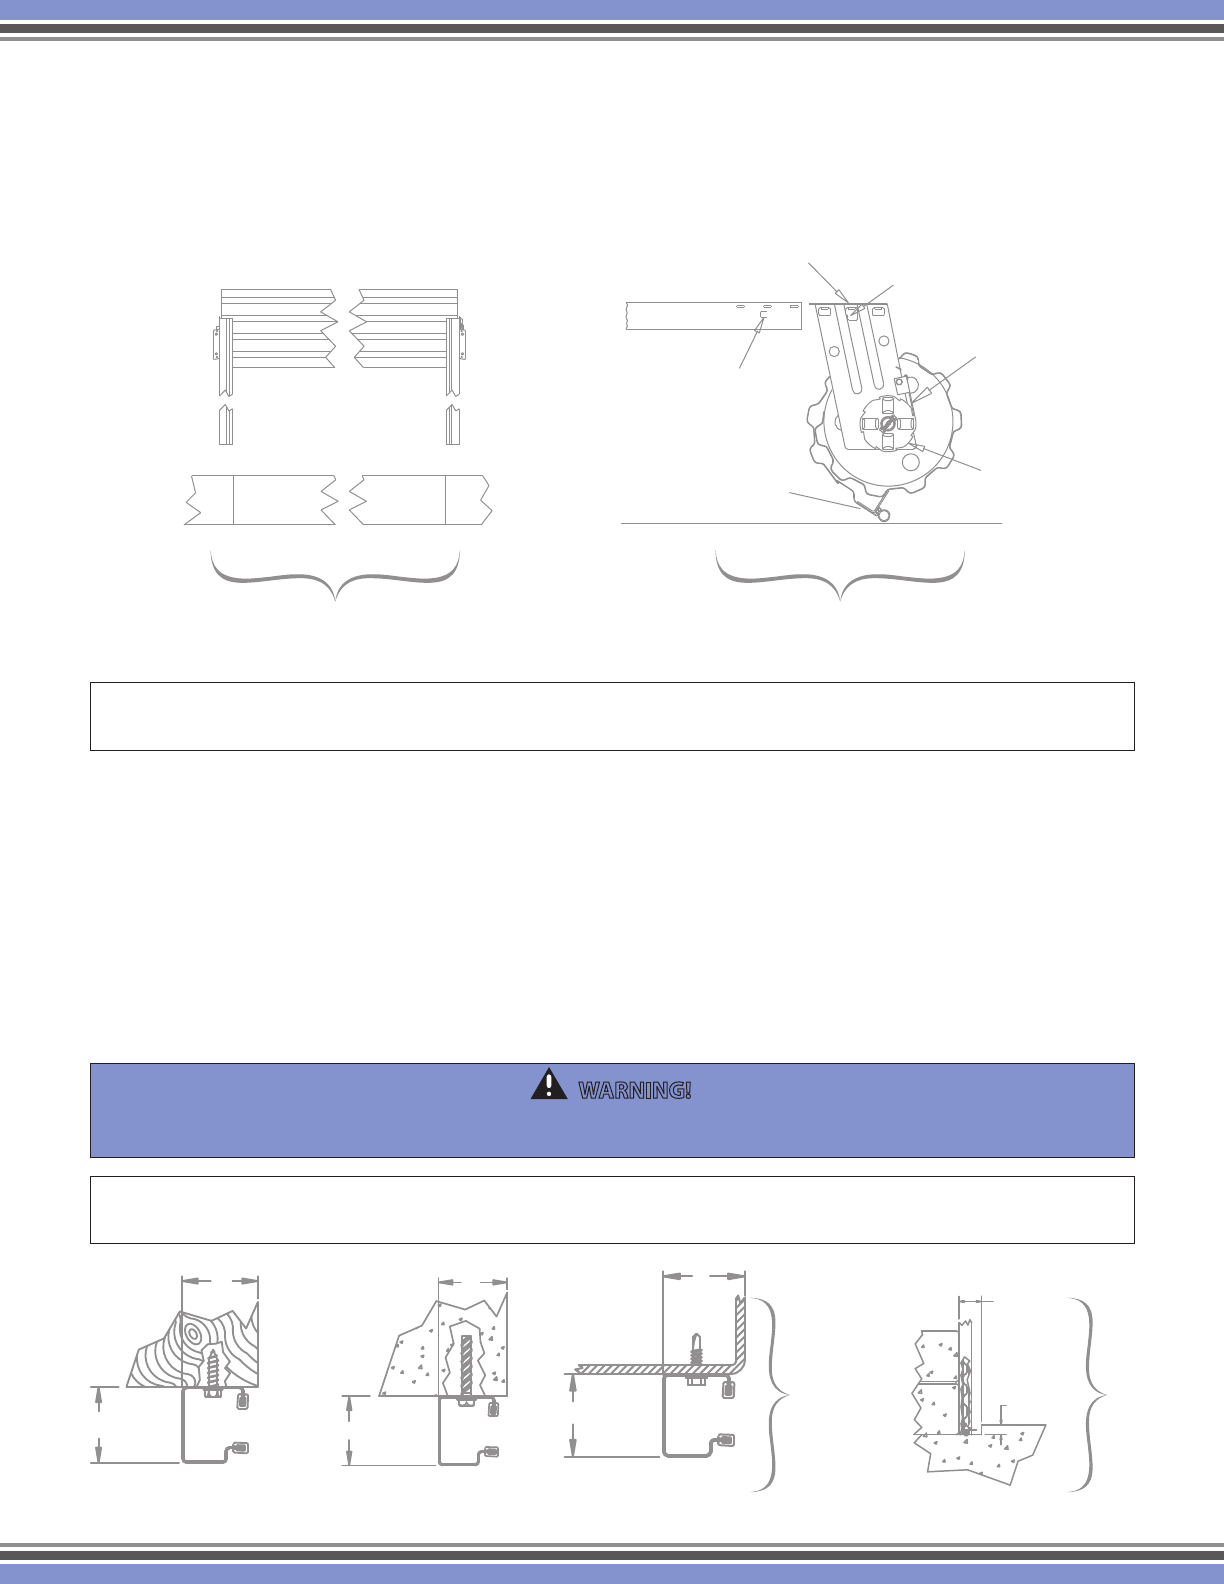
STEEL JAMBS
USING 1/4-14 X 1" TEKS
2"
2"
WOOD JAMBS
USING 1/4-10 X 1" LAG
2"
2"
CONCRETE/MASONRY JAMBS
5/16” X 2-1/4" TAPCON XL MASONRY SCREW
2"
2"
RAIN LIP DETAIL
1-1/2"
3 -1/2" Min.
UNIVERSAL
MOUNT
GUIDES
FIGURE 4
LIP
DETAIL
FIGURE 5
NOTE: For opening heights over 8'-8", clamp bottom of brackets to guides with locking pliers in order
to ensure rigidity of top of guide while lifting. Remove pliers after securing brackets to jambs.
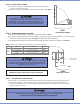
WARNING!
Locking tab in guide must fully engage with notch in bracket. Failure to do so may allow the door to
fall during installation, which can cause serious injury or death and/or damage to door.
revised 1/12/12
2