
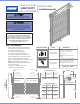
Installation Instructions


A rolling door is a large heavy object that moves
with the help of springs under extreme tension and
follow these instructions.
electric motors. Moving objects, springs under
tension and electric motors can cause serious injuries
or death. For your safety and the safety of others,
WARNING!
Use proper lifting equipment and correct
lifting procedures to avoid damage or injury.
CAUTION
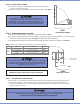
OUTSIDE OF
BRACKET CLEARANCE
EDGE OF OPENING
EDGE OF OPENING
END OF AXLE CLEARANCE
OUTSIDE OF
BRACKET CLEARANCE
END OF AXLE CLEARANCE
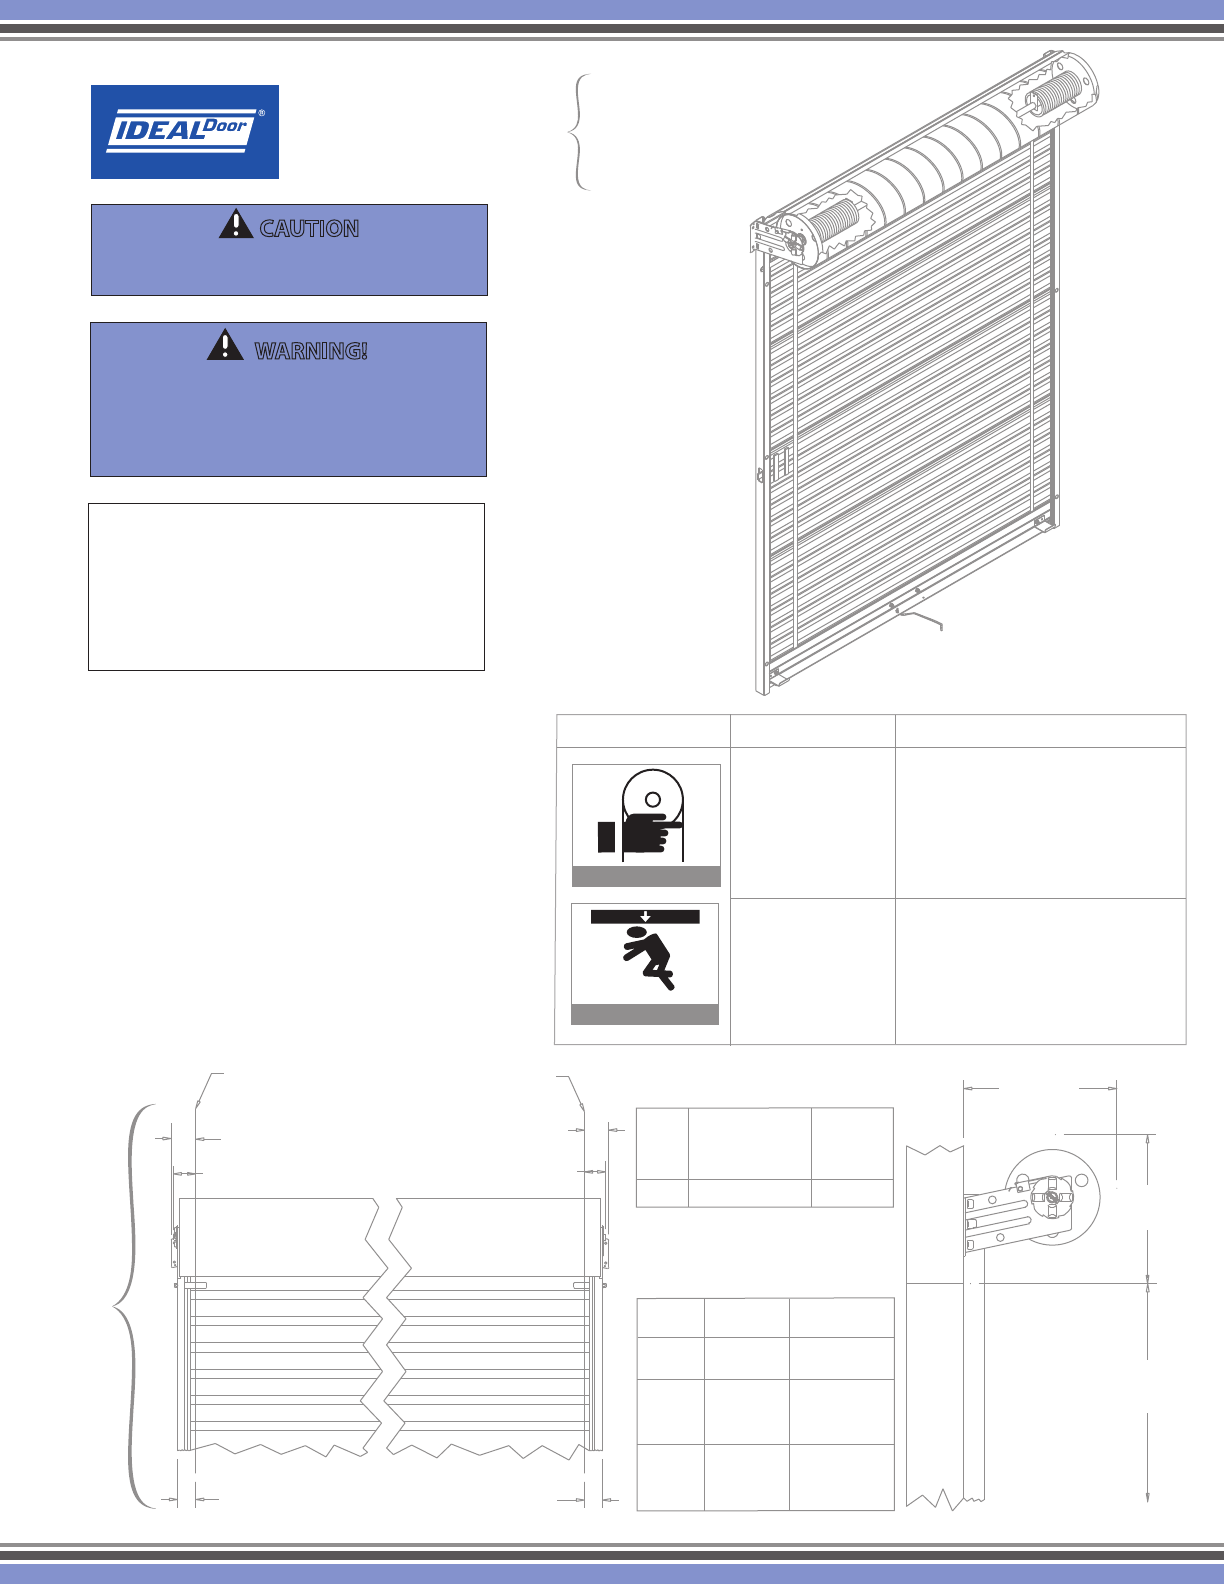
BACK OF
GUIDE CLEARANCE
BACK OF
GUIDE CLEARANCE
Non-Tensioner End
Tensioner End
GUIDE
OUTSIDE OF EACH
BRACKET LEG
EACH END
OF AXLE
2-1/4” 3-3/8” 3-1/4”
*Dimensions are taken from edge of opening
SIDE ROOM REQUIRED*
OPENING
HEIGHT
VERTICAL
HEADROOM
HORIZONTAL
HEADROOM
THRU
7’-4”
OVER
7’-4”
THRU
8’-8”
OVER
8’-8”
THRU
10’-0”
15-1/2”
16”
17”
17”
17-1/2”
18-1/4”
HEADROOM REQUIRED
WALL
OPENING
HEIGHT
VERTICAL
HEADROOM
HORIZONTAL
HEADROOM
TENSIONER END
CLEARANCE CHARTS
FIGURE 1
1-800-621-3667
LIGHT DUTY
ROLL UP DOOR
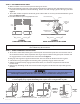
CAN CAUSE SERIOUS
INJURY OR DEATH
CAN CAUSE SERIOUS
INJURY OR DEATH
POTENTIAL HAZARD PREVENTION
EFFECT
MOVING DOOR
Installation, repairs and adjustments
must be made by a trained rolling
service door systems technician
using proper tools and instructions.
DOOR MUST BE FULLY OPENED WHEN
MAKING ADJUSTMENTS
DO NOT stand or walk under
moving door. Keep door in full
view and free of obstructions
while operating.
DO NOT allow children to operate
the door.
EXTREME SPRING TENSION
STEP 1: WALL OPENING
A. Check wall opening width and height
and verify these measurements against
size of door to be installed.
B. Verify that jambs are plumb.
C. Check floor and header for level.
D. Check for adequate side clearance at
jambs and clearance above and at sides of
header. Check horizontal and vertical
headroom requirements. See clearance charts
figure 1 for minimum requirements.
E. Verify that the guide mounting surface
on the jamb is flush.
F. Make sure all parts required for
installation are with the door.
IMPORTANT NOTE:
Do not cut tape and plastic wrap that holds the door
in a roll until you are directed to do so in step 6B.
Ideal Doors cannot guarantee or accept responsibility
for doors that are not installed as directed. Please
read and understand all instructions before
beginning the installation process.
MODEL 200M
installation guide
revised 1/12/12
1