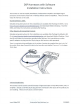
DSP Harnesses with Software Installation Instructions This harness is used to simplify installation of aftermarket amplifiers and digital signal processors at the factory head unit in vehicles without external amplifiers. There are three ways this harness can be used . Rockford/Maestro DSRl: Detailed wiring instructions for this installation are available after flashing the DSRl. Go to https://maestro.idatalink.com/weblinkdesktop/en and download Weblink Desktop.
DSP Harnesses with Software Installation Instructions ::::==================::::::: WHITE - LF SPEAKER (+ I WHITE/BLACK- LF SPEAKER (-1-------(-1-------• (+1---------(-1------(-1 ~~~~~~~!!!!3 (+1---------- GRAY - RF SPEAKER GRAY/BLACK - RF SPEAKER GREEN - LR SPEAKER (+I - - - - - - - - - GREEN/BLACK - LR SPEAKER PURPLE - RR SPEAKER PURPLE/BLACK - RR SPEAKER No analog turn on signal is available so a turn on signal must be derived using signal sensing or switched accessory.
SELECT VEHICLE PRINT PAGES NEEDED HOW TO USE THIS INSTALL GUIDE 1 Open the Bookmarks menu and find your vehicle OR scroll down until you find the install guide for your vehicle. 2 Print only the pages for your vehicle using the advanced options in the Print menu. 3 Install your DSR1 module according to the guide for your vehicle. WARNING Pressing the printer icon or “quick printing” this document will print all of the guides in this compilation. NOTICE: Automotive Data Solutions Inc.
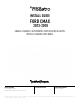
INSTALL GUIDE Ford Cmax 2013-2018 ENABLE A SEAMLESS AFTERMARKET AMPLIFIER INSTALLATION, WITHOUT CHANGING YOUR RADIO. PRODUCTS REQUIRED Rockford Fosgate DSR1 iDatalink Maestro DSP-FO2 Installation Harness OPTIONAL ACCESSORIES PROGRAMMED FIRMWARE ADS-AR-DC-dFO2 NOTICE: Automotive Data Solutions Inc. (ADS) recommends having this installation performed by a certified technician. Logos and trademarks used here in are the properties of their respective owners.
Ford Cmax 2013-2018 WELCOME Congratulations on the purchase of your iDatalink Maestro / Rockford Fosgate DSR1 Amplifier replacement solution. You are now a few simple steps away from enjoying your new car amplifier. TABLE OF CONTENTS Installation Instructions 3 Wiring Diagram 4 Before starting your installation, please ensure that your module is programmed with the correct firmware for your vehicle and that you carefully review the install guide. NEED HELP? 1 866 427-2999 maestro.support@idatalink.
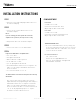
Ford Cmax 2013-2018 INSTALLATION INSTRUCTIONS CHIME ADJUSTMENT STEP 1 Front chime • Remove the factory radio and plug the dFO2 T-harness in line with the radio plug. Set Audio source to OFF. Activate front chime (Ex: door chime). STEP 2 Adjust using the radio’s volume knob. • Connect the wires from the dFO2 T-harness to the aftermarket amplifier.
Ford Cmax 2013-2018 WIRING DIAGRAM STEP 2 STEP 1 AFTERMARKET AMPLIFIER WHITE (LEFT FRONT) WHITE/BLACK (LEFT FRONT) GRAY (RIGHT FRONT) GRAY/BLACK (RIGHT FRONT) GREEN (LEFT REAR) GREEN/BLACK (LEFT REAR) PURPLE (RIGHT REAR) PURPLE/BLACK (RIGHT REAR) CONNECT TO OEM RADIO HARNESS CONNECT TO OEM RADIO CONNECTOR dFO2 T-HARNESS STEP 3 DSR1 MODULE (NC) AMP TURN ON RCA CABLES LEFT FRONT OUT 1 RIGHT FRONT OUT 2 LEFT SPARE OUT 3 RIGHT SPARE OUT 4 LEFT REAR OUT 5 RIGHT REAR OUT 6 LEFT SUB OUT 7 RIGHT SUB OUT
SELECT VEHICLE PRINT PAGES NEEDED HOW TO USE THIS INSTALL GUIDE 1 Open the Bookmarks menu and find your vehicle OR scroll down until you find the install guide for your vehicle. 2 Print only the pages for your vehicle using the advanced options in the Print menu. 3 Install your Maestro AR according to the guide for your vehicle. WARNING Pressing the printer icon or “quick printing” this document will print all of the guides in this compilation. NOTICE: Automotive Data Solutions Inc.
INSTALL GUIDE Ford Cmax 2013-2018 *With dFO2 (version 1.2) ENABLE A SEAMLESS AFTERMARKET AMPLIFIER INSTALLATION, WITHOUT CHANGING YOUR RADIO. PRODUCTS REQUIRED iDatalink Maestro AR Amplifier Replacement Interface iDatalink Maestro DSP-FO2 Installation Harness ACC-RCA1 cable OPTIONAL ACCESSORIES PROGRAMMED FIRMWARE ADS-AR-AS-dFO2 NOTICE: Automotive Data Solutions Inc. (ADS) recommends having this installation performed by a certified technician.
Ford Cmax With dFO2 (version 1.2) 2013-2018 WELCOME Congratulations on the purchase of your iDatalink Maestro AR Amplifier replacement solution. You are now a few simple steps away from enjoying your new car amplifier. TABLE OF CONTENTS Installation Instructions 3 Wiring Diagram 4 Before starting your installation, please ensure that your iDatalink Maestro module is programmed with the correct firmware for your vehicle and that you carefully review the install guide.
Ford Cmax With dFO2 (version 1.2) 2013-2018 INSTALLATION INSTRUCTIONS Required : The Maestro AR is now locked to this particular vehicle by VIN number. dFO2 t-harness (version 1.2) ACC-RCA1 Note: If you need to return the radio to its factory nonamplified mode, do this programming procedure and press and hold VOL– button on the steering wheel instead. The radio screen will change to FM and will show volume 0. Release the button.
Ford Cmax With dFO2 (version 1.2) 2013-2018 WIRING DIAGRAM dFO2 T-HARNESS VERSION 1.2 STEP 2 STEP 1 AMPLIFIER CONNECT TO OEM RADIO HARNESS REAR FRONT WHITE (LEFT FRONT) WHITE/BLACK (LEFT FRONT) GRAY (RIGHT FRONT) GRAY/BLACK (RIGHT FRONT) GREEN (LEFT REAR) GREEN/BLACK (LEFT REAR) PURPLE (RIGHT REAR) PURPLE/BLACK (RIGHT REAR) CONNECT TO OEM RADIO CONNECTOR TO AMP TURN ON INPUT AMP TURN ON OUTPUT 3 OUTPUT 2 OUTPUT 1 dFO2 T-HARNESS (VER 1.
INSTALL GUIDE Ford Edge 2011-2019 *With dFO2 (version 1.2) ENABLE A SEAMLESS AFTERMARKET AMPLIFIER INSTALLATION, WITHOUT CHANGING YOUR RADIO. PRODUCTS REQUIRED iDatalink Maestro AR Amplifier Replacement Interface iDatalink Maestro DSP-FO2 Installation Harness ACC-RCA1 cable OPTIONAL ACCESSORIES PROGRAMMED FIRMWARE ADS-AR-AS-dFO2 NOTICE: Automotive Data Solutions Inc. (ADS) recommends having this installation performed by a certified technician.
Ford Edge With dFO2 (version 1.2) 2011-2019 WELCOME Congratulations on the purchase of your iDatalink Maestro AR Amplifier replacement solution. You are now a few simple steps away from enjoying your new car amplifier. TABLE OF CONTENTS Installation Instructions 3 Wiring Diagram 4 Before starting your installation, please ensure that your iDatalink Maestro module is programmed with the correct firmware for your vehicle and that you carefully review the install guide.
Ford Edge With dFO2 (version 1.2) 2011-2019 INSTALLATION INSTRUCTIONS Required : The Maestro AR is now locked to this particular vehicle by VIN number. dFO2 t-harness (version 1.2) ACC-RCA1 Note: If you need to return the radio to its factory nonamplified mode, do this programming procedure and press and hold VOL– button on the steering wheel instead. The radio screen will change to FM and will show volume 0. Release the button.
Ford Edge With dFO2 (version 1.2) 2011-2019 WIRING DIAGRAM dFO2 T-HARNESS VERSION 1.2 STEP 2 STEP 1 AMPLIFIER CONNECT TO OEM RADIO HARNESS REAR FRONT WHITE (LEFT FRONT) WHITE/BLACK (LEFT FRONT) GRAY (RIGHT FRONT) GRAY/BLACK (RIGHT FRONT) GREEN (LEFT REAR) GREEN/BLACK (LEFT REAR) PURPLE (RIGHT REAR) PURPLE/BLACK (RIGHT REAR) CONNECT TO OEM RADIO CONNECTOR TO AMP TURN ON INPUT AMP TURN ON OUTPUT 3 OUTPUT 2 OUTPUT 1 dFO2 T-HARNESS (VER 1.
INSTALL GUIDE Ford Escape 2013-2019 *With dFO2 (version 1.2) ENABLE A SEAMLESS AFTERMARKET AMPLIFIER INSTALLATION, WITHOUT CHANGING YOUR RADIO. PRODUCTS REQUIRED iDatalink Maestro AR Amplifier Replacement Interface iDatalink Maestro DSP-FO2 Installation Harness ACC-RCA1 cable OPTIONAL ACCESSORIES PROGRAMMED FIRMWARE ADS-AR-AS-dFO2 NOTICE: Automotive Data Solutions Inc. (ADS) recommends having this installation performed by a certified technician.
Ford Escape With dFO2 (version 1.2) 2013-2019 WELCOME Congratulations on the purchase of your iDatalink Maestro AR Amplifier replacement solution. You are now a few simple steps away from enjoying your new car amplifier. TABLE OF CONTENTS Installation Instructions 3 Wiring Diagram 4 Before starting your installation, please ensure that your iDatalink Maestro module is programmed with the correct firmware for your vehicle and that you carefully review the install guide.
Ford Escape With dFO2 (version 1.2) 2013-2019 INSTALLATION INSTRUCTIONS Required : The Maestro AR is now locked to this particular vehicle by VIN number. dFO2 t-harness (version 1.2) ACC-RCA1 Note: If you need to return the radio to its factory nonamplified mode, do this programming procedure and press and hold VOL– button on the steering wheel instead. The radio screen will change to FM and will show volume 0. Release the button.
Ford Escape With dFO2 (version 1.2) 2013-2019 WIRING DIAGRAM dFO2 T-HARNESS VERSION 1.2 STEP 2 STEP 1 AMPLIFIER CONNECT TO OEM RADIO HARNESS REAR FRONT WHITE (LEFT FRONT) WHITE/BLACK (LEFT FRONT) GRAY (RIGHT FRONT) GRAY/BLACK (RIGHT FRONT) GREEN (LEFT REAR) GREEN/BLACK (LEFT REAR) PURPLE (RIGHT REAR) PURPLE/BLACK (RIGHT REAR) CONNECT TO OEM RADIO CONNECTOR TO AMP TURN ON INPUT AMP TURN ON OUTPUT 3 OUTPUT 2 OUTPUT 1 dFO2 T-HARNESS (VER 1.
INSTALL GUIDE Ford Expedition 2015-2020 *With dFO2 (version 1.2) ENABLE A SEAMLESS AFTERMARKET AMPLIFIER INSTALLATION, WITHOUT CHANGING YOUR RADIO. PRODUCTS REQUIRED iDatalink Maestro AR Amplifier Replacement Interface iDatalink Maestro DSP-FO2 Installation Harness ACC-RCA1 cable OPTIONAL ACCESSORIES PROGRAMMED FIRMWARE ADS-AR-AS-dFO2 NOTICE: Automotive Data Solutions Inc. (ADS) recommends having this installation performed by a certified technician.
Ford Expedition With dFO2 (version 1.2) 2015-2020 WELCOME Congratulations on the purchase of your iDatalink Maestro AR Amplifier replacement solution. You are now a few simple steps away from enjoying your new car amplifier. TABLE OF CONTENTS Installation Instructions 3 Wiring Diagram 4 Before starting your installation, please ensure that your iDatalink Maestro module is programmed with the correct firmware for your vehicle and that you carefully review the install guide.
Ford Expedition With dFO2 (version 1.2) 2015-2020 INSTALLATION INSTRUCTIONS Required : The Maestro AR is now locked to this particular vehicle by VIN number. dFO2 t-harness (version 1.2) ACC-RCA1 Note: If you need to return the radio to its factory nonamplified mode, do this programming procedure and press and hold VOL– button on the steering wheel instead. The radio screen will change to FM and will show volume 0. Release the button.
Ford Expedition With dFO2 (version 1.2) 2015-2020 WIRING DIAGRAM dFO2 T-HARNESS VERSION 1.2 STEP 2 STEP 1 AMPLIFIER CONNECT TO OEM RADIO HARNESS REAR FRONT WHITE (LEFT FRONT) WHITE/BLACK (LEFT FRONT) GRAY (RIGHT FRONT) GRAY/BLACK (RIGHT FRONT) GREEN (LEFT REAR) GREEN/BLACK (LEFT REAR) PURPLE (RIGHT REAR) PURPLE/BLACK (RIGHT REAR) CONNECT TO OEM RADIO CONNECTOR TO AMP TURN ON INPUT AMP TURN ON OUTPUT 3 OUTPUT 2 OUTPUT 1 dFO2 T-HARNESS (VER 1.
INSTALL GUIDE Ford Explorer 2011-2019 *With dFO2 (version 1.2) ENABLE A SEAMLESS AFTERMARKET AMPLIFIER INSTALLATION, WITHOUT CHANGING YOUR RADIO. PRODUCTS REQUIRED iDatalink Maestro AR Amplifier Replacement Interface iDatalink Maestro DSP-FO2 Installation Harness ACC-RCA1 cable OPTIONAL ACCESSORIES PROGRAMMED FIRMWARE ADS-AR-AS-dFO2 NOTICE: Automotive Data Solutions Inc. (ADS) recommends having this installation performed by a certified technician.
Ford Explorer With dFO2 (version 1.2) 2011-2019 WELCOME Congratulations on the purchase of your iDatalink Maestro AR Amplifier replacement solution. You are now a few simple steps away from enjoying your new car amplifier. TABLE OF CONTENTS Installation Instructions 3 Wiring Diagram 4 Before starting your installation, please ensure that your iDatalink Maestro module is programmed with the correct firmware for your vehicle and that you carefully review the install guide.
Ford Explorer With dFO2 (version 1.2) 2011-2019 INSTALLATION INSTRUCTIONS Required : The Maestro AR is now locked to this particular vehicle by VIN number. dFO2 t-harness (version 1.2) ACC-RCA1 Note: If you need to return the radio to its factory nonamplified mode, do this programming procedure and press and hold VOL– button on the steering wheel instead. The radio screen will change to FM and will show volume 0. Release the button.
Ford Explorer With dFO2 (version 1.2) 2011-2019 WIRING DIAGRAM dFO2 T-HARNESS VERSION 1.2 STEP 2 STEP 1 AMPLIFIER CONNECT TO OEM RADIO HARNESS REAR FRONT WHITE (LEFT FRONT) WHITE/BLACK (LEFT FRONT) GRAY (RIGHT FRONT) GRAY/BLACK (RIGHT FRONT) GREEN (LEFT REAR) GREEN/BLACK (LEFT REAR) PURPLE (RIGHT REAR) PURPLE/BLACK (RIGHT REAR) CONNECT TO OEM RADIO CONNECTOR TO AMP TURN ON INPUT AMP TURN ON OUTPUT 3 OUTPUT 2 OUTPUT 1 dFO2 T-HARNESS (VER 1.
INSTALL GUIDE Ford F Super Duty 2017-2020 *With dFO2 (version 1.2) ENABLE A SEAMLESS AFTERMARKET AMPLIFIER INSTALLATION, WITHOUT CHANGING YOUR RADIO. PRODUCTS REQUIRED iDatalink Maestro AR Amplifier Replacement Interface iDatalink Maestro DSP-FO2 Installation Harness ACC-RCA1 cable OPTIONAL ACCESSORIES PROGRAMMED FIRMWARE ADS-AR-AS-dFO2 NOTICE: Automotive Data Solutions Inc. (ADS) recommends having this installation performed by a certified technician.
Ford F Super Duty With dFO2 (version 1.2) 2017-2020 WELCOME Congratulations on the purchase of your iDatalink Maestro AR Amplifier replacement solution. You are now a few simple steps away from enjoying your new car amplifier. TABLE OF CONTENTS Installation Instructions 3 Wiring Diagram 4 Before starting your installation, please ensure that your iDatalink Maestro module is programmed with the correct firmware for your vehicle and that you carefully review the install guide.
Ford F Super Duty With dFO2 (version 1.2) 2017-2020 INSTALLATION INSTRUCTIONS Required : The Maestro AR is now locked to this particular vehicle by VIN number. dFO2 t-harness (version 1.2) ACC-RCA1 Note: If you need to return the radio to its factory nonamplified mode, do this programming procedure and press and hold VOL– button on the steering wheel instead. The radio screen will change to FM and will show volume 0. Release the button.
Ford F Super Duty With dFO2 (version 1.2) 2017-2020 WIRING DIAGRAM dFO2 T-HARNESS VERSION 1.2 STEP 2 STEP 1 AMPLIFIER CONNECT TO OEM RADIO HARNESS REAR FRONT WHITE (LEFT FRONT) WHITE/BLACK (LEFT FRONT) GRAY (RIGHT FRONT) GRAY/BLACK (RIGHT FRONT) GREEN (LEFT REAR) GREEN/BLACK (LEFT REAR) PURPLE (RIGHT REAR) PURPLE/BLACK (RIGHT REAR) CONNECT TO OEM RADIO CONNECTOR TO AMP TURN ON INPUT AMP TURN ON OUTPUT 3 OUTPUT 2 OUTPUT 1 dFO2 T-HARNESS (VER 1.
INSTALL GUIDE Ford F150 2013-2020 *With dFO2 (version 1.2) ENABLE A SEAMLESS AFTERMARKET AMPLIFIER INSTALLATION, WITHOUT CHANGING YOUR RADIO. PRODUCTS REQUIRED iDatalink Maestro AR Amplifier Replacement Interface iDatalink Maestro DSP-FO2 Installation Harness ACC-RCA1 cable OPTIONAL ACCESSORIES PROGRAMMED FIRMWARE ADS-AR-AS-dFO2 NOTICE: Automotive Data Solutions Inc. (ADS) recommends having this installation performed by a certified technician.
Ford F150 With dFO2 (version 1.2) 2013-2020 WELCOME Congratulations on the purchase of your iDatalink Maestro AR Amplifier replacement solution. You are now a few simple steps away from enjoying your new car amplifier. TABLE OF CONTENTS Installation Instructions 3 Wiring Diagram 4 Before starting your installation, please ensure that your iDatalink Maestro module is programmed with the correct firmware for your vehicle and that you carefully review the install guide.
Ford F150 With dFO2 (version 1.2) 2013-2020 INSTALLATION INSTRUCTIONS Required : The Maestro AR is now locked to this particular vehicle by VIN number. dFO2 t-harness (version 1.2) ACC-RCA1 Note: If you need to return the radio to its factory nonamplified mode, do this programming procedure and press and hold VOL– button on the steering wheel instead. The radio screen will change to FM and will show volume 0. Release the button.
Ford F150 With dFO2 (version 1.2) 2013-2020 WIRING DIAGRAM dFO2 T-HARNESS VERSION 1.2 STEP 2 STEP 1 AMPLIFIER CONNECT TO OEM RADIO HARNESS REAR FRONT WHITE (LEFT FRONT) WHITE/BLACK (LEFT FRONT) GRAY (RIGHT FRONT) GRAY/BLACK (RIGHT FRONT) GREEN (LEFT REAR) GREEN/BLACK (LEFT REAR) PURPLE (RIGHT REAR) PURPLE/BLACK (RIGHT REAR) CONNECT TO OEM RADIO CONNECTOR TO AMP TURN ON INPUT AMP TURN ON OUTPUT 3 OUTPUT 2 OUTPUT 1 dFO2 T-HARNESS (VER 1.
INSTALL GUIDE Ford Focus 2012-2018 *With dFO2 (version 1.2) ENABLE A SEAMLESS AFTERMARKET AMPLIFIER INSTALLATION, WITHOUT CHANGING YOUR RADIO. PRODUCTS REQUIRED iDatalink Maestro AR Amplifier Replacement Interface iDatalink Maestro DSP-FO2 Installation Harness ACC-RCA1 cable OPTIONAL ACCESSORIES PROGRAMMED FIRMWARE ADS-AR-AS-dFO2 NOTICE: Automotive Data Solutions Inc. (ADS) recommends having this installation performed by a certified technician.
Ford Focus With dFO2 (version 1.2) 2012-2018 WELCOME Congratulations on the purchase of your iDatalink Maestro AR Amplifier replacement solution. You are now a few simple steps away from enjoying your new car amplifier. TABLE OF CONTENTS Installation Instructions 3 Wiring Diagram 4 Before starting your installation, please ensure that your iDatalink Maestro module is programmed with the correct firmware for your vehicle and that you carefully review the install guide.
Ford Focus With dFO2 (version 1.2) 2012-2018 INSTALLATION INSTRUCTIONS Required : The Maestro AR is now locked to this particular vehicle by VIN number. dFO2 t-harness (version 1.2) ACC-RCA1 Note: If you need to return the radio to its factory nonamplified mode, do this programming procedure and press and hold VOL– button on the steering wheel instead. The radio screen will change to FM and will show volume 0. Release the button.
Ford Focus With dFO2 (version 1.2) 2012-2018 WIRING DIAGRAM dFO2 T-HARNESS VERSION 1.2 STEP 2 STEP 1 AMPLIFIER CONNECT TO OEM RADIO HARNESS REAR FRONT WHITE (LEFT FRONT) WHITE/BLACK (LEFT FRONT) GRAY (RIGHT FRONT) GRAY/BLACK (RIGHT FRONT) GREEN (LEFT REAR) GREEN/BLACK (LEFT REAR) PURPLE (RIGHT REAR) PURPLE/BLACK (RIGHT REAR) CONNECT TO OEM RADIO CONNECTOR TO AMP TURN ON INPUT AMP TURN ON OUTPUT 3 OUTPUT 2 OUTPUT 1 dFO2 T-HARNESS (VER 1.
INSTALL GUIDE Ford Fusion 2013-2019 *With dFO2 (version 1.2) ENABLE A SEAMLESS AFTERMARKET AMPLIFIER INSTALLATION, WITHOUT CHANGING YOUR RADIO. PRODUCTS REQUIRED iDatalink Maestro AR Amplifier Replacement Interface iDatalink Maestro DSP-FO2 Installation Harness ACC-RCA1 cable OPTIONAL ACCESSORIES PROGRAMMED FIRMWARE ADS-AR-AS-dFO2 NOTICE: Automotive Data Solutions Inc. (ADS) recommends having this installation performed by a certified technician.
Ford Fusion With dFO2 (version 1.2) 2013-2019 WELCOME Congratulations on the purchase of your iDatalink Maestro AR Amplifier replacement solution. You are now a few simple steps away from enjoying your new car amplifier. TABLE OF CONTENTS Installation Instructions 3 Wiring Diagram 4 Before starting your installation, please ensure that your iDatalink Maestro module is programmed with the correct firmware for your vehicle and that you carefully review the install guide.
Ford Fusion With dFO2 (version 1.2) 2013-2019 INSTALLATION INSTRUCTIONS Required : The Maestro AR is now locked to this particular vehicle by VIN number. dFO2 t-harness (version 1.2) ACC-RCA1 Note: If you need to return the radio to its factory nonamplified mode, do this programming procedure and press and hold VOL– button on the steering wheel instead. The radio screen will change to FM and will show volume 0. Release the button.
Ford Fusion With dFO2 (version 1.2) 2013-2019 WIRING DIAGRAM dFO2 T-HARNESS VERSION 1.2 STEP 2 STEP 1 AMPLIFIER CONNECT TO OEM RADIO HARNESS REAR FRONT WHITE (LEFT FRONT) WHITE/BLACK (LEFT FRONT) GRAY (RIGHT FRONT) GRAY/BLACK (RIGHT FRONT) GREEN (LEFT REAR) GREEN/BLACK (LEFT REAR) PURPLE (RIGHT REAR) PURPLE/BLACK (RIGHT REAR) CONNECT TO OEM RADIO CONNECTOR TO AMP TURN ON INPUT AMP TURN ON OUTPUT 3 OUTPUT 2 OUTPUT 1 dFO2 T-HARNESS (VER 1.
INSTALL GUIDE Ford Mustang 2015-2020 *With dFO2 (version 1.2) ENABLE A SEAMLESS AFTERMARKET AMPLIFIER INSTALLATION, WITHOUT CHANGING YOUR RADIO. PRODUCTS REQUIRED iDatalink Maestro AR Amplifier Replacement Interface iDatalink Maestro DSP-FO2 Installation Harness ACC-RCA1 cable OPTIONAL ACCESSORIES PROGRAMMED FIRMWARE ADS-AR-AS-dFO2 NOTICE: Automotive Data Solutions Inc. (ADS) recommends having this installation performed by a certified technician.
Ford Mustang With dFO2 (version 1.2) 2015-2020 WELCOME Congratulations on the purchase of your iDatalink Maestro AR Amplifier replacement solution. You are now a few simple steps away from enjoying your new car amplifier. TABLE OF CONTENTS Installation Instructions 3 Wiring Diagram 4 Before starting your installation, please ensure that your iDatalink Maestro module is programmed with the correct firmware for your vehicle and that you carefully review the install guide.
Ford Mustang With dFO2 (version 1.2) 2015-2020 INSTALLATION INSTRUCTIONS Required : The Maestro AR is now locked to this particular vehicle by VIN number. dFO2 t-harness (version 1.2) ACC-RCA1 Note: If you need to return the radio to its factory nonamplified mode, do this programming procedure and press and hold VOL– button on the steering wheel instead. The radio screen will change to FM and will show volume 0. Release the button.
Ford Mustang With dFO2 (version 1.2) 2015-2020 WIRING DIAGRAM dFO2 T-HARNESS VERSION 1.2 STEP 2 STEP 1 AMPLIFIER CONNECT TO OEM RADIO HARNESS REAR FRONT WHITE (LEFT FRONT) WHITE/BLACK (LEFT FRONT) GRAY (RIGHT FRONT) GRAY/BLACK (RIGHT FRONT) GREEN (LEFT REAR) GREEN/BLACK (LEFT REAR) PURPLE (RIGHT REAR) PURPLE/BLACK (RIGHT REAR) CONNECT TO OEM RADIO CONNECTOR TO AMP TURN ON INPUT AMP TURN ON OUTPUT 3 OUTPUT 2 OUTPUT 1 dFO2 T-HARNESS (VER 1.
INSTALL GUIDE Ford Taurus 2013-2019 *With dFO2 (version 1.2) ENABLE A SEAMLESS AFTERMARKET AMPLIFIER INSTALLATION, WITHOUT CHANGING YOUR RADIO. PRODUCTS REQUIRED iDatalink Maestro AR Amplifier Replacement Interface iDatalink Maestro DSP-FO2 Installation Harness ACC-RCA1 cable OPTIONAL ACCESSORIES PROGRAMMED FIRMWARE ADS-AR-AS-dFO2 NOTICE: Automotive Data Solutions Inc. (ADS) recommends having this installation performed by a certified technician.
Ford Taurus With dFO2 (version 1.2) 2013-2019 WELCOME Congratulations on the purchase of your iDatalink Maestro AR Amplifier replacement solution. You are now a few simple steps away from enjoying your new car amplifier. TABLE OF CONTENTS Installation Instructions 3 Wiring Diagram 4 Before starting your installation, please ensure that your iDatalink Maestro module is programmed with the correct firmware for your vehicle and that you carefully review the install guide.
Ford Taurus With dFO2 (version 1.2) 2013-2019 INSTALLATION INSTRUCTIONS Required : The Maestro AR is now locked to this particular vehicle by VIN number. dFO2 t-harness (version 1.2) ACC-RCA1 Note: If you need to return the radio to its factory nonamplified mode, do this programming procedure and press and hold VOL– button on the steering wheel instead. The radio screen will change to FM and will show volume 0. Release the button.
Ford Taurus With dFO2 (version 1.2) 2013-2019 WIRING DIAGRAM dFO2 T-HARNESS VERSION 1.2 STEP 2 STEP 1 AMPLIFIER CONNECT TO OEM RADIO HARNESS REAR FRONT WHITE (LEFT FRONT) WHITE/BLACK (LEFT FRONT) GRAY (RIGHT FRONT) GRAY/BLACK (RIGHT FRONT) GREEN (LEFT REAR) GREEN/BLACK (LEFT REAR) PURPLE (RIGHT REAR) PURPLE/BLACK (RIGHT REAR) CONNECT TO OEM RADIO CONNECTOR TO AMP TURN ON INPUT AMP TURN ON OUTPUT 3 OUTPUT 2 OUTPUT 1 dFO2 T-HARNESS (VER 1.
INSTALL GUIDE Ford Transit Connect 2014-2019 *With dFO2 (version 1.2) ENABLE A SEAMLESS AFTERMARKET AMPLIFIER INSTALLATION, WITHOUT CHANGING YOUR RADIO. PRODUCTS REQUIRED iDatalink Maestro AR Amplifier Replacement Interface iDatalink Maestro DSP-FO2 Installation Harness ACC-RCA1 cable OPTIONAL ACCESSORIES PROGRAMMED FIRMWARE ADS-AR-AS-dFO2 NOTICE: Automotive Data Solutions Inc. (ADS) recommends having this installation performed by a certified technician.
Ford Transit Connect With dFO2 (version 1.2) 2014-2019 WELCOME Congratulations on the purchase of your iDatalink Maestro AR Amplifier replacement solution. You are now a few simple steps away from enjoying your new car amplifier. TABLE OF CONTENTS Installation Instructions 3 Wiring Diagram 4 Before starting your installation, please ensure that your iDatalink Maestro module is programmed with the correct firmware for your vehicle and that you carefully review the install guide.
Ford Transit Connect With dFO2 (version 1.2) 2014-2019 INSTALLATION INSTRUCTIONS Required : The Maestro AR is now locked to this particular vehicle by VIN number. dFO2 t-harness (version 1.2) ACC-RCA1 Note: If you need to return the radio to its factory nonamplified mode, do this programming procedure and press and hold VOL– button on the steering wheel instead. The radio screen will change to FM and will show volume 0. Release the button.
Ford Transit Connect With dFO2 (version 1.2) 2014-2019 WIRING DIAGRAM dFO2 T-HARNESS VERSION 1.2 STEP 2 STEP 1 AMPLIFIER CONNECT TO OEM RADIO HARNESS REAR FRONT WHITE (LEFT FRONT) WHITE/BLACK (LEFT FRONT) GRAY (RIGHT FRONT) GRAY/BLACK (RIGHT FRONT) GREEN (LEFT REAR) GREEN/BLACK (LEFT REAR) PURPLE (RIGHT REAR) PURPLE/BLACK (RIGHT REAR) CONNECT TO OEM RADIO CONNECTOR TO AMP TURN ON INPUT AMP TURN ON OUTPUT 3 OUTPUT 2 OUTPUT 1 dFO2 T-HARNESS (VER 1.
INSTALL GUIDE Ford Transit 2015-2019 *With dFO2 (version 1.2) ENABLE A SEAMLESS AFTERMARKET AMPLIFIER INSTALLATION, WITHOUT CHANGING YOUR RADIO. PRODUCTS REQUIRED iDatalink Maestro AR Amplifier Replacement Interface iDatalink Maestro DSP-FO2 Installation Harness ACC-RCA1 cable OPTIONAL ACCESSORIES PROGRAMMED FIRMWARE ADS-AR-AS-dFO2 NOTICE: Automotive Data Solutions Inc. (ADS) recommends having this installation performed by a certified technician.
Ford Transit With dFO2 (version 1.2) 2015-2019 WELCOME Congratulations on the purchase of your iDatalink Maestro AR Amplifier replacement solution. You are now a few simple steps away from enjoying your new car amplifier. TABLE OF CONTENTS Installation Instructions 3 Wiring Diagram 4 Before starting your installation, please ensure that your iDatalink Maestro module is programmed with the correct firmware for your vehicle and that you carefully review the install guide.
Ford Transit With dFO2 (version 1.2) 2015-2019 INSTALLATION INSTRUCTIONS Required : The Maestro AR is now locked to this particular vehicle by VIN number. dFO2 t-harness (version 1.2) ACC-RCA1 Note: If you need to return the radio to its factory nonamplified mode, do this programming procedure and press and hold VOL– button on the steering wheel instead. The radio screen will change to FM and will show volume 0. Release the button.
Ford Transit With dFO2 (version 1.2) 2015-2019 WIRING DIAGRAM dFO2 T-HARNESS VERSION 1.2 STEP 2 STEP 1 AMPLIFIER CONNECT TO OEM RADIO HARNESS REAR FRONT WHITE (LEFT FRONT) WHITE/BLACK (LEFT FRONT) GRAY (RIGHT FRONT) GRAY/BLACK (RIGHT FRONT) GREEN (LEFT REAR) GREEN/BLACK (LEFT REAR) PURPLE (RIGHT REAR) PURPLE/BLACK (RIGHT REAR) CONNECT TO OEM RADIO CONNECTOR TO AMP TURN ON INPUT AMP TURN ON OUTPUT 3 OUTPUT 2 OUTPUT 1 dFO2 T-HARNESS (VER 1.
SELECT VEHICLE PRINT PAGES NEEDED HOW TO USE THIS INSTALL GUIDE 1 Open the Bookmarks menu and find your vehicle OR scroll down until you find the install guide for your vehicle. 2 Print only the pages for your vehicle using the advanced options in the Print menu. 3 Install your Maestro AR according to the guide for your vehicle. WARNING Pressing the printer icon or “quick printing” this document will print all of the guides in this compilation. NOTICE: Automotive Data Solutions Inc.
INSTALL GUIDE Ford Cmax 2013-2018 *With dFO2 (version 2.0) ENABLE A SEAMLESS AFTERMARKET AMPLIFIER INSTALLATION, WITHOUT CHANGING YOUR RADIO. PRODUCTS REQUIRED iDatalink Maestro AR Amplifier Replacement Interface iDatalink Maestro DSP-FO2 Installation Harness ACC-RCA1 cable OPTIONAL ACCESSORIES PROGRAMMED FIRMWARE ADS-AR-AS-dFO2 NOTICE: Automotive Data Solutions Inc. (ADS) recommends having this installation performed by a certified technician.
Ford Cmax With dFO2 (version 2.0) 2013-2018 WELCOME Congratulations on the purchase of your iDatalink Maestro AR Amplifier replacement solution. You are now a few simple steps away from enjoying your new car amplifier. Before starting your installation, please ensure that your iDatalink Maestro module is programmed with the correct firmware for your vehicle and that you carefully review the install guide.
Ford Cmax With dFO2 (version 2.0) 2013-2018 INSTALLATION INSTRUCTIONS For 4-channel amplifier only. • Push and hold Volume+ button on the steering wheel. The radio screen will change to FM and will show volume 0. Release the button. (You may also turn the volume knob clockwise instead of using the Volume + button.) Required : dFO2 t-harness (version 2.0), ACC-RCA1 STEP 1 • Screen will show Volume 10 – 20 - 30. The Maestro AR is now locked to this particular vehicle by VIN number.
Ford Cmax With dFO2 (version 2.0) 2013-2018 WIRING DIAGRAM dFO2 T-HARNESS VERSION 2.0 / 4-CHANNEL AMP STEP 2 STEP 1 CUT AND REMOVE GRAY AND PURPLE CONNECTORS AMPLIFIER CONNECT TO OEM RADIO HARNESS REAR FRONT PURPLE (RIGHT REAR) PURPLE/BLACK (RIGHT REAR) GRAY (RIGHT FRONT) GRAY/BLACK (RIGHT FRONT) WHITE (LEFT FRONT) WHITE/BLACK (LEFT FRONT) GREEN (LEFT REAR) GREEN/BLACK (LEFT REAR) CONNECT TO OEM RADIO CONNECTOR TO AMP TURN ON INPUT WHITE dFO2 T-HARNESS (VER 2.0) N.C.
Ford Cmax With dFO2 (version 2.0) 2013-2018 INSTALLATION INSTRUCTIONS For 4-channel amplifier and subwoofer amp • Plug the Data cable into the RCA1 harness and the other end into the Maestro AR. Required : dFO2 t-harness (version 2.0), ACC-RCA1 STEP 3 STEP 1 • Connect all the harnesses to the Maestro AR module. • Remove the factory radio and plug the dFO2 T-harness in line with the radio plug. STEP 4 • Locate the 26 pin secondary harness that was plugged into the OEM radio.
Ford Cmax With dFO2 (version 2.0) 2013-2018 INSTALLATION INSTRUCTIONS TROUBLESHOOTING TIPS: • To reset the module back its factory settings, turn the key to the OFF position then disconnect all connectors from the module. Press and hold the module’s programming button and connect all the connectors back to the module. Wait, the module’s LED will flash RED rapidly (this may take up to 10 seconds). Release the programming button. Wait, the LED will turn solid GREEN for 2 seconds.
Ford Cmax With dFO2 (version 2.0) 2013-2018 WIRING DIAGRAM dFO2 T-HARNESS VERSION 2.0 / 4-CHANNEL AMP AND SUBWOOFER AMP STEP 2 STEP 1 CUT AND REMOVE GRAY AND PURPLE CONNECTORS AMPLIFIER(S) CONNECT TO OEM RADIO HARNESS REAR SUB FRONT PURPLE (RIGHT REAR) PURPLE/BLACK (RIGHT REAR) GRAY (RIGHT FRONT) GRAY/BLACK (RIGHT FRONT) WHITE (LEFT FRONT) WHITE/BLACK (LEFT FRONT) GREEN (LEFT REAR) GREEN/BLACK (LEFT REAR) CONNECT TO OEM RADIO CONNECTOR TO AMP TURN ON INPUT WHITE dFO2 T-HARNESS (VER 2.
Ford Cmax With dFO2 (version 2.0) 2013-2018 INSTALLATION INSTRUCTIONS For subwoofer amp only • Push and hold Volume+ button on the steering wheel. The radio screen will change to FM and will show volume 0. Release the button. (You may also turn the volume knob clockwise instead of using the Volume + button.) Required : dFO2 t-harness (version 2.0), ACC-RCA1 STEP 1 • Screen will show Volume 10 – 20 - 30. • Remove the factory radio and plug the dFO2 T-harness in line with the radio plug.
Ford Cmax With dFO2 (version 2.0) 2013-2018 WIRING DIAGRAM dFO2 T-HARNESS VERSION 2.0 / SUBWOOFER AMP ONLY STEP 2 STEP 1 SUBWOOFER AMPLIFIER CONNECT TO OEM RADIO HARNESS PURPLE GREEN CONNECT TO OEM RADIO CONNECTOR TO AMP TURN ON INPUT dFO2 T-HARNESS (VER 2.0) SECONDARY OEM RADIO CONNECTOR AMP TURN ON OUTPUT 3 N.C. OUTPUT 2 OUTPUT 1 N.C. GRAY WHITE BLACK/WHITE 1 N.C. N.C.
INSTALL GUIDE Ford Edge 2011-2019 *With dFO2 (version 2.0) ENABLE A SEAMLESS AFTERMARKET AMPLIFIER INSTALLATION, WITHOUT CHANGING YOUR RADIO. PRODUCTS REQUIRED iDatalink Maestro AR Amplifier Replacement Interface iDatalink Maestro DSP-FO2 Installation Harness ACC-RCA1 cable OPTIONAL ACCESSORIES PROGRAMMED FIRMWARE ADS-AR-AS-dFO2 NOTICE: Automotive Data Solutions Inc. (ADS) recommends having this installation performed by a certified technician.
Ford Edge With dFO2 (version 2.0) 2011-2019 WELCOME Congratulations on the purchase of your iDatalink Maestro AR Amplifier replacement solution. You are now a few simple steps away from enjoying your new car amplifier. Before starting your installation, please ensure that your iDatalink Maestro module is programmed with the correct firmware for your vehicle and that you carefully review the install guide.
Ford Edge With dFO2 (version 2.0) 2011-2019 INSTALLATION INSTRUCTIONS For 4-channel amplifier only. • Push and hold Volume+ button on the steering wheel. The radio screen will change to FM and will show volume 0. Release the button. (You may also turn the volume knob clockwise instead of using the Volume + button.) Required : dFO2 t-harness (version 2.0), ACC-RCA1 STEP 1 • Screen will show Volume 10 – 20 - 30. The Maestro AR is now locked to this particular vehicle by VIN number.
Ford Edge With dFO2 (version 2.0) 2011-2019 WIRING DIAGRAM dFO2 T-HARNESS VERSION 2.0 / 4-CHANNEL AMP STEP 2 STEP 1 CUT AND REMOVE GRAY AND PURPLE CONNECTORS AMPLIFIER CONNECT TO OEM RADIO HARNESS REAR FRONT PURPLE (RIGHT REAR) PURPLE/BLACK (RIGHT REAR) GRAY (RIGHT FRONT) GRAY/BLACK (RIGHT FRONT) WHITE (LEFT FRONT) WHITE/BLACK (LEFT FRONT) GREEN (LEFT REAR) GREEN/BLACK (LEFT REAR) CONNECT TO OEM RADIO CONNECTOR TO AMP TURN ON INPUT WHITE dFO2 T-HARNESS (VER 2.0) N.C.
Ford Edge With dFO2 (version 2.0) 2011-2019 INSTALLATION INSTRUCTIONS For 4-channel amplifier and subwoofer amp • Plug the Data cable into the RCA1 harness and the other end into the Maestro AR. Required : dFO2 t-harness (version 2.0), ACC-RCA1 STEP 3 STEP 1 • Connect all the harnesses to the Maestro AR module. • Remove the factory radio and plug the dFO2 T-harness in line with the radio plug. STEP 4 • Locate the 26 pin secondary harness that was plugged into the OEM radio.
Ford Edge With dFO2 (version 2.0) 2011-2019 INSTALLATION INSTRUCTIONS TROUBLESHOOTING TIPS: • To reset the module back its factory settings, turn the key to the OFF position then disconnect all connectors from the module. Press and hold the module’s programming button and connect all the connectors back to the module. Wait, the module’s LED will flash RED rapidly (this may take up to 10 seconds). Release the programming button. Wait, the LED will turn solid GREEN for 2 seconds.
Ford Edge With dFO2 (version 2.0) 2011-2019 WIRING DIAGRAM dFO2 T-HARNESS VERSION 2.0 / 4-CHANNEL AMP AND SUBWOOFER AMP STEP 2 STEP 1 CUT AND REMOVE GRAY AND PURPLE CONNECTORS AMPLIFIER(S) CONNECT TO OEM RADIO HARNESS REAR SUB FRONT PURPLE (RIGHT REAR) PURPLE/BLACK (RIGHT REAR) GRAY (RIGHT FRONT) GRAY/BLACK (RIGHT FRONT) WHITE (LEFT FRONT) WHITE/BLACK (LEFT FRONT) GREEN (LEFT REAR) GREEN/BLACK (LEFT REAR) CONNECT TO OEM RADIO CONNECTOR TO AMP TURN ON INPUT WHITE dFO2 T-HARNESS (VER 2.
Ford Edge With dFO2 (version 2.0) 2011-2019 INSTALLATION INSTRUCTIONS For subwoofer amp only • Push and hold Volume+ button on the steering wheel. The radio screen will change to FM and will show volume 0. Release the button. (You may also turn the volume knob clockwise instead of using the Volume + button.) Required : dFO2 t-harness (version 2.0), ACC-RCA1 STEP 1 • Screen will show Volume 10 – 20 - 30. • Remove the factory radio and plug the dFO2 T-harness in line with the radio plug.
Ford Edge With dFO2 (version 2.0) 2011-2019 WIRING DIAGRAM dFO2 T-HARNESS VERSION 2.0 / SUBWOOFER AMP ONLY STEP 2 STEP 1 SUBWOOFER AMPLIFIER CONNECT TO OEM RADIO HARNESS PURPLE GREEN CONNECT TO OEM RADIO CONNECTOR TO AMP TURN ON INPUT dFO2 T-HARNESS (VER 2.0) SECONDARY OEM RADIO CONNECTOR AMP TURN ON OUTPUT 3 N.C. OUTPUT 2 OUTPUT 1 N.C. GRAY WHITE BLACK/WHITE 1 N.C. N.C.
INSTALL GUIDE Ford Escape 2013-2019 *With dFO2 (version 2.0) ENABLE A SEAMLESS AFTERMARKET AMPLIFIER INSTALLATION, WITHOUT CHANGING YOUR RADIO. PRODUCTS REQUIRED iDatalink Maestro AR Amplifier Replacement Interface iDatalink Maestro DSP-FO2 Installation Harness ACC-RCA1 cable OPTIONAL ACCESSORIES PROGRAMMED FIRMWARE ADS-AR-AS-dFO2 NOTICE: Automotive Data Solutions Inc. (ADS) recommends having this installation performed by a certified technician.
Ford Escape With dFO2 (version 2.0) 2013-2019 WELCOME Congratulations on the purchase of your iDatalink Maestro AR Amplifier replacement solution. You are now a few simple steps away from enjoying your new car amplifier. Before starting your installation, please ensure that your iDatalink Maestro module is programmed with the correct firmware for your vehicle and that you carefully review the install guide.
Ford Escape With dFO2 (version 2.0) 2013-2019 INSTALLATION INSTRUCTIONS For 4-channel amplifier only. • Push and hold Volume+ button on the steering wheel. The radio screen will change to FM and will show volume 0. Release the button. (You may also turn the volume knob clockwise instead of using the Volume + button.) Required : dFO2 t-harness (version 2.0), ACC-RCA1 STEP 1 • Screen will show Volume 10 – 20 - 30. The Maestro AR is now locked to this particular vehicle by VIN number.
Ford Escape With dFO2 (version 2.0) 2013-2019 WIRING DIAGRAM dFO2 T-HARNESS VERSION 2.0 / 4-CHANNEL AMP STEP 2 STEP 1 CUT AND REMOVE GRAY AND PURPLE CONNECTORS AMPLIFIER CONNECT TO OEM RADIO HARNESS REAR FRONT PURPLE (RIGHT REAR) PURPLE/BLACK (RIGHT REAR) GRAY (RIGHT FRONT) GRAY/BLACK (RIGHT FRONT) WHITE (LEFT FRONT) WHITE/BLACK (LEFT FRONT) GREEN (LEFT REAR) GREEN/BLACK (LEFT REAR) CONNECT TO OEM RADIO CONNECTOR TO AMP TURN ON INPUT WHITE dFO2 T-HARNESS (VER 2.0) N.C.
Ford Escape With dFO2 (version 2.0) 2013-2019 INSTALLATION INSTRUCTIONS For 4-channel amplifier and subwoofer amp • Plug the Data cable into the RCA1 harness and the other end into the Maestro AR. Required : dFO2 t-harness (version 2.0), ACC-RCA1 STEP 3 STEP 1 • Connect all the harnesses to the Maestro AR module. • Remove the factory radio and plug the dFO2 T-harness in line with the radio plug. STEP 4 • Locate the 26 pin secondary harness that was plugged into the OEM radio.
Ford Escape With dFO2 (version 2.0) 2013-2019 INSTALLATION INSTRUCTIONS TROUBLESHOOTING TIPS: • To reset the module back its factory settings, turn the key to the OFF position then disconnect all connectors from the module. Press and hold the module’s programming button and connect all the connectors back to the module. Wait, the module’s LED will flash RED rapidly (this may take up to 10 seconds). Release the programming button. Wait, the LED will turn solid GREEN for 2 seconds.
Ford Escape With dFO2 (version 2.0) 2013-2019 WIRING DIAGRAM dFO2 T-HARNESS VERSION 2.0 / 4-CHANNEL AMP AND SUBWOOFER AMP STEP 2 STEP 1 CUT AND REMOVE GRAY AND PURPLE CONNECTORS AMPLIFIER(S) CONNECT TO OEM RADIO HARNESS REAR SUB FRONT PURPLE (RIGHT REAR) PURPLE/BLACK (RIGHT REAR) GRAY (RIGHT FRONT) GRAY/BLACK (RIGHT FRONT) WHITE (LEFT FRONT) WHITE/BLACK (LEFT FRONT) GREEN (LEFT REAR) GREEN/BLACK (LEFT REAR) CONNECT TO OEM RADIO CONNECTOR TO AMP TURN ON INPUT WHITE dFO2 T-HARNESS (VER 2.
Ford Escape With dFO2 (version 2.0) 2013-2019 INSTALLATION INSTRUCTIONS For subwoofer amp only • Push and hold Volume+ button on the steering wheel. The radio screen will change to FM and will show volume 0. Release the button. (You may also turn the volume knob clockwise instead of using the Volume + button.) Required : dFO2 t-harness (version 2.0), ACC-RCA1 STEP 1 • Screen will show Volume 10 – 20 - 30. • Remove the factory radio and plug the dFO2 T-harness in line with the radio plug.
Ford Escape With dFO2 (version 2.0) 2013-2019 WIRING DIAGRAM dFO2 T-HARNESS VERSION 2.0 / SUBWOOFER AMP ONLY STEP 2 STEP 1 SUBWOOFER AMPLIFIER CONNECT TO OEM RADIO HARNESS PURPLE GREEN CONNECT TO OEM RADIO CONNECTOR TO AMP TURN ON INPUT dFO2 T-HARNESS (VER 2.0) SECONDARY OEM RADIO CONNECTOR AMP TURN ON OUTPUT 3 N.C. OUTPUT 2 OUTPUT 1 N.C. GRAY WHITE BLACK/WHITE 1 N.C. N.C.
INSTALL GUIDE Ford Expedition 2015-2020 *With dFO2 (version 2.0) ENABLE A SEAMLESS AFTERMARKET AMPLIFIER INSTALLATION, WITHOUT CHANGING YOUR RADIO. PRODUCTS REQUIRED iDatalink Maestro AR Amplifier Replacement Interface iDatalink Maestro DSP-FO2 Installation Harness ACC-RCA1 cable OPTIONAL ACCESSORIES PROGRAMMED FIRMWARE ADS-AR-AS-dFO2 NOTICE: Automotive Data Solutions Inc. (ADS) recommends having this installation performed by a certified technician.
Ford Expedition With dFO2 (version 2.0) 2015-2020 WELCOME Congratulations on the purchase of your iDatalink Maestro AR Amplifier replacement solution. You are now a few simple steps away from enjoying your new car amplifier. Before starting your installation, please ensure that your iDatalink Maestro module is programmed with the correct firmware for your vehicle and that you carefully review the install guide.
Ford Expedition With dFO2 (version 2.0) 2015-2020 INSTALLATION INSTRUCTIONS For 4-channel amplifier only. • Push and hold Volume+ button on the steering wheel. The radio screen will change to FM and will show volume 0. Release the button. (You may also turn the volume knob clockwise instead of using the Volume + button.) Required : dFO2 t-harness (version 2.0), ACC-RCA1 STEP 1 • Screen will show Volume 10 – 20 - 30. The Maestro AR is now locked to this particular vehicle by VIN number.
Ford Expedition With dFO2 (version 2.0) 2015-2020 WIRING DIAGRAM dFO2 T-HARNESS VERSION 2.0 / 4-CHANNEL AMP STEP 2 STEP 1 CUT AND REMOVE GRAY AND PURPLE CONNECTORS AMPLIFIER CONNECT TO OEM RADIO HARNESS REAR FRONT PURPLE (RIGHT REAR) PURPLE/BLACK (RIGHT REAR) GRAY (RIGHT FRONT) GRAY/BLACK (RIGHT FRONT) WHITE (LEFT FRONT) WHITE/BLACK (LEFT FRONT) GREEN (LEFT REAR) GREEN/BLACK (LEFT REAR) CONNECT TO OEM RADIO CONNECTOR TO AMP TURN ON INPUT WHITE dFO2 T-HARNESS (VER 2.0) N.C.
Ford Expedition With dFO2 (version 2.0) 2015-2020 INSTALLATION INSTRUCTIONS For 4-channel amplifier and subwoofer amp • Plug the Data cable into the RCA1 harness and the other end into the Maestro AR. Required : dFO2 t-harness (version 2.0), ACC-RCA1 STEP 3 STEP 1 • Connect all the harnesses to the Maestro AR module. • Remove the factory radio and plug the dFO2 T-harness in line with the radio plug. STEP 4 • Locate the 26 pin secondary harness that was plugged into the OEM radio.
Ford Expedition With dFO2 (version 2.0) 2015-2020 INSTALLATION INSTRUCTIONS TROUBLESHOOTING TIPS: • To reset the module back its factory settings, turn the key to the OFF position then disconnect all connectors from the module. Press and hold the module’s programming button and connect all the connectors back to the module. Wait, the module’s LED will flash RED rapidly (this may take up to 10 seconds). Release the programming button. Wait, the LED will turn solid GREEN for 2 seconds.
Ford Expedition With dFO2 (version 2.0) 2015-2020 WIRING DIAGRAM dFO2 T-HARNESS VERSION 2.0 / 4-CHANNEL AMP AND SUBWOOFER AMP STEP 2 STEP 1 CUT AND REMOVE GRAY AND PURPLE CONNECTORS AMPLIFIER(S) CONNECT TO OEM RADIO HARNESS REAR SUB FRONT PURPLE (RIGHT REAR) PURPLE/BLACK (RIGHT REAR) GRAY (RIGHT FRONT) GRAY/BLACK (RIGHT FRONT) WHITE (LEFT FRONT) WHITE/BLACK (LEFT FRONT) GREEN (LEFT REAR) GREEN/BLACK (LEFT REAR) CONNECT TO OEM RADIO CONNECTOR TO AMP TURN ON INPUT WHITE dFO2 T-HARNESS (VER 2.
Ford Expedition With dFO2 (version 2.0) 2015-2020 INSTALLATION INSTRUCTIONS For subwoofer amp only • Push and hold Volume+ button on the steering wheel. The radio screen will change to FM and will show volume 0. Release the button. (You may also turn the volume knob clockwise instead of using the Volume + button.) Required : dFO2 t-harness (version 2.0), ACC-RCA1 STEP 1 • Screen will show Volume 10 – 20 - 30. • Remove the factory radio and plug the dFO2 T-harness in line with the radio plug.
Ford Expedition With dFO2 (version 2.0) 2015-2020 WIRING DIAGRAM dFO2 T-HARNESS VERSION 2.0 / SUBWOOFER AMP ONLY STEP 2 STEP 1 SUBWOOFER AMPLIFIER CONNECT TO OEM RADIO HARNESS PURPLE GREEN CONNECT TO OEM RADIO CONNECTOR TO AMP TURN ON INPUT dFO2 T-HARNESS (VER 2.0) SECONDARY OEM RADIO CONNECTOR AMP TURN ON OUTPUT 3 N.C. OUTPUT 2 OUTPUT 1 N.C. GRAY WHITE BLACK/WHITE 1 N.C. N.C.
INSTALL GUIDE Ford Explorer 2011-2019 *With dFO2 (version 2.0) ENABLE A SEAMLESS AFTERMARKET AMPLIFIER INSTALLATION, WITHOUT CHANGING YOUR RADIO. PRODUCTS REQUIRED iDatalink Maestro AR Amplifier Replacement Interface iDatalink Maestro DSP-FO2 Installation Harness ACC-RCA1 cable OPTIONAL ACCESSORIES PROGRAMMED FIRMWARE ADS-AR-AS-dFO2 NOTICE: Automotive Data Solutions Inc. (ADS) recommends having this installation performed by a certified technician.
Ford Explorer With dFO2 (version 2.0) 2011-2019 WELCOME Congratulations on the purchase of your iDatalink Maestro AR Amplifier replacement solution. You are now a few simple steps away from enjoying your new car amplifier. Before starting your installation, please ensure that your iDatalink Maestro module is programmed with the correct firmware for your vehicle and that you carefully review the install guide.
Ford Explorer With dFO2 (version 2.0) 2011-2019 INSTALLATION INSTRUCTIONS For 4-channel amplifier only. • Push and hold Volume+ button on the steering wheel. The radio screen will change to FM and will show volume 0. Release the button. (You may also turn the volume knob clockwise instead of using the Volume + button.) Required : dFO2 t-harness (version 2.0), ACC-RCA1 STEP 1 • Screen will show Volume 10 – 20 - 30. The Maestro AR is now locked to this particular vehicle by VIN number.
Ford Explorer With dFO2 (version 2.0) 2011-2019 WIRING DIAGRAM dFO2 T-HARNESS VERSION 2.0 / 4-CHANNEL AMP STEP 2 STEP 1 CUT AND REMOVE GRAY AND PURPLE CONNECTORS AMPLIFIER CONNECT TO OEM RADIO HARNESS REAR FRONT PURPLE (RIGHT REAR) PURPLE/BLACK (RIGHT REAR) GRAY (RIGHT FRONT) GRAY/BLACK (RIGHT FRONT) WHITE (LEFT FRONT) WHITE/BLACK (LEFT FRONT) GREEN (LEFT REAR) GREEN/BLACK (LEFT REAR) CONNECT TO OEM RADIO CONNECTOR TO AMP TURN ON INPUT WHITE dFO2 T-HARNESS (VER 2.0) N.C.
Ford Explorer With dFO2 (version 2.0) 2011-2019 INSTALLATION INSTRUCTIONS For 4-channel amplifier and subwoofer amp • Plug the Data cable into the RCA1 harness and the other end into the Maestro AR. Required : dFO2 t-harness (version 2.0), ACC-RCA1 STEP 3 STEP 1 • Connect all the harnesses to the Maestro AR module. • Remove the factory radio and plug the dFO2 T-harness in line with the radio plug. STEP 4 • Locate the 26 pin secondary harness that was plugged into the OEM radio.
Ford Explorer With dFO2 (version 2.0) 2011-2019 INSTALLATION INSTRUCTIONS TROUBLESHOOTING TIPS: • To reset the module back its factory settings, turn the key to the OFF position then disconnect all connectors from the module. Press and hold the module’s programming button and connect all the connectors back to the module. Wait, the module’s LED will flash RED rapidly (this may take up to 10 seconds). Release the programming button. Wait, the LED will turn solid GREEN for 2 seconds.
Ford Explorer With dFO2 (version 2.0) 2011-2019 WIRING DIAGRAM dFO2 T-HARNESS VERSION 2.0 / 4-CHANNEL AMP AND SUBWOOFER AMP STEP 2 STEP 1 CUT AND REMOVE GRAY AND PURPLE CONNECTORS AMPLIFIER(S) CONNECT TO OEM RADIO HARNESS REAR SUB FRONT PURPLE (RIGHT REAR) PURPLE/BLACK (RIGHT REAR) GRAY (RIGHT FRONT) GRAY/BLACK (RIGHT FRONT) WHITE (LEFT FRONT) WHITE/BLACK (LEFT FRONT) GREEN (LEFT REAR) GREEN/BLACK (LEFT REAR) CONNECT TO OEM RADIO CONNECTOR TO AMP TURN ON INPUT WHITE dFO2 T-HARNESS (VER 2.
Ford Explorer With dFO2 (version 2.0) 2011-2019 INSTALLATION INSTRUCTIONS For subwoofer amp only • Push and hold Volume+ button on the steering wheel. The radio screen will change to FM and will show volume 0. Release the button. (You may also turn the volume knob clockwise instead of using the Volume + button.) Required : dFO2 t-harness (version 2.0), ACC-RCA1 STEP 1 • Screen will show Volume 10 – 20 - 30. • Remove the factory radio and plug the dFO2 T-harness in line with the radio plug.
Ford Explorer With dFO2 (version 2.0) 2011-2019 WIRING DIAGRAM dFO2 T-HARNESS VERSION 2.0 / SUBWOOFER AMP ONLY STEP 2 STEP 1 SUBWOOFER AMPLIFIER CONNECT TO OEM RADIO HARNESS PURPLE GREEN CONNECT TO OEM RADIO CONNECTOR TO AMP TURN ON INPUT dFO2 T-HARNESS (VER 2.0) SECONDARY OEM RADIO CONNECTOR AMP TURN ON OUTPUT 3 N.C. OUTPUT 2 OUTPUT 1 N.C. GRAY WHITE BLACK/WHITE 1 N.C. N.C.
INSTALL GUIDE Ford F Super Duty 2017-2020 *With dFO2 (version 2.0) ENABLE A SEAMLESS AFTERMARKET AMPLIFIER INSTALLATION, WITHOUT CHANGING YOUR RADIO. PRODUCTS REQUIRED iDatalink Maestro AR Amplifier Replacement Interface iDatalink Maestro DSP-FO2 Installation Harness ACC-RCA1 cable OPTIONAL ACCESSORIES PROGRAMMED FIRMWARE ADS-AR-AS-dFO2 NOTICE: Automotive Data Solutions Inc. (ADS) recommends having this installation performed by a certified technician.
Ford F Super Duty With dFO2 (version 2.0) 2017-2020 WELCOME Congratulations on the purchase of your iDatalink Maestro AR Amplifier replacement solution. You are now a few simple steps away from enjoying your new car amplifier. Before starting your installation, please ensure that your iDatalink Maestro module is programmed with the correct firmware for your vehicle and that you carefully review the install guide.
Ford F Super Duty With dFO2 (version 2.0) 2017-2020 INSTALLATION INSTRUCTIONS For 4-channel amplifier only. • Push and hold Volume+ button on the steering wheel. The radio screen will change to FM and will show volume 0. Release the button. (You may also turn the volume knob clockwise instead of using the Volume + button.) Required : dFO2 t-harness (version 2.0), ACC-RCA1 STEP 1 • Screen will show Volume 10 – 20 - 30. The Maestro AR is now locked to this particular vehicle by VIN number.
Ford F Super Duty With dFO2 (version 2.0) 2017-2020 WIRING DIAGRAM dFO2 T-HARNESS VERSION 2.0 / 4-CHANNEL AMP STEP 2 STEP 1 CUT AND REMOVE GRAY AND PURPLE CONNECTORS AMPLIFIER CONNECT TO OEM RADIO HARNESS REAR FRONT PURPLE (RIGHT REAR) PURPLE/BLACK (RIGHT REAR) GRAY (RIGHT FRONT) GRAY/BLACK (RIGHT FRONT) WHITE (LEFT FRONT) WHITE/BLACK (LEFT FRONT) GREEN (LEFT REAR) GREEN/BLACK (LEFT REAR) CONNECT TO OEM RADIO CONNECTOR TO AMP TURN ON INPUT WHITE dFO2 T-HARNESS (VER 2.0) N.C.
Ford F Super Duty With dFO2 (version 2.0) 2017-2020 INSTALLATION INSTRUCTIONS For 4-channel amplifier and subwoofer amp • Plug the Data cable into the RCA1 harness and the other end into the Maestro AR. Required : dFO2 t-harness (version 2.0), ACC-RCA1 STEP 3 STEP 1 • Connect all the harnesses to the Maestro AR module. • Remove the factory radio and plug the dFO2 T-harness in line with the radio plug. STEP 4 • Locate the 26 pin secondary harness that was plugged into the OEM radio.
Ford F Super Duty With dFO2 (version 2.0) 2017-2020 INSTALLATION INSTRUCTIONS TROUBLESHOOTING TIPS: • To reset the module back its factory settings, turn the key to the OFF position then disconnect all connectors from the module. Press and hold the module’s programming button and connect all the connectors back to the module. Wait, the module’s LED will flash RED rapidly (this may take up to 10 seconds). Release the programming button. Wait, the LED will turn solid GREEN for 2 seconds.
Ford F Super Duty With dFO2 (version 2.0) 2017-2020 WIRING DIAGRAM dFO2 T-HARNESS VERSION 2.0 / 4-CHANNEL AMP AND SUBWOOFER AMP STEP 2 STEP 1 CUT AND REMOVE GRAY AND PURPLE CONNECTORS AMPLIFIER(S) CONNECT TO OEM RADIO HARNESS REAR SUB FRONT PURPLE (RIGHT REAR) PURPLE/BLACK (RIGHT REAR) GRAY (RIGHT FRONT) GRAY/BLACK (RIGHT FRONT) WHITE (LEFT FRONT) WHITE/BLACK (LEFT FRONT) GREEN (LEFT REAR) GREEN/BLACK (LEFT REAR) CONNECT TO OEM RADIO CONNECTOR TO AMP TURN ON INPUT WHITE dFO2 T-HARNESS (VER 2.
Ford F Super Duty With dFO2 (version 2.0) 2017-2020 INSTALLATION INSTRUCTIONS For subwoofer amp only • Push and hold Volume+ button on the steering wheel. The radio screen will change to FM and will show volume 0. Release the button. (You may also turn the volume knob clockwise instead of using the Volume + button.) Required : dFO2 t-harness (version 2.0), ACC-RCA1 STEP 1 • Screen will show Volume 10 – 20 - 30. • Remove the factory radio and plug the dFO2 T-harness in line with the radio plug.
Ford F Super Duty With dFO2 (version 2.0) 2017-2020 WIRING DIAGRAM dFO2 T-HARNESS VERSION 2.0 / SUBWOOFER AMP ONLY STEP 2 STEP 1 SUBWOOFER AMPLIFIER CONNECT TO OEM RADIO HARNESS PURPLE GREEN CONNECT TO OEM RADIO CONNECTOR TO AMP TURN ON INPUT dFO2 T-HARNESS (VER 2.0) SECONDARY OEM RADIO CONNECTOR AMP TURN ON OUTPUT 3 N.C. OUTPUT 2 OUTPUT 1 N.C. GRAY WHITE BLACK/WHITE 1 N.C. N.C.
INSTALL GUIDE Ford F150 2013-2020 *With dFO2 (version 2.0) ENABLE A SEAMLESS AFTERMARKET AMPLIFIER INSTALLATION, WITHOUT CHANGING YOUR RADIO. PRODUCTS REQUIRED iDatalink Maestro AR Amplifier Replacement Interface iDatalink Maestro DSP-FO2 Installation Harness ACC-RCA1 cable OPTIONAL ACCESSORIES PROGRAMMED FIRMWARE ADS-AR-AS-dFO2 NOTICE: Automotive Data Solutions Inc. (ADS) recommends having this installation performed by a certified technician.
Ford F150 With dFO2 (version 2.0) 2013-2020 WELCOME Congratulations on the purchase of your iDatalink Maestro AR Amplifier replacement solution. You are now a few simple steps away from enjoying your new car amplifier. Before starting your installation, please ensure that your iDatalink Maestro module is programmed with the correct firmware for your vehicle and that you carefully review the install guide.
Ford F150 With dFO2 (version 2.0) 2013-2020 INSTALLATION INSTRUCTIONS For 4-channel amplifier only. • Push and hold Volume+ button on the steering wheel. The radio screen will change to FM and will show volume 0. Release the button. (You may also turn the volume knob clockwise instead of using the Volume + button.) Required : dFO2 t-harness (version 2.0), ACC-RCA1 STEP 1 • Screen will show Volume 10 – 20 - 30. The Maestro AR is now locked to this particular vehicle by VIN number.
Ford F150 With dFO2 (version 2.0) 2013-2020 WIRING DIAGRAM dFO2 T-HARNESS VERSION 2.0 / 4-CHANNEL AMP STEP 2 STEP 1 CUT AND REMOVE GRAY AND PURPLE CONNECTORS AMPLIFIER CONNECT TO OEM RADIO HARNESS REAR FRONT PURPLE (RIGHT REAR) PURPLE/BLACK (RIGHT REAR) GRAY (RIGHT FRONT) GRAY/BLACK (RIGHT FRONT) WHITE (LEFT FRONT) WHITE/BLACK (LEFT FRONT) GREEN (LEFT REAR) GREEN/BLACK (LEFT REAR) CONNECT TO OEM RADIO CONNECTOR TO AMP TURN ON INPUT WHITE dFO2 T-HARNESS (VER 2.0) N.C.
Ford F150 With dFO2 (version 2.0) 2013-2020 INSTALLATION INSTRUCTIONS For 4-channel amplifier and subwoofer amp • Plug the Data cable into the RCA1 harness and the other end into the Maestro AR. Required : dFO2 t-harness (version 2.0), ACC-RCA1 STEP 3 STEP 1 • Connect all the harnesses to the Maestro AR module. • Remove the factory radio and plug the dFO2 T-harness in line with the radio plug. STEP 4 • Locate the 26 pin secondary harness that was plugged into the OEM radio.
Ford F150 With dFO2 (version 2.0) 2013-2020 INSTALLATION INSTRUCTIONS TROUBLESHOOTING TIPS: • To reset the module back its factory settings, turn the key to the OFF position then disconnect all connectors from the module. Press and hold the module’s programming button and connect all the connectors back to the module. Wait, the module’s LED will flash RED rapidly (this may take up to 10 seconds). Release the programming button. Wait, the LED will turn solid GREEN for 2 seconds.
Ford F150 With dFO2 (version 2.0) 2013-2020 WIRING DIAGRAM dFO2 T-HARNESS VERSION 2.0 / 4-CHANNEL AMP AND SUBWOOFER AMP STEP 2 STEP 1 CUT AND REMOVE GRAY AND PURPLE CONNECTORS AMPLIFIER(S) CONNECT TO OEM RADIO HARNESS REAR SUB FRONT PURPLE (RIGHT REAR) PURPLE/BLACK (RIGHT REAR) GRAY (RIGHT FRONT) GRAY/BLACK (RIGHT FRONT) WHITE (LEFT FRONT) WHITE/BLACK (LEFT FRONT) GREEN (LEFT REAR) GREEN/BLACK (LEFT REAR) CONNECT TO OEM RADIO CONNECTOR TO AMP TURN ON INPUT WHITE dFO2 T-HARNESS (VER 2.
Ford F150 With dFO2 (version 2.0) 2013-2020 INSTALLATION INSTRUCTIONS For subwoofer amp only • Push and hold Volume+ button on the steering wheel. The radio screen will change to FM and will show volume 0. Release the button. (You may also turn the volume knob clockwise instead of using the Volume + button.) Required : dFO2 t-harness (version 2.0), ACC-RCA1 STEP 1 • Screen will show Volume 10 – 20 - 30. • Remove the factory radio and plug the dFO2 T-harness in line with the radio plug.
Ford F150 With dFO2 (version 2.0) 2013-2020 WIRING DIAGRAM dFO2 T-HARNESS VERSION 2.0 / SUBWOOFER AMP ONLY STEP 2 STEP 1 SUBWOOFER AMPLIFIER CONNECT TO OEM RADIO HARNESS PURPLE GREEN CONNECT TO OEM RADIO CONNECTOR TO AMP TURN ON INPUT dFO2 T-HARNESS (VER 2.0) SECONDARY OEM RADIO CONNECTOR AMP TURN ON OUTPUT 3 N.C. OUTPUT 2 OUTPUT 1 N.C. GRAY WHITE BLACK/WHITE 1 N.C. N.C.
INSTALL GUIDE Ford Focus 2012-2018 *With dFO2 (version 2.0) ENABLE A SEAMLESS AFTERMARKET AMPLIFIER INSTALLATION, WITHOUT CHANGING YOUR RADIO. PRODUCTS REQUIRED iDatalink Maestro AR Amplifier Replacement Interface iDatalink Maestro DSP-FO2 Installation Harness ACC-RCA1 cable OPTIONAL ACCESSORIES PROGRAMMED FIRMWARE ADS-AR-AS-dFO2 NOTICE: Automotive Data Solutions Inc. (ADS) recommends having this installation performed by a certified technician.
Ford Focus With dFO2 (version 2.0) 2012-2018 WELCOME Congratulations on the purchase of your iDatalink Maestro AR Amplifier replacement solution. You are now a few simple steps away from enjoying your new car amplifier. Before starting your installation, please ensure that your iDatalink Maestro module is programmed with the correct firmware for your vehicle and that you carefully review the install guide.
Ford Focus With dFO2 (version 2.0) 2012-2018 INSTALLATION INSTRUCTIONS For 4-channel amplifier only. • Push and hold Volume+ button on the steering wheel. The radio screen will change to FM and will show volume 0. Release the button. (You may also turn the volume knob clockwise instead of using the Volume + button.) Required : dFO2 t-harness (version 2.0), ACC-RCA1 STEP 1 • Screen will show Volume 10 – 20 - 30. The Maestro AR is now locked to this particular vehicle by VIN number.
Ford Focus With dFO2 (version 2.0) 2012-2018 WIRING DIAGRAM dFO2 T-HARNESS VERSION 2.0 / 4-CHANNEL AMP STEP 2 STEP 1 CUT AND REMOVE GRAY AND PURPLE CONNECTORS AMPLIFIER CONNECT TO OEM RADIO HARNESS REAR FRONT PURPLE (RIGHT REAR) PURPLE/BLACK (RIGHT REAR) GRAY (RIGHT FRONT) GRAY/BLACK (RIGHT FRONT) WHITE (LEFT FRONT) WHITE/BLACK (LEFT FRONT) GREEN (LEFT REAR) GREEN/BLACK (LEFT REAR) CONNECT TO OEM RADIO CONNECTOR TO AMP TURN ON INPUT WHITE dFO2 T-HARNESS (VER 2.0) N.C.
Ford Focus With dFO2 (version 2.0) 2012-2018 INSTALLATION INSTRUCTIONS For 4-channel amplifier and subwoofer amp • Plug the Data cable into the RCA1 harness and the other end into the Maestro AR. Required : dFO2 t-harness (version 2.0), ACC-RCA1 STEP 3 STEP 1 • Connect all the harnesses to the Maestro AR module. • Remove the factory radio and plug the dFO2 T-harness in line with the radio plug. STEP 4 • Locate the 26 pin secondary harness that was plugged into the OEM radio.
Ford Focus With dFO2 (version 2.0) 2012-2018 INSTALLATION INSTRUCTIONS TROUBLESHOOTING TIPS: • To reset the module back its factory settings, turn the key to the OFF position then disconnect all connectors from the module. Press and hold the module’s programming button and connect all the connectors back to the module. Wait, the module’s LED will flash RED rapidly (this may take up to 10 seconds). Release the programming button. Wait, the LED will turn solid GREEN for 2 seconds.
Ford Focus With dFO2 (version 2.0) 2012-2018 WIRING DIAGRAM dFO2 T-HARNESS VERSION 2.0 / 4-CHANNEL AMP AND SUBWOOFER AMP STEP 2 STEP 1 CUT AND REMOVE GRAY AND PURPLE CONNECTORS AMPLIFIER(S) CONNECT TO OEM RADIO HARNESS REAR SUB FRONT PURPLE (RIGHT REAR) PURPLE/BLACK (RIGHT REAR) GRAY (RIGHT FRONT) GRAY/BLACK (RIGHT FRONT) WHITE (LEFT FRONT) WHITE/BLACK (LEFT FRONT) GREEN (LEFT REAR) GREEN/BLACK (LEFT REAR) CONNECT TO OEM RADIO CONNECTOR TO AMP TURN ON INPUT WHITE dFO2 T-HARNESS (VER 2.
Ford Focus With dFO2 (version 2.0) 2012-2018 INSTALLATION INSTRUCTIONS For subwoofer amp only • Push and hold Volume+ button on the steering wheel. The radio screen will change to FM and will show volume 0. Release the button. (You may also turn the volume knob clockwise instead of using the Volume + button.) Required : dFO2 t-harness (version 2.0), ACC-RCA1 STEP 1 • Screen will show Volume 10 – 20 - 30. • Remove the factory radio and plug the dFO2 T-harness in line with the radio plug.
Ford Focus With dFO2 (version 2.0) 2012-2018 WIRING DIAGRAM dFO2 T-HARNESS VERSION 2.0 / SUBWOOFER AMP ONLY STEP 2 STEP 1 SUBWOOFER AMPLIFIER CONNECT TO OEM RADIO HARNESS PURPLE GREEN CONNECT TO OEM RADIO CONNECTOR TO AMP TURN ON INPUT dFO2 T-HARNESS (VER 2.0) SECONDARY OEM RADIO CONNECTOR AMP TURN ON OUTPUT 3 N.C. OUTPUT 2 OUTPUT 1 N.C. GRAY WHITE BLACK/WHITE 1 N.C. N.C.
INSTALL GUIDE Ford Fusion 2013-2019 *With dFO2 (version 2.0) ENABLE A SEAMLESS AFTERMARKET AMPLIFIER INSTALLATION, WITHOUT CHANGING YOUR RADIO. PRODUCTS REQUIRED iDatalink Maestro AR Amplifier Replacement Interface iDatalink Maestro DSP-FO2 Installation Harness ACC-RCA1 cable OPTIONAL ACCESSORIES PROGRAMMED FIRMWARE ADS-AR-AS-dFO2 NOTICE: Automotive Data Solutions Inc. (ADS) recommends having this installation performed by a certified technician.
Ford Fusion With dFO2 (version 2.0) 2013-2019 WELCOME Congratulations on the purchase of your iDatalink Maestro AR Amplifier replacement solution. You are now a few simple steps away from enjoying your new car amplifier. Before starting your installation, please ensure that your iDatalink Maestro module is programmed with the correct firmware for your vehicle and that you carefully review the install guide.
Ford Fusion With dFO2 (version 2.0) 2013-2019 INSTALLATION INSTRUCTIONS For 4-channel amplifier only. • Push and hold Volume+ button on the steering wheel. The radio screen will change to FM and will show volume 0. Release the button. (You may also turn the volume knob clockwise instead of using the Volume + button.) Required : dFO2 t-harness (version 2.0), ACC-RCA1 STEP 1 • Screen will show Volume 10 – 20 - 30. The Maestro AR is now locked to this particular vehicle by VIN number.
Ford Fusion With dFO2 (version 2.0) 2013-2019 WIRING DIAGRAM dFO2 T-HARNESS VERSION 2.0 / 4-CHANNEL AMP STEP 2 STEP 1 CUT AND REMOVE GRAY AND PURPLE CONNECTORS AMPLIFIER CONNECT TO OEM RADIO HARNESS REAR FRONT PURPLE (RIGHT REAR) PURPLE/BLACK (RIGHT REAR) GRAY (RIGHT FRONT) GRAY/BLACK (RIGHT FRONT) WHITE (LEFT FRONT) WHITE/BLACK (LEFT FRONT) GREEN (LEFT REAR) GREEN/BLACK (LEFT REAR) CONNECT TO OEM RADIO CONNECTOR TO AMP TURN ON INPUT WHITE dFO2 T-HARNESS (VER 2.0) N.C.
Ford Fusion With dFO2 (version 2.0) 2013-2019 INSTALLATION INSTRUCTIONS For 4-channel amplifier and subwoofer amp • Plug the Data cable into the RCA1 harness and the other end into the Maestro AR. Required : dFO2 t-harness (version 2.0), ACC-RCA1 STEP 3 STEP 1 • Connect all the harnesses to the Maestro AR module. • Remove the factory radio and plug the dFO2 T-harness in line with the radio plug. STEP 4 • Locate the 26 pin secondary harness that was plugged into the OEM radio.
Ford Fusion With dFO2 (version 2.0) 2013-2019 INSTALLATION INSTRUCTIONS TROUBLESHOOTING TIPS: • To reset the module back its factory settings, turn the key to the OFF position then disconnect all connectors from the module. Press and hold the module’s programming button and connect all the connectors back to the module. Wait, the module’s LED will flash RED rapidly (this may take up to 10 seconds). Release the programming button. Wait, the LED will turn solid GREEN for 2 seconds.
Ford Fusion With dFO2 (version 2.0) 2013-2019 WIRING DIAGRAM dFO2 T-HARNESS VERSION 2.0 / 4-CHANNEL AMP AND SUBWOOFER AMP STEP 2 STEP 1 CUT AND REMOVE GRAY AND PURPLE CONNECTORS AMPLIFIER(S) CONNECT TO OEM RADIO HARNESS REAR SUB FRONT PURPLE (RIGHT REAR) PURPLE/BLACK (RIGHT REAR) GRAY (RIGHT FRONT) GRAY/BLACK (RIGHT FRONT) WHITE (LEFT FRONT) WHITE/BLACK (LEFT FRONT) GREEN (LEFT REAR) GREEN/BLACK (LEFT REAR) CONNECT TO OEM RADIO CONNECTOR TO AMP TURN ON INPUT WHITE dFO2 T-HARNESS (VER 2.
Ford Fusion With dFO2 (version 2.0) 2013-2019 INSTALLATION INSTRUCTIONS For subwoofer amp only • Push and hold Volume+ button on the steering wheel. The radio screen will change to FM and will show volume 0. Release the button. (You may also turn the volume knob clockwise instead of using the Volume + button.) Required : dFO2 t-harness (version 2.0), ACC-RCA1 STEP 1 • Screen will show Volume 10 – 20 - 30. • Remove the factory radio and plug the dFO2 T-harness in line with the radio plug.
Ford Fusion With dFO2 (version 2.0) 2013-2019 WIRING DIAGRAM dFO2 T-HARNESS VERSION 2.0 / SUBWOOFER AMP ONLY STEP 2 STEP 1 SUBWOOFER AMPLIFIER CONNECT TO OEM RADIO HARNESS PURPLE GREEN CONNECT TO OEM RADIO CONNECTOR TO AMP TURN ON INPUT dFO2 T-HARNESS (VER 2.0) SECONDARY OEM RADIO CONNECTOR AMP TURN ON OUTPUT 3 N.C. OUTPUT 2 OUTPUT 1 N.C. GRAY WHITE BLACK/WHITE 1 N.C. N.C.
INSTALL GUIDE Ford Mustang 2015-2020 *With dFO2 (version 2.0) ENABLE A SEAMLESS AFTERMARKET AMPLIFIER INSTALLATION, WITHOUT CHANGING YOUR RADIO. PRODUCTS REQUIRED iDatalink Maestro AR Amplifier Replacement Interface iDatalink Maestro DSP-FO2 Installation Harness ACC-RCA1 cable OPTIONAL ACCESSORIES PROGRAMMED FIRMWARE ADS-AR-AS-dFO2 NOTICE: Automotive Data Solutions Inc. (ADS) recommends having this installation performed by a certified technician.
Ford Mustang With dFO2 (version 2.0) 2015-2020 WELCOME Congratulations on the purchase of your iDatalink Maestro AR Amplifier replacement solution. You are now a few simple steps away from enjoying your new car amplifier. Before starting your installation, please ensure that your iDatalink Maestro module is programmed with the correct firmware for your vehicle and that you carefully review the install guide.
Ford Mustang With dFO2 (version 2.0) 2015-2020 INSTALLATION INSTRUCTIONS For 4-channel amplifier only. • Push and hold Volume+ button on the steering wheel. The radio screen will change to FM and will show volume 0. Release the button. (You may also turn the volume knob clockwise instead of using the Volume + button.) Required : dFO2 t-harness (version 2.0), ACC-RCA1 STEP 1 • Screen will show Volume 10 – 20 - 30. The Maestro AR is now locked to this particular vehicle by VIN number.
Ford Mustang With dFO2 (version 2.0) 2015-2020 WIRING DIAGRAM dFO2 T-HARNESS VERSION 2.0 / 4-CHANNEL AMP STEP 2 STEP 1 CUT AND REMOVE GRAY AND PURPLE CONNECTORS AMPLIFIER CONNECT TO OEM RADIO HARNESS REAR FRONT PURPLE (RIGHT REAR) PURPLE/BLACK (RIGHT REAR) GRAY (RIGHT FRONT) GRAY/BLACK (RIGHT FRONT) WHITE (LEFT FRONT) WHITE/BLACK (LEFT FRONT) GREEN (LEFT REAR) GREEN/BLACK (LEFT REAR) CONNECT TO OEM RADIO CONNECTOR TO AMP TURN ON INPUT WHITE dFO2 T-HARNESS (VER 2.0) N.C.
Ford Mustang With dFO2 (version 2.0) 2015-2020 INSTALLATION INSTRUCTIONS For 4-channel amplifier and subwoofer amp • Plug the Data cable into the RCA1 harness and the other end into the Maestro AR. Required : dFO2 t-harness (version 2.0), ACC-RCA1 STEP 3 STEP 1 • Connect all the harnesses to the Maestro AR module. • Remove the factory radio and plug the dFO2 T-harness in line with the radio plug. STEP 4 • Locate the 26 pin secondary harness that was plugged into the OEM radio.
Ford Mustang With dFO2 (version 2.0) 2015-2020 INSTALLATION INSTRUCTIONS TROUBLESHOOTING TIPS: • To reset the module back its factory settings, turn the key to the OFF position then disconnect all connectors from the module. Press and hold the module’s programming button and connect all the connectors back to the module. Wait, the module’s LED will flash RED rapidly (this may take up to 10 seconds). Release the programming button. Wait, the LED will turn solid GREEN for 2 seconds.
Ford Mustang With dFO2 (version 2.0) 2015-2020 WIRING DIAGRAM dFO2 T-HARNESS VERSION 2.0 / 4-CHANNEL AMP AND SUBWOOFER AMP STEP 2 STEP 1 CUT AND REMOVE GRAY AND PURPLE CONNECTORS AMPLIFIER(S) CONNECT TO OEM RADIO HARNESS REAR SUB FRONT PURPLE (RIGHT REAR) PURPLE/BLACK (RIGHT REAR) GRAY (RIGHT FRONT) GRAY/BLACK (RIGHT FRONT) WHITE (LEFT FRONT) WHITE/BLACK (LEFT FRONT) GREEN (LEFT REAR) GREEN/BLACK (LEFT REAR) CONNECT TO OEM RADIO CONNECTOR TO AMP TURN ON INPUT WHITE dFO2 T-HARNESS (VER 2.
Ford Mustang With dFO2 (version 2.0) 2015-2020 INSTALLATION INSTRUCTIONS For subwoofer amp only • Push and hold Volume+ button on the steering wheel. The radio screen will change to FM and will show volume 0. Release the button. (You may also turn the volume knob clockwise instead of using the Volume + button.) Required : dFO2 t-harness (version 2.0), ACC-RCA1 STEP 1 • Screen will show Volume 10 – 20 - 30. • Remove the factory radio and plug the dFO2 T-harness in line with the radio plug.
Ford Mustang With dFO2 (version 2.0) 2015-2020 WIRING DIAGRAM dFO2 T-HARNESS VERSION 2.0 / SUBWOOFER AMP ONLY STEP 2 STEP 1 SUBWOOFER AMPLIFIER CONNECT TO OEM RADIO HARNESS PURPLE GREEN CONNECT TO OEM RADIO CONNECTOR TO AMP TURN ON INPUT dFO2 T-HARNESS (VER 2.0) SECONDARY OEM RADIO CONNECTOR AMP TURN ON OUTPUT 3 N.C. OUTPUT 2 OUTPUT 1 N.C. GRAY WHITE BLACK/WHITE 1 N.C. N.C.
INSTALL GUIDE Ford Taurus 2013-2019 *With dFO2 (version 2.0) ENABLE A SEAMLESS AFTERMARKET AMPLIFIER INSTALLATION, WITHOUT CHANGING YOUR RADIO. PRODUCTS REQUIRED iDatalink Maestro AR Amplifier Replacement Interface iDatalink Maestro DSP-FO2 Installation Harness ACC-RCA1 cable OPTIONAL ACCESSORIES PROGRAMMED FIRMWARE ADS-AR-AS-dFO2 NOTICE: Automotive Data Solutions Inc. (ADS) recommends having this installation performed by a certified technician.
Ford Taurus With dFO2 (version 2.0) 2013-2019 WELCOME Congratulations on the purchase of your iDatalink Maestro AR Amplifier replacement solution. You are now a few simple steps away from enjoying your new car amplifier. Before starting your installation, please ensure that your iDatalink Maestro module is programmed with the correct firmware for your vehicle and that you carefully review the install guide.
Ford Taurus With dFO2 (version 2.0) 2013-2019 INSTALLATION INSTRUCTIONS For 4-channel amplifier only. • Push and hold Volume+ button on the steering wheel. The radio screen will change to FM and will show volume 0. Release the button. (You may also turn the volume knob clockwise instead of using the Volume + button.) Required : dFO2 t-harness (version 2.0), ACC-RCA1 STEP 1 • Screen will show Volume 10 – 20 - 30. The Maestro AR is now locked to this particular vehicle by VIN number.
Ford Taurus With dFO2 (version 2.0) 2013-2019 WIRING DIAGRAM dFO2 T-HARNESS VERSION 2.0 / 4-CHANNEL AMP STEP 2 STEP 1 CUT AND REMOVE GRAY AND PURPLE CONNECTORS AMPLIFIER CONNECT TO OEM RADIO HARNESS REAR FRONT PURPLE (RIGHT REAR) PURPLE/BLACK (RIGHT REAR) GRAY (RIGHT FRONT) GRAY/BLACK (RIGHT FRONT) WHITE (LEFT FRONT) WHITE/BLACK (LEFT FRONT) GREEN (LEFT REAR) GREEN/BLACK (LEFT REAR) CONNECT TO OEM RADIO CONNECTOR TO AMP TURN ON INPUT WHITE dFO2 T-HARNESS (VER 2.0) N.C.
Ford Taurus With dFO2 (version 2.0) 2013-2019 INSTALLATION INSTRUCTIONS For 4-channel amplifier and subwoofer amp • Plug the Data cable into the RCA1 harness and the other end into the Maestro AR. Required : dFO2 t-harness (version 2.0), ACC-RCA1 STEP 3 STEP 1 • Connect all the harnesses to the Maestro AR module. • Remove the factory radio and plug the dFO2 T-harness in line with the radio plug. STEP 4 • Locate the 26 pin secondary harness that was plugged into the OEM radio.
Ford Taurus With dFO2 (version 2.0) 2013-2019 INSTALLATION INSTRUCTIONS TROUBLESHOOTING TIPS: • To reset the module back its factory settings, turn the key to the OFF position then disconnect all connectors from the module. Press and hold the module’s programming button and connect all the connectors back to the module. Wait, the module’s LED will flash RED rapidly (this may take up to 10 seconds). Release the programming button. Wait, the LED will turn solid GREEN for 2 seconds.
Ford Taurus With dFO2 (version 2.0) 2013-2019 WIRING DIAGRAM dFO2 T-HARNESS VERSION 2.0 / 4-CHANNEL AMP AND SUBWOOFER AMP STEP 2 STEP 1 CUT AND REMOVE GRAY AND PURPLE CONNECTORS AMPLIFIER(S) CONNECT TO OEM RADIO HARNESS REAR SUB FRONT PURPLE (RIGHT REAR) PURPLE/BLACK (RIGHT REAR) GRAY (RIGHT FRONT) GRAY/BLACK (RIGHT FRONT) WHITE (LEFT FRONT) WHITE/BLACK (LEFT FRONT) GREEN (LEFT REAR) GREEN/BLACK (LEFT REAR) CONNECT TO OEM RADIO CONNECTOR TO AMP TURN ON INPUT WHITE dFO2 T-HARNESS (VER 2.
Ford Taurus With dFO2 (version 2.0) 2013-2019 INSTALLATION INSTRUCTIONS For subwoofer amp only • Push and hold Volume+ button on the steering wheel. The radio screen will change to FM and will show volume 0. Release the button. (You may also turn the volume knob clockwise instead of using the Volume + button.) Required : dFO2 t-harness (version 2.0), ACC-RCA1 STEP 1 • Screen will show Volume 10 – 20 - 30. • Remove the factory radio and plug the dFO2 T-harness in line with the radio plug.
Ford Taurus With dFO2 (version 2.0) 2013-2019 WIRING DIAGRAM dFO2 T-HARNESS VERSION 2.0 / SUBWOOFER AMP ONLY STEP 2 STEP 1 SUBWOOFER AMPLIFIER CONNECT TO OEM RADIO HARNESS PURPLE GREEN CONNECT TO OEM RADIO CONNECTOR TO AMP TURN ON INPUT dFO2 T-HARNESS (VER 2.0) SECONDARY OEM RADIO CONNECTOR AMP TURN ON OUTPUT 3 N.C. OUTPUT 2 OUTPUT 1 N.C. GRAY WHITE BLACK/WHITE 1 N.C. N.C.
INSTALL GUIDE Ford Transit Connect 2014-2019 *With dFO2 (version 2.0) ENABLE A SEAMLESS AFTERMARKET AMPLIFIER INSTALLATION, WITHOUT CHANGING YOUR RADIO. PRODUCTS REQUIRED iDatalink Maestro AR Amplifier Replacement Interface iDatalink Maestro DSP-FO2 Installation Harness ACC-RCA1 cable OPTIONAL ACCESSORIES PROGRAMMED FIRMWARE ADS-AR-AS-dFO2 NOTICE: Automotive Data Solutions Inc. (ADS) recommends having this installation performed by a certified technician.
Ford Transit Connect With dFO2 (version 2.0) 2014-2019 WELCOME Congratulations on the purchase of your iDatalink Maestro AR Amplifier replacement solution. You are now a few simple steps away from enjoying your new car amplifier. Before starting your installation, please ensure that your iDatalink Maestro module is programmed with the correct firmware for your vehicle and that you carefully review the install guide.
Ford Transit Connect With dFO2 (version 2.0) 2014-2019 INSTALLATION INSTRUCTIONS For 4-channel amplifier only. • Push and hold Volume+ button on the steering wheel. The radio screen will change to FM and will show volume 0. Release the button. (You may also turn the volume knob clockwise instead of using the Volume + button.) Required : dFO2 t-harness (version 2.0), ACC-RCA1 STEP 1 • Screen will show Volume 10 – 20 - 30. The Maestro AR is now locked to this particular vehicle by VIN number.
Ford Transit Connect With dFO2 (version 2.0) 2014-2019 WIRING DIAGRAM dFO2 T-HARNESS VERSION 2.0 / 4-CHANNEL AMP STEP 2 STEP 1 CUT AND REMOVE GRAY AND PURPLE CONNECTORS AMPLIFIER CONNECT TO OEM RADIO HARNESS REAR FRONT PURPLE (RIGHT REAR) PURPLE/BLACK (RIGHT REAR) GRAY (RIGHT FRONT) GRAY/BLACK (RIGHT FRONT) WHITE (LEFT FRONT) WHITE/BLACK (LEFT FRONT) GREEN (LEFT REAR) GREEN/BLACK (LEFT REAR) CONNECT TO OEM RADIO CONNECTOR TO AMP TURN ON INPUT WHITE dFO2 T-HARNESS (VER 2.0) N.C.
Ford Transit Connect With dFO2 (version 2.0) 2014-2019 INSTALLATION INSTRUCTIONS For 4-channel amplifier and subwoofer amp • Plug the Data cable into the RCA1 harness and the other end into the Maestro AR. Required : dFO2 t-harness (version 2.0), ACC-RCA1 STEP 3 STEP 1 • Connect all the harnesses to the Maestro AR module. • Remove the factory radio and plug the dFO2 T-harness in line with the radio plug. STEP 4 • Locate the 26 pin secondary harness that was plugged into the OEM radio.
Ford Transit Connect With dFO2 (version 2.0) 2014-2019 INSTALLATION INSTRUCTIONS TROUBLESHOOTING TIPS: • To reset the module back its factory settings, turn the key to the OFF position then disconnect all connectors from the module. Press and hold the module’s programming button and connect all the connectors back to the module. Wait, the module’s LED will flash RED rapidly (this may take up to 10 seconds). Release the programming button. Wait, the LED will turn solid GREEN for 2 seconds.
Ford Transit Connect With dFO2 (version 2.0) 2014-2019 WIRING DIAGRAM dFO2 T-HARNESS VERSION 2.
Ford Transit Connect With dFO2 (version 2.0) 2014-2019 INSTALLATION INSTRUCTIONS For subwoofer amp only • Push and hold Volume+ button on the steering wheel. The radio screen will change to FM and will show volume 0. Release the button. (You may also turn the volume knob clockwise instead of using the Volume + button.) Required : dFO2 t-harness (version 2.0), ACC-RCA1 STEP 1 • Screen will show Volume 10 – 20 - 30. • Remove the factory radio and plug the dFO2 T-harness in line with the radio plug.
Ford Transit Connect With dFO2 (version 2.0) 2014-2019 WIRING DIAGRAM dFO2 T-HARNESS VERSION 2.0 / SUBWOOFER AMP ONLY STEP 2 STEP 1 SUBWOOFER AMPLIFIER CONNECT TO OEM RADIO HARNESS PURPLE GREEN CONNECT TO OEM RADIO CONNECTOR TO AMP TURN ON INPUT dFO2 T-HARNESS (VER 2.0) SECONDARY OEM RADIO CONNECTOR AMP TURN ON OUTPUT 3 N.C. OUTPUT 2 OUTPUT 1 N.C. GRAY WHITE BLACK/WHITE 1 N.C. N.C.
INSTALL GUIDE Ford Transit 2015-2019 *With dFO2 (version 2.0) ENABLE A SEAMLESS AFTERMARKET AMPLIFIER INSTALLATION, WITHOUT CHANGING YOUR RADIO. PRODUCTS REQUIRED iDatalink Maestro AR Amplifier Replacement Interface iDatalink Maestro DSP-FO2 Installation Harness ACC-RCA1 cable OPTIONAL ACCESSORIES PROGRAMMED FIRMWARE ADS-AR-AS-dFO2 NOTICE: Automotive Data Solutions Inc. (ADS) recommends having this installation performed by a certified technician.
Ford Transit With dFO2 (version 2.0) 2015-2019 WELCOME Congratulations on the purchase of your iDatalink Maestro AR Amplifier replacement solution. You are now a few simple steps away from enjoying your new car amplifier. Before starting your installation, please ensure that your iDatalink Maestro module is programmed with the correct firmware for your vehicle and that you carefully review the install guide.
Ford Transit With dFO2 (version 2.0) 2015-2019 INSTALLATION INSTRUCTIONS For 4-channel amplifier only. • Push and hold Volume+ button on the steering wheel. The radio screen will change to FM and will show volume 0. Release the button. (You may also turn the volume knob clockwise instead of using the Volume + button.) Required : dFO2 t-harness (version 2.0), ACC-RCA1 STEP 1 • Screen will show Volume 10 – 20 - 30. The Maestro AR is now locked to this particular vehicle by VIN number.
Ford Transit With dFO2 (version 2.0) 2015-2019 WIRING DIAGRAM dFO2 T-HARNESS VERSION 2.0 / 4-CHANNEL AMP STEP 2 STEP 1 CUT AND REMOVE GRAY AND PURPLE CONNECTORS AMPLIFIER CONNECT TO OEM RADIO HARNESS REAR FRONT PURPLE (RIGHT REAR) PURPLE/BLACK (RIGHT REAR) GRAY (RIGHT FRONT) GRAY/BLACK (RIGHT FRONT) WHITE (LEFT FRONT) WHITE/BLACK (LEFT FRONT) GREEN (LEFT REAR) GREEN/BLACK (LEFT REAR) CONNECT TO OEM RADIO CONNECTOR TO AMP TURN ON INPUT WHITE dFO2 T-HARNESS (VER 2.0) N.C.
Ford Transit With dFO2 (version 2.0) 2015-2019 INSTALLATION INSTRUCTIONS For 4-channel amplifier and subwoofer amp • Plug the Data cable into the RCA1 harness and the other end into the Maestro AR. Required : dFO2 t-harness (version 2.0), ACC-RCA1 STEP 3 STEP 1 • Connect all the harnesses to the Maestro AR module. • Remove the factory radio and plug the dFO2 T-harness in line with the radio plug. STEP 4 • Locate the 26 pin secondary harness that was plugged into the OEM radio.
Ford Transit With dFO2 (version 2.0) 2015-2019 INSTALLATION INSTRUCTIONS TROUBLESHOOTING TIPS: • To reset the module back its factory settings, turn the key to the OFF position then disconnect all connectors from the module. Press and hold the module’s programming button and connect all the connectors back to the module. Wait, the module’s LED will flash RED rapidly (this may take up to 10 seconds). Release the programming button. Wait, the LED will turn solid GREEN for 2 seconds.
Ford Transit With dFO2 (version 2.0) 2015-2019 WIRING DIAGRAM dFO2 T-HARNESS VERSION 2.0 / 4-CHANNEL AMP AND SUBWOOFER AMP STEP 2 STEP 1 CUT AND REMOVE GRAY AND PURPLE CONNECTORS AMPLIFIER(S) CONNECT TO OEM RADIO HARNESS REAR SUB FRONT PURPLE (RIGHT REAR) PURPLE/BLACK (RIGHT REAR) GRAY (RIGHT FRONT) GRAY/BLACK (RIGHT FRONT) WHITE (LEFT FRONT) WHITE/BLACK (LEFT FRONT) GREEN (LEFT REAR) GREEN/BLACK (LEFT REAR) CONNECT TO OEM RADIO CONNECTOR TO AMP TURN ON INPUT WHITE dFO2 T-HARNESS (VER 2.
Ford Transit With dFO2 (version 2.0) 2015-2019 INSTALLATION INSTRUCTIONS For subwoofer amp only • Push and hold Volume+ button on the steering wheel. The radio screen will change to FM and will show volume 0. Release the button. (You may also turn the volume knob clockwise instead of using the Volume + button.) Required : dFO2 t-harness (version 2.0), ACC-RCA1 STEP 1 • Screen will show Volume 10 – 20 - 30. • Remove the factory radio and plug the dFO2 T-harness in line with the radio plug.
Ford Transit With dFO2 (version 2.0) 2015-2019 WIRING DIAGRAM dFO2 T-HARNESS VERSION 2.0 / SUBWOOFER AMP ONLY STEP 2 STEP 1 SUBWOOFER AMPLIFIER CONNECT TO OEM RADIO HARNESS PURPLE GREEN CONNECT TO OEM RADIO CONNECTOR TO AMP TURN ON INPUT dFO2 T-HARNESS (VER 2.0) SECONDARY OEM RADIO CONNECTOR AMP TURN ON OUTPUT 3 N.C. OUTPUT 2 OUTPUT 1 N.C. GRAY WHITE BLACK/WHITE 1 N.C. N.C.
INSTALL GUIDE Ford Edge 2011-2019 ENABLE A SEAMLESS AFTERMARKET AMPLIFIER INSTALLATION, WITHOUT CHANGING YOUR RADIO. PRODUCTS REQUIRED Rockford Fosgate DSR1 iDatalink Maestro DSP-FO2 Installation Harness OPTIONAL ACCESSORIES PROGRAMMED FIRMWARE ADS-AR-DC-dFO2 NOTICE: Automotive Data Solutions Inc. (ADS) recommends having this installation performed by a certified technician. Logos and trademarks used here in are the properties of their respective owners.
Ford Edge 2011-2019 WELCOME Congratulations on the purchase of your iDatalink Maestro / Rockford Fosgate DSR1 Amplifier replacement solution. You are now a few simple steps away from enjoying your new car amplifier. TABLE OF CONTENTS Installation Instructions 3 Wiring Diagram 4 Before starting your installation, please ensure that your module is programmed with the correct firmware for your vehicle and that you carefully review the install guide. NEED HELP? 1 866 427-2999 maestro.support@idatalink.
Ford Edge 2011-2019 INSTALLATION INSTRUCTIONS CHIME ADJUSTMENT STEP 1 Front chime • Remove the factory radio and plug the dFO2 T-harness in line with the radio plug. Set Audio source to OFF. Activate front chime (Ex: door chime). STEP 2 Adjust using the radio’s volume knob. • Connect the wires from the dFO2 T-harness to the aftermarket amplifier.
Ford Edge 2011-2019 WIRING DIAGRAM STEP 2 STEP 1 AFTERMARKET AMPLIFIER WHITE (LEFT FRONT) WHITE/BLACK (LEFT FRONT) GRAY (RIGHT FRONT) GRAY/BLACK (RIGHT FRONT) GREEN (LEFT REAR) GREEN/BLACK (LEFT REAR) PURPLE (RIGHT REAR) PURPLE/BLACK (RIGHT REAR) CONNECT TO OEM RADIO HARNESS CONNECT TO OEM RADIO CONNECTOR dFO2 T-HARNESS STEP 3 DSR1 MODULE (NC) AMP TURN ON RCA CABLES LEFT FRONT OUT 1 RIGHT FRONT OUT 2 LEFT SPARE OUT 3 RIGHT SPARE OUT 4 LEFT REAR OUT 5 RIGHT REAR OUT 6 LEFT SUB OUT 7 RIGHT SUB OUT
INSTALL GUIDE Ford Escape 2013-2019 ENABLE A SEAMLESS AFTERMARKET AMPLIFIER INSTALLATION, WITHOUT CHANGING YOUR RADIO. PRODUCTS REQUIRED Rockford Fosgate DSR1 iDatalink Maestro DSP-FO2 Installation Harness OPTIONAL ACCESSORIES PROGRAMMED FIRMWARE ADS-AR-DC-dFO2 NOTICE: Automotive Data Solutions Inc. (ADS) recommends having this installation performed by a certified technician. Logos and trademarks used here in are the properties of their respective owners.
Ford Escape 2013-2019 WELCOME Congratulations on the purchase of your iDatalink Maestro / Rockford Fosgate DSR1 Amplifier replacement solution. You are now a few simple steps away from enjoying your new car amplifier. TABLE OF CONTENTS Installation Instructions 3 Wiring Diagram 4 Before starting your installation, please ensure that your module is programmed with the correct firmware for your vehicle and that you carefully review the install guide. NEED HELP? 1 866 427-2999 maestro.support@idatalink.
Ford Escape 2013-2019 INSTALLATION INSTRUCTIONS CHIME ADJUSTMENT STEP 1 Front chime • Remove the factory radio and plug the dFO2 T-harness in line with the radio plug. Set Audio source to OFF. Activate front chime (Ex: door chime). STEP 2 Adjust using the radio’s volume knob. • Connect the wires from the dFO2 T-harness to the aftermarket amplifier.
Ford Escape 2013-2019 WIRING DIAGRAM STEP 2 STEP 1 AFTERMARKET AMPLIFIER WHITE (LEFT FRONT) WHITE/BLACK (LEFT FRONT) GRAY (RIGHT FRONT) GRAY/BLACK (RIGHT FRONT) GREEN (LEFT REAR) GREEN/BLACK (LEFT REAR) PURPLE (RIGHT REAR) PURPLE/BLACK (RIGHT REAR) CONNECT TO OEM RADIO HARNESS CONNECT TO OEM RADIO CONNECTOR dFO2 T-HARNESS STEP 3 DSR1 MODULE (NC) AMP TURN ON RCA CABLES LEFT FRONT OUT 1 RIGHT FRONT OUT 2 LEFT SPARE OUT 3 RIGHT SPARE OUT 4 LEFT REAR OUT 5 RIGHT REAR OUT 6 LEFT SUB OUT 7 RIGHT SUB OU
INSTALL GUIDE Ford Expedition 2015-2020 ENABLE A SEAMLESS AFTERMARKET AMPLIFIER INSTALLATION, WITHOUT CHANGING YOUR RADIO. PRODUCTS REQUIRED Rockford Fosgate DSR1 iDatalink Maestro DSP-FO2 Installation Harness OPTIONAL ACCESSORIES PROGRAMMED FIRMWARE ADS-AR-DC-dFO2 NOTICE: Automotive Data Solutions Inc. (ADS) recommends having this installation performed by a certified technician. Logos and trademarks used here in are the properties of their respective owners.
Ford Expedition 2015-2020 WELCOME Congratulations on the purchase of your iDatalink Maestro / Rockford Fosgate DSR1 Amplifier replacement solution. You are now a few simple steps away from enjoying your new car amplifier. TABLE OF CONTENTS Installation Instructions 3 Wiring Diagram 4 Before starting your installation, please ensure that your module is programmed with the correct firmware for your vehicle and that you carefully review the install guide. NEED HELP? 1 866 427-2999 maestro.
Ford Expedition 2015-2020 INSTALLATION INSTRUCTIONS CHIME ADJUSTMENT STEP 1 Front chime • Remove the factory radio and plug the dFO2 T-harness in line with the radio plug. Set Audio source to OFF. Activate front chime (Ex: door chime). STEP 2 Adjust using the radio’s volume knob. • Connect the wires from the dFO2 T-harness to the aftermarket amplifier.
Ford Expedition 2015-2020 WIRING DIAGRAM STEP 2 STEP 1 AFTERMARKET AMPLIFIER WHITE (LEFT FRONT) WHITE/BLACK (LEFT FRONT) GRAY (RIGHT FRONT) GRAY/BLACK (RIGHT FRONT) GREEN (LEFT REAR) GREEN/BLACK (LEFT REAR) PURPLE (RIGHT REAR) PURPLE/BLACK (RIGHT REAR) CONNECT TO OEM RADIO HARNESS CONNECT TO OEM RADIO CONNECTOR dFO2 T-HARNESS STEP 3 DSR1 MODULE (NC) AMP TURN ON RCA CABLES LEFT FRONT OUT 1 RIGHT FRONT OUT 2 LEFT SPARE OUT 3 RIGHT SPARE OUT 4 LEFT REAR OUT 5 RIGHT REAR OUT 6 LEFT SUB OUT 7 RIGHT SU
INSTALL GUIDE Ford Explorer 2011-2019 ENABLE A SEAMLESS AFTERMARKET AMPLIFIER INSTALLATION, WITHOUT CHANGING YOUR RADIO. PRODUCTS REQUIRED Rockford Fosgate DSR1 iDatalink Maestro DSP-FO2 Installation Harness OPTIONAL ACCESSORIES PROGRAMMED FIRMWARE ADS-AR-DC-dFO2 NOTICE: Automotive Data Solutions Inc. (ADS) recommends having this installation performed by a certified technician. Logos and trademarks used here in are the properties of their respective owners.
Ford Explorer 2011-2019 WELCOME Congratulations on the purchase of your iDatalink Maestro / Rockford Fosgate DSR1 Amplifier replacement solution. You are now a few simple steps away from enjoying your new car amplifier. TABLE OF CONTENTS Installation Instructions 3 Wiring Diagram 4 Before starting your installation, please ensure that your module is programmed with the correct firmware for your vehicle and that you carefully review the install guide. NEED HELP? 1 866 427-2999 maestro.
Ford Explorer 2011-2019 INSTALLATION INSTRUCTIONS CHIME ADJUSTMENT STEP 1 Front chime • Remove the factory radio and plug the dFO2 T-harness in line with the radio plug. Set Audio source to OFF. Activate front chime (Ex: door chime). STEP 2 Adjust using the radio’s volume knob. • Connect the wires from the dFO2 T-harness to the aftermarket amplifier.
Ford Explorer 2011-2019 WIRING DIAGRAM STEP 2 STEP 1 AFTERMARKET AMPLIFIER WHITE (LEFT FRONT) WHITE/BLACK (LEFT FRONT) GRAY (RIGHT FRONT) GRAY/BLACK (RIGHT FRONT) GREEN (LEFT REAR) GREEN/BLACK (LEFT REAR) PURPLE (RIGHT REAR) PURPLE/BLACK (RIGHT REAR) CONNECT TO OEM RADIO HARNESS CONNECT TO OEM RADIO CONNECTOR dFO2 T-HARNESS STEP 3 DSR1 MODULE (NC) AMP TURN ON RCA CABLES LEFT FRONT OUT 1 RIGHT FRONT OUT 2 LEFT SPARE OUT 3 RIGHT SPARE OUT 4 LEFT REAR OUT 5 RIGHT REAR OUT 6 LEFT SUB OUT 7 RIGHT SUB
INSTALL GUIDE Ford F Super Duty 2017-2019 ENABLE A SEAMLESS AFTERMARKET AMPLIFIER INSTALLATION, WITHOUT CHANGING YOUR RADIO. PRODUCTS REQUIRED Rockford Fosgate DSR1 iDatalink Maestro DSP-FO2 Installation Harness OPTIONAL ACCESSORIES PROGRAMMED FIRMWARE ADS-AR-DC-dFO2 NOTICE: Automotive Data Solutions Inc. (ADS) recommends having this installation performed by a certified technician. Logos and trademarks used here in are the properties of their respective owners.
Ford F Super Duty 2017-2019 WELCOME Congratulations on the purchase of your iDatalink Maestro / Rockford Fosgate DSR1 Amplifier replacement solution. You are now a few simple steps away from enjoying your new car amplifier. TABLE OF CONTENTS Installation Instructions 3 Wiring Diagram 4 Before starting your installation, please ensure that your module is programmed with the correct firmware for your vehicle and that you carefully review the install guide. NEED HELP? 1 866 427-2999 maestro.
Ford F Super Duty 2017-2019 INSTALLATION INSTRUCTIONS CHIME ADJUSTMENT STEP 1 Front chime • Remove the factory radio and plug the dFO2 T-harness in line with the radio plug. Set Audio source to OFF. Activate front chime (Ex: door chime). STEP 2 Adjust using the radio’s volume knob. • Connect the wires from the dFO2 T-harness to the aftermarket amplifier.
Ford F Super Duty 2017-2019 WIRING DIAGRAM STEP 2 STEP 1 AFTERMARKET AMPLIFIER WHITE (LEFT FRONT) WHITE/BLACK (LEFT FRONT) GRAY (RIGHT FRONT) GRAY/BLACK (RIGHT FRONT) GREEN (LEFT REAR) GREEN/BLACK (LEFT REAR) PURPLE (RIGHT REAR) PURPLE/BLACK (RIGHT REAR) CONNECT TO OEM RADIO HARNESS CONNECT TO OEM RADIO CONNECTOR dFO2 T-HARNESS STEP 3 DSR1 MODULE (NC) AMP TURN ON RCA CABLES LEFT FRONT OUT 1 RIGHT FRONT OUT 2 LEFT SPARE OUT 3 RIGHT SPARE OUT 4 LEFT REAR OUT 5 RIGHT REAR OUT 6 LEFT SUB OUT 7 RIGHT
INSTALL GUIDE Ford F150 2013-2019 ENABLE A SEAMLESS AFTERMARKET AMPLIFIER INSTALLATION, WITHOUT CHANGING YOUR RADIO. PRODUCTS REQUIRED Rockford Fosgate DSR1 iDatalink Maestro DSP-FO2 Installation Harness OPTIONAL ACCESSORIES PROGRAMMED FIRMWARE ADS-AR-DC-dFO2 NOTICE: Automotive Data Solutions Inc. (ADS) recommends having this installation performed by a certified technician. Logos and trademarks used here in are the properties of their respective owners.
Ford F150 2013-2019 WELCOME Congratulations on the purchase of your iDatalink Maestro / Rockford Fosgate DSR1 Amplifier replacement solution. You are now a few simple steps away from enjoying your new car amplifier. TABLE OF CONTENTS Installation Instructions 3 Wiring Diagram 4 Before starting your installation, please ensure that your module is programmed with the correct firmware for your vehicle and that you carefully review the install guide. NEED HELP? 1 866 427-2999 maestro.support@idatalink.
Ford F150 2013-2019 INSTALLATION INSTRUCTIONS CHIME ADJUSTMENT STEP 1 Front chime • Remove the factory radio and plug the dFO2 T-harness in line with the radio plug. Set Audio source to OFF. Activate front chime (Ex: door chime). STEP 2 Adjust using the radio’s volume knob. • Connect the wires from the dFO2 T-harness to the aftermarket amplifier.
Ford F150 2013-2019 WIRING DIAGRAM STEP 2 STEP 1 AFTERMARKET AMPLIFIER WHITE (LEFT FRONT) WHITE/BLACK (LEFT FRONT) GRAY (RIGHT FRONT) GRAY/BLACK (RIGHT FRONT) GREEN (LEFT REAR) GREEN/BLACK (LEFT REAR) PURPLE (RIGHT REAR) PURPLE/BLACK (RIGHT REAR) CONNECT TO OEM RADIO HARNESS CONNECT TO OEM RADIO CONNECTOR dFO2 T-HARNESS STEP 3 DSR1 MODULE (NC) AMP TURN ON RCA CABLES LEFT FRONT OUT 1 RIGHT FRONT OUT 2 LEFT SPARE OUT 3 RIGHT SPARE OUT 4 LEFT REAR OUT 5 RIGHT REAR OUT 6 LEFT SUB OUT 7 RIGHT SUB OUT
INSTALL GUIDE Ford Focus 2012-2018 ENABLE A SEAMLESS AFTERMARKET AMPLIFIER INSTALLATION, WITHOUT CHANGING YOUR RADIO. PRODUCTS REQUIRED Rockford Fosgate DSR1 iDatalink Maestro DSP-FO2 Installation Harness OPTIONAL ACCESSORIES PROGRAMMED FIRMWARE ADS-AR-DC-dFO2 NOTICE: Automotive Data Solutions Inc. (ADS) recommends having this installation performed by a certified technician. Logos and trademarks used here in are the properties of their respective owners.
Ford Focus 2012-2018 WELCOME Congratulations on the purchase of your iDatalink Maestro / Rockford Fosgate DSR1 Amplifier replacement solution. You are now a few simple steps away from enjoying your new car amplifier. TABLE OF CONTENTS Installation Instructions 3 Wiring Diagram 4 Before starting your installation, please ensure that your module is programmed with the correct firmware for your vehicle and that you carefully review the install guide. NEED HELP? 1 866 427-2999 maestro.support@idatalink.
Ford Focus 2012-2018 INSTALLATION INSTRUCTIONS CHIME ADJUSTMENT STEP 1 Front chime • Remove the factory radio and plug the dFO2 T-harness in line with the radio plug. Set Audio source to OFF. Activate front chime (Ex: door chime). STEP 2 Adjust using the radio’s volume knob. • Connect the wires from the dFO2 T-harness to the aftermarket amplifier.
Ford Focus 2012-2018 WIRING DIAGRAM STEP 2 STEP 1 AFTERMARKET AMPLIFIER WHITE (LEFT FRONT) WHITE/BLACK (LEFT FRONT) GRAY (RIGHT FRONT) GRAY/BLACK (RIGHT FRONT) GREEN (LEFT REAR) GREEN/BLACK (LEFT REAR) PURPLE (RIGHT REAR) PURPLE/BLACK (RIGHT REAR) CONNECT TO OEM RADIO HARNESS CONNECT TO OEM RADIO CONNECTOR dFO2 T-HARNESS STEP 3 DSR1 MODULE (NC) AMP TURN ON RCA CABLES LEFT FRONT OUT 1 RIGHT FRONT OUT 2 LEFT SPARE OUT 3 RIGHT SPARE OUT 4 LEFT REAR OUT 5 RIGHT REAR OUT 6 LEFT SUB OUT 7 RIGHT SUB OUT
INSTALL GUIDE Ford Fusion 2013-2019 ENABLE A SEAMLESS AFTERMARKET AMPLIFIER INSTALLATION, WITHOUT CHANGING YOUR RADIO. PRODUCTS REQUIRED Rockford Fosgate DSR1 iDatalink Maestro DSP-FO2 Installation Harness OPTIONAL ACCESSORIES PROGRAMMED FIRMWARE ADS-AR-DC-dFO2 NOTICE: Automotive Data Solutions Inc. (ADS) recommends having this installation performed by a certified technician. Logos and trademarks used here in are the properties of their respective owners.
Ford Fusion 2013-2019 WELCOME Congratulations on the purchase of your iDatalink Maestro / Rockford Fosgate DSR1 Amplifier replacement solution. You are now a few simple steps away from enjoying your new car amplifier. TABLE OF CONTENTS Installation Instructions 3 Wiring Diagram 4 Before starting your installation, please ensure that your module is programmed with the correct firmware for your vehicle and that you carefully review the install guide. NEED HELP? 1 866 427-2999 maestro.support@idatalink.
Ford Fusion 2013-2019 INSTALLATION INSTRUCTIONS CHIME ADJUSTMENT STEP 1 Front chime • Remove the factory radio and plug the dFO2 T-harness in line with the radio plug. Set Audio source to OFF. Activate front chime (Ex: door chime). STEP 2 Adjust using the radio’s volume knob. • Connect the wires from the dFO2 T-harness to the aftermarket amplifier.
Ford Fusion 2013-2019 WIRING DIAGRAM STEP 2 STEP 1 AFTERMARKET AMPLIFIER WHITE (LEFT FRONT) WHITE/BLACK (LEFT FRONT) GRAY (RIGHT FRONT) GRAY/BLACK (RIGHT FRONT) GREEN (LEFT REAR) GREEN/BLACK (LEFT REAR) PURPLE (RIGHT REAR) PURPLE/BLACK (RIGHT REAR) CONNECT TO OEM RADIO HARNESS CONNECT TO OEM RADIO CONNECTOR dFO2 T-HARNESS STEP 3 DSR1 MODULE (NC) AMP TURN ON RCA CABLES LEFT FRONT OUT 1 RIGHT FRONT OUT 2 LEFT SPARE OUT 3 RIGHT SPARE OUT 4 LEFT REAR OUT 5 RIGHT REAR OUT 6 LEFT SUB OUT 7 RIGHT SUB OU
INSTALL GUIDE Ford Mustang 2015-2019 ENABLE A SEAMLESS AFTERMARKET AMPLIFIER INSTALLATION, WITHOUT CHANGING YOUR RADIO. PRODUCTS REQUIRED Rockford Fosgate DSR1 iDatalink Maestro DSP-FO2 Installation Harness OPTIONAL ACCESSORIES PROGRAMMED FIRMWARE ADS-AR-DC-dFO2 NOTICE: Automotive Data Solutions Inc. (ADS) recommends having this installation performed by a certified technician. Logos and trademarks used here in are the properties of their respective owners.
Ford Mustang 2015-2019 WELCOME Congratulations on the purchase of your iDatalink Maestro / Rockford Fosgate DSR1 Amplifier replacement solution. You are now a few simple steps away from enjoying your new car amplifier. TABLE OF CONTENTS Installation Instructions 3 Wiring Diagram 4 Before starting your installation, please ensure that your module is programmed with the correct firmware for your vehicle and that you carefully review the install guide. NEED HELP? 1 866 427-2999 maestro.
Ford Mustang 2015-2019 INSTALLATION INSTRUCTIONS CHIME ADJUSTMENT STEP 1 Front chime • Remove the factory radio and plug the dFO2 T-harness in line with the radio plug. Set Audio source to OFF. Activate front chime (Ex: door chime). STEP 2 Adjust using the radio’s volume knob. • Connect the wires from the dFO2 T-harness to the aftermarket amplifier.
Ford Mustang 2015-2019 WIRING DIAGRAM STEP 2 STEP 1 AFTERMARKET AMPLIFIER WHITE (LEFT FRONT) WHITE/BLACK (LEFT FRONT) GRAY (RIGHT FRONT) GRAY/BLACK (RIGHT FRONT) GREEN (LEFT REAR) GREEN/BLACK (LEFT REAR) PURPLE (RIGHT REAR) PURPLE/BLACK (RIGHT REAR) CONNECT TO OEM RADIO HARNESS CONNECT TO OEM RADIO CONNECTOR dFO2 T-HARNESS STEP 3 DSR1 MODULE (NC) AMP TURN ON RCA CABLES LEFT FRONT OUT 1 RIGHT FRONT OUT 2 LEFT SPARE OUT 3 RIGHT SPARE OUT 4 LEFT REAR OUT 5 RIGHT REAR OUT 6 LEFT SUB OUT 7 RIGHT SUB O
INSTALL GUIDE Ford Taurus 2013-2019 ENABLE A SEAMLESS AFTERMARKET AMPLIFIER INSTALLATION, WITHOUT CHANGING YOUR RADIO. PRODUCTS REQUIRED Rockford Fosgate DSR1 iDatalink Maestro DSP-FO2 Installation Harness OPTIONAL ACCESSORIES PROGRAMMED FIRMWARE ADS-AR-DC-dFO2 NOTICE: Automotive Data Solutions Inc. (ADS) recommends having this installation performed by a certified technician. Logos and trademarks used here in are the properties of their respective owners.
Ford Taurus 2013-2019 WELCOME Congratulations on the purchase of your iDatalink Maestro / Rockford Fosgate DSR1 Amplifier replacement solution. You are now a few simple steps away from enjoying your new car amplifier. TABLE OF CONTENTS Installation Instructions 3 Wiring Diagram 4 Before starting your installation, please ensure that your module is programmed with the correct firmware for your vehicle and that you carefully review the install guide. NEED HELP? 1 866 427-2999 maestro.support@idatalink.
Ford Taurus 2013-2019 INSTALLATION INSTRUCTIONS CHIME ADJUSTMENT STEP 1 Front chime • Remove the factory radio and plug the dFO2 T-harness in line with the radio plug. Set Audio source to OFF. Activate front chime (Ex: door chime). STEP 2 Adjust using the radio’s volume knob. • Connect the wires from the dFO2 T-harness to the aftermarket amplifier.
Ford Taurus 2013-2019 WIRING DIAGRAM STEP 2 STEP 1 AFTERMARKET AMPLIFIER WHITE (LEFT FRONT) WHITE/BLACK (LEFT FRONT) GRAY (RIGHT FRONT) GRAY/BLACK (RIGHT FRONT) GREEN (LEFT REAR) GREEN/BLACK (LEFT REAR) PURPLE (RIGHT REAR) PURPLE/BLACK (RIGHT REAR) CONNECT TO OEM RADIO HARNESS CONNECT TO OEM RADIO CONNECTOR dFO2 T-HARNESS STEP 3 DSR1 MODULE (NC) AMP TURN ON RCA CABLES LEFT FRONT OUT 1 RIGHT FRONT OUT 2 LEFT SPARE OUT 3 RIGHT SPARE OUT 4 LEFT REAR OUT 5 RIGHT REAR OUT 6 LEFT SUB OUT 7 RIGHT SUB OU
INSTALL GUIDE Ford Transit 2015-2019 ENABLE A SEAMLESS AFTERMARKET AMPLIFIER INSTALLATION, WITHOUT CHANGING YOUR RADIO. PRODUCTS REQUIRED Rockford Fosgate DSR1 iDatalink Maestro DSP-FO2 Installation Harness OPTIONAL ACCESSORIES PROGRAMMED FIRMWARE ADS-AR-DC-dFO2 NOTICE: Automotive Data Solutions Inc. (ADS) recommends having this installation performed by a certified technician. Logos and trademarks used here in are the properties of their respective owners.
Ford Transit 2015-2019 WELCOME Congratulations on the purchase of your iDatalink Maestro / Rockford Fosgate DSR1 Amplifier replacement solution. You are now a few simple steps away from enjoying your new car amplifier. TABLE OF CONTENTS Installation Instructions 3 Wiring Diagram 4 Before starting your installation, please ensure that your module is programmed with the correct firmware for your vehicle and that you carefully review the install guide. NEED HELP? 1 866 427-2999 maestro.
Ford Transit 2015-2019 INSTALLATION INSTRUCTIONS CHIME ADJUSTMENT STEP 1 Front chime • Remove the factory radio and plug the dFO2 T-harness in line with the radio plug. Set Audio source to OFF. Activate front chime (Ex: door chime). STEP 2 Adjust using the radio’s volume knob. • Connect the wires from the dFO2 T-harness to the aftermarket amplifier.
Ford Transit 2015-2019 WIRING DIAGRAM STEP 2 STEP 1 AFTERMARKET AMPLIFIER WHITE (LEFT FRONT) WHITE/BLACK (LEFT FRONT) GRAY (RIGHT FRONT) GRAY/BLACK (RIGHT FRONT) GREEN (LEFT REAR) GREEN/BLACK (LEFT REAR) PURPLE (RIGHT REAR) PURPLE/BLACK (RIGHT REAR) CONNECT TO OEM RADIO HARNESS CONNECT TO OEM RADIO CONNECTOR dFO2 T-HARNESS STEP 3 DSR1 MODULE (NC) AMP TURN ON RCA CABLES LEFT FRONT OUT 1 RIGHT FRONT OUT 2 LEFT SPARE OUT 3 RIGHT SPARE OUT 4 LEFT REAR OUT 5 RIGHT REAR OUT 6 LEFT SUB OUT 7 RIGHT SUB O
INSTALL GUIDE Ford Transit Connect 2014-2019 ENABLE A SEAMLESS AFTERMARKET AMPLIFIER INSTALLATION, WITHOUT CHANGING YOUR RADIO. PRODUCTS REQUIRED Rockford Fosgate DSR1 iDatalink Maestro DSP-FO2 Installation Harness OPTIONAL ACCESSORIES PROGRAMMED FIRMWARE ADS-AR-DC-dFO2 NOTICE: Automotive Data Solutions Inc. (ADS) recommends having this installation performed by a certified technician. Logos and trademarks used here in are the properties of their respective owners.
Ford Transit Connect 2014-2019 WELCOME Congratulations on the purchase of your iDatalink Maestro / Rockford Fosgate DSR1 Amplifier replacement solution. You are now a few simple steps away from enjoying your new car amplifier. TABLE OF CONTENTS Installation Instructions 3 Wiring Diagram 4 Before starting your installation, please ensure that your module is programmed with the correct firmware for your vehicle and that you carefully review the install guide. NEED HELP? 1 866 427-2999 maestro.
Ford Transit Connect 2014-2019 INSTALLATION INSTRUCTIONS CHIME ADJUSTMENT STEP 1 Front chime • Remove the factory radio and plug the dFO2 T-harness in line with the radio plug. Set Audio source to OFF. Activate front chime (Ex: door chime). STEP 2 Adjust using the radio’s volume knob. • Connect the wires from the dFO2 T-harness to the aftermarket amplifier.
Ford Transit Connect 2014-2019 WIRING DIAGRAM STEP 2 STEP 1 AFTERMARKET AMPLIFIER WHITE (LEFT FRONT) WHITE/BLACK (LEFT FRONT) GRAY (RIGHT FRONT) GRAY/BLACK (RIGHT FRONT) GREEN (LEFT REAR) GREEN/BLACK (LEFT REAR) PURPLE (RIGHT REAR) PURPLE/BLACK (RIGHT REAR) CONNECT TO OEM RADIO HARNESS CONNECT TO OEM RADIO CONNECTOR dFO2 T-HARNESS STEP 3 DSR1 MODULE (NC) AMP TURN ON RCA CABLES LEFT FRONT OUT 1 RIGHT FRONT OUT 2 LEFT SPARE OUT 3 RIGHT SPARE OUT 4 LEFT REAR OUT 5 RIGHT REAR OUT 6 LEFT SUB OUT 7 RIG