
Personal Computer User Manual
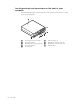
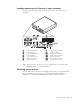
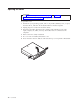
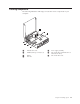
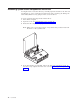
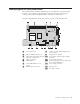
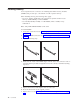
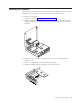
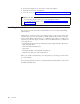
Table Of Contents
- Contents
- Important safety information
- Chapter 1. Overview
- Chapter 2. Installing options
- Handling static-sensitive devices
- Installing external options
- Opening the cover
- Locating components
- Accessing system board components and drives
- Identifying parts on the system board
- Installing memory
- Installing PCI adapters
- Installing internal drives
- Installing security features
- Erasing a lost or forgotten password (clearing CMOS)
- Closing the cover and connecting the cables
- Chapter 3. Using the IBM Setup Utility
- Appendix A. Replacing customer replaceable units (CRU)
- CRU list
- Removing and replacing the power supply assembly
- Removing and replacing the system board assembly
- Removing the microprocessor
- Replacing the microprocessor
- Removing and replacing the battery
- Removing and replacing the speaker
- Removing and replacing the power button and LED assembly
- Removing and replacing the fan assembly
- Completing the installation
- Appendix B. Updating POST/BIOS
- Appendix C. Cleaning the mouse
- Appendix D. Manual modem commands
- Appendix E. Notices
- Index
Installing
PCI
adapters
This
section
provides
information
and
instructions
for
installing
and
removing
PCI
adapters.
Your
computer
has
a
riser
card
with
two
PCI
expansion
slots.
To
install
a
PCI
adapter:
1.
Open
the
cover.
See
“Opening
the
cover”
on
page
10.
2.
While
holding
the
left
rear
of
the
computer
chassis
down,
pull
upward
on
the
handle
provided,
to
remove
the
PCI
riser
and
any
adapters
that
are
currently
installed.
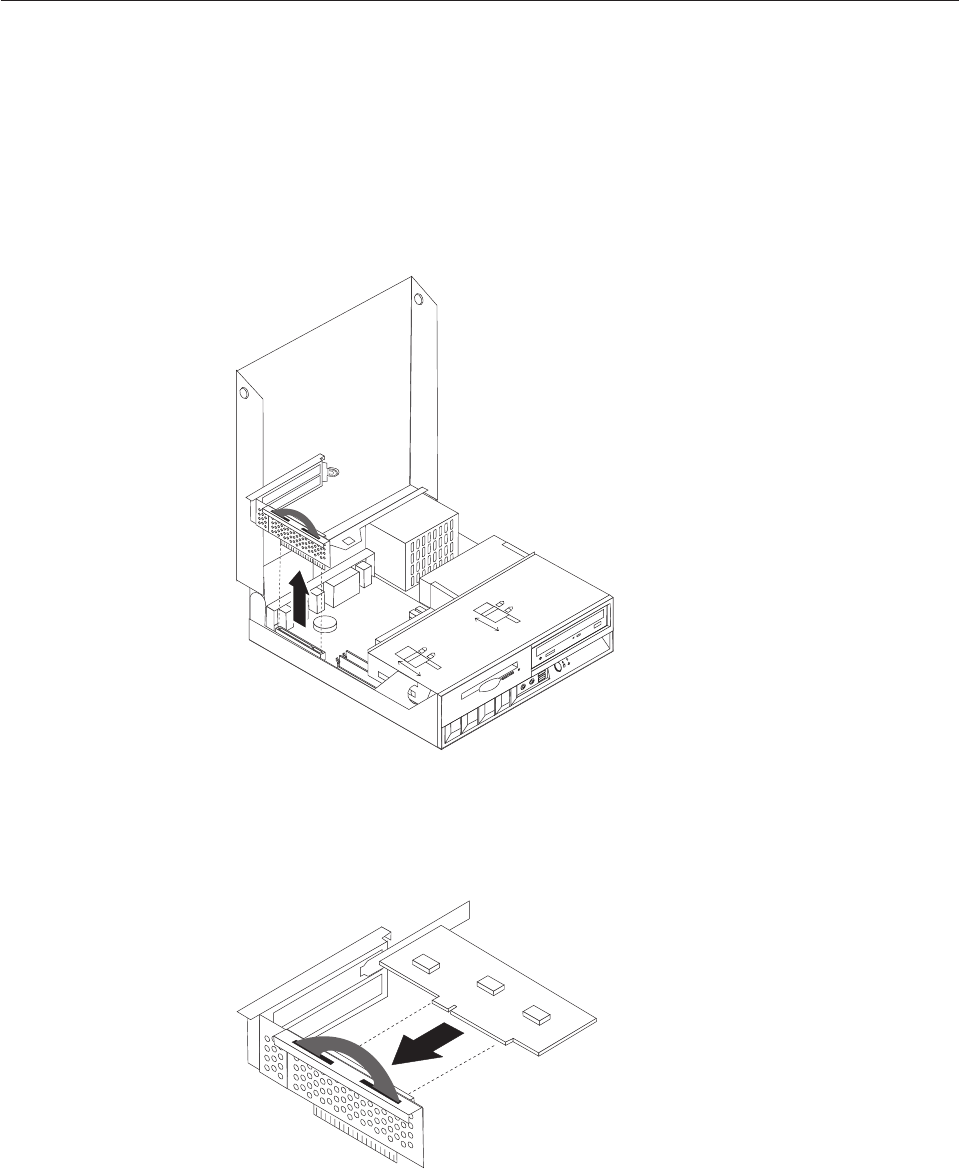
3.
Release
the
slot
cover
latch
and
remove
the
slot
cover
for
the
appropriate
expansion
slot.
4.
Remove
the
adapter
from
its
static-protective
package.
5.
Install
the
adapter
into
the
appropriate
slot
in
the
PCI
riser.
Chapter
2.
Installing
options
15