
Personal Computer User Manual
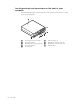
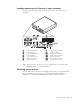
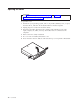
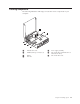
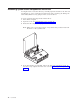
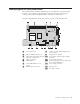
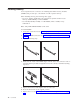
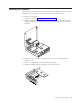
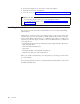
Table Of Contents
- Contents
- Important safety information
- Chapter 1. Overview
- Chapter 2. Installing options
- Handling static-sensitive devices
- Installing external options
- Opening the cover
- Locating components
- Accessing system board components and drives
- Identifying parts on the system board
- Installing memory
- Installing PCI adapters
- Installing internal drives
- Installing security features
- Erasing a lost or forgotten password (clearing CMOS)
- Closing the cover and connecting the cables
- Chapter 3. Using the IBM Setup Utility
- Appendix A. Replacing customer replaceable units (CRU)
- CRU list
- Removing and replacing the power supply assembly
- Removing and replacing the system board assembly
- Removing the microprocessor
- Replacing the microprocessor
- Removing and replacing the battery
- Removing and replacing the speaker
- Removing and replacing the power button and LED assembly
- Removing and replacing the fan assembly
- Completing the installation
- Appendix B. Updating POST/BIOS
- Appendix C. Cleaning the mouse
- Appendix D. Manual modem commands
- Appendix E. Notices
- Index
Installing
memory
Your
computer
has
two
connectors
for
installing
dual
inline
memory
modules
(DIMMs)
that
provide
up
to
a
maximum
of
2
GB
of
system
memory.
When
installing
memory,
the
following
rules
apply:
v
Use
2.5
V,
184-pin,
double
data
rate
synchronous
dynamic
random
access
memory
(DDR
SDRAM),
non-ECC
DIMMs.
v
Use
128
MB,
256
MB,
512
MB,
or
1
GB
DIMMs
(when
available)
in
any
combination.
Note:
Only
DDR
SDRAM
DIMMs
can
be
used.
To
install
DIMMs:
1.
Access
the
system
board.
See
“Accessing
system
board
components
and
drives”
on
page
12.
2.
Locate
the
DIMM
connectors.
See
“Identifying
parts
on
the
system
board”
on
page
13.
3.
Open
the
retaining
clips.
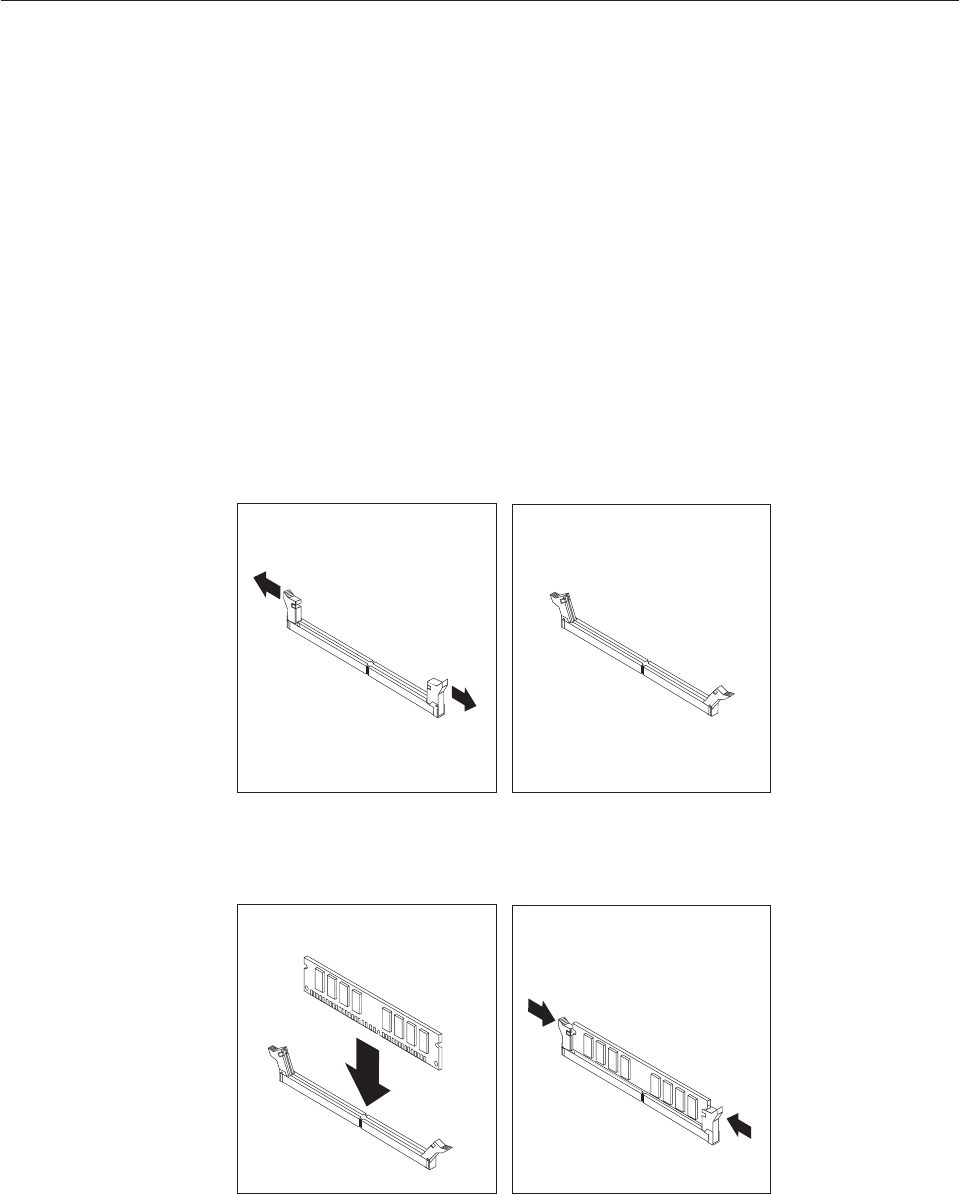
4.
Make
sure
the
notch
in
the
DIMM
aligns
with
the
tab
on
the
connector.
Push
or
insert
the
memory
module
straight
down
into
the
connector
until
the
retaining
clips
close.
5.
Replace
the
PCI
riser
and
adapters
if
it
was
removed.
6.
Place
the
drives
back
to
the
original
position.
7.
Replace
the
cover.
See
“Closing
the
cover
and
connecting
the
cables”
on
page
25.
14
User
Guide