Using Your Personal Computer PC 365 with Pentium Pro Processor
Using Your Personal Computer PC 365 with Pentium Pro Processor IBM
Note Before using this information and the product it supports, be sure to read the general information under Appendix B, “Product Warranties, License Information, and Notices” on page 111.
Contents Safety Information . . . . . Laser Compliance Statement Lithium Battery Notice . . . About This Book . Related Publications . . . . . . . . . . . . . . . . . . . . . . . . . . . . . . . . . . . . . . . . . . . . . . . . . . . . . . . . . . . . . . . . . . . . . . . . . . . . . . . . . . . . . . . . . . . . . vii viii . ix . . . . . . . . . . . . . . . . . . . . . . . . . . . . . . . . . . . . . . . . . . . . . . . . . . . . . . . . . . . . . . . . . . . . . . . . . Chapter 1.
Chapter 3. Operating Your Personal Computer . . . . . . . . . . . . . . . . . . Using Controls and Status Indicators . . . . . . . . . . . . . . . . . . . . . . . . . Starting Your Personal Computer . . . . . . . . . . . . . . . . . . . . . . . . . . . Using a Mouse . . . . . . . . . . . . . . . . . . . . . . . . . . . . . . . . . . . . . . . Shutting Down . . . . . . . . . . . . . . . . . . . . . . . . . . . . . . . . . . . . . . . Configuring Your Computer . . . . . . . . . . . . . . . . . . . . . . . . .
Cleaning Your Computer Computer and Keyboard Monitor Screen . . . . . Mouse . . . . . . . . . . Replacing the Battery . . . Moving Your Computer . . . . . . . . . . . . . . . . . . . . . . . . . . . . . . . . . . . . . . . . . . . . . . . . . . . . . . . . . . . . . . . . . . . . . . . . . . . . . . . . . . . . . . . . . . . . . . . . . . . . . . . . . . . . . . . . . . . . . . . . . . . . . . . . . . . . . . . . . . . . . . . . . . . . . . . . . . . . . . . . . . . . . . . . . . . . . . . . . . . . . . .
Warranty . . . . . . . . . . . . . . . . . . U.S. Government Users Restricted Rights Other Documentation . . . . . . . . . . . Other Additional Terms and Conditions Notices . . . . . . . . . . . . . . . . . . . Trademarks . . . . . . . . . . . . . . . . . . . . Electronic Emission Notices Telecommunication Notices . . . . . Power Cord Notice . . . . . . . . . . . Index vi . . . . . . . . . . . . . . . . . . . . . . . . 116 116 116 116 118 118 120 121 124 . . . . . . . . . . . . . . . . . . . . . . . . .
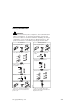
Safety Information DANGER: Electrical current from power, telephone, and communication cables is hazardous. To avoid shock hazard, connect and disconnect cables as shown below when installing, moving or opening the covers of this product or attached devices. The power cord must be used with a properly grounded outlet. To Connect To Disconnect Turn everything OFF. Turn everything OFF. First, attach all cables to devices. 1 First, remove power cord from outlet. 2 Remove signal cables from receptacles.
Laser Compliance Statement Some IBM Personal Computer models are equipped from the factory with a CD-ROM drive. CD-ROM drives are also sold separately as options. The CD-ROM drive is a laser product. The CD-ROM drive is certified in the U.S. to conform to the requirements of the Department of Health and Human Services 21 Code of Federal Regulations (DHHS 21 CFR) Subchapter J for Class 1 laser products.
Lithium Battery Notice CAUTION: Danger of explosion if battery is incorrectly replaced. When replacing the battery, use only IBM Part Number 33F8354 or an equivalent type battery recommended by the manufacturer. The battery contains lithium and can explode if not properly used, handled, or disposed of. Do not: Throw or immerse into water Heat to more than 100°C (212°F) Repair or disassemble Dispose of the battery as required by local ordinances or regulations.
x Using Your Personal Computer
About This Book This book will help you become familiar with your IBM Personal Computer and its many features. It describes how to configure, operate, and maintain your PC. In the unlikely event you experience problems, you will also find helpful troubleshooting information, as well as instructions for obtaining service in this book. The book is organized as follows: Chapter 1, "Your IBM Personal Computer," contains an overview of the features of your PC.
Related Publications The following publications, together with this book, contain information about your computer. Setting Up Your Personal Computer This publication contains instructions to help you set up your computer. Installing Options in Your Personal Computer This publication contains instructions for adding memory, adapters, drives, and other options to your computer.
Technical Information Manual This separately purchased publication contains information for individuals who want to know more about the technical aspects of their computer. To obtain a copy, refer to “Ordering Publications” on page 105.
xiv Using Your Personal Computer
Chapter 1. Your IBM Personal Computer Thank you for selecting an IBM Personal Computer. Your PC incorporates many of the latest advances in personal computer technology and is easy to expand and upgrade as your needs change. Copyright IBM Corp.
What Your IBM Personal Computer Offers This section describes many of the features of your computer. Support for Pentium Pro Microprocessors At the core of your PC is an Intel Pentium Pro microprocessor. With its advanced performance features, this microprocessor supplies the speed and power you need to take advantage of even the most complex programs. Your computer supports dual microprocessors, which means that you can upgrade processor performance by adding a second microprocessor to the system board.
High-Capacity Hard Disk Drives Some PC models have a hard disk drive with an EIDE (enhanced integrated drive electronics) bus master interface to transmit data to and from the hard disk drive. The EIDE interface specification, which is an extension of the original IDE interface specification, refers to a hard disk drive with the controller built into the drive (as opposed to a hard disk drive with a separate controller).
PD/CD-ROM Drive A PD/CD-ROM drive is preinstalled in some PC models. This dual-function IDE drive can be used as a standard CD-ROM reader or as a mechanism for day-to-day backup and storage of data. Using removable, rewritable optical disks called PD cartridges, you can save, store, and read files just as you would with a hard disk drive. PD cartridges, which store 650 MB of data, are particularly useful for performing system backups and for saving space-consuming data, such as graphic and multimedia files.
where USB devices can be attached. Note that your computer does not support a keyboard or mouse attached to the USB port. Watch the USB web site at www.teleport.com/ ˜ USB for further developments. Infrared Port With infrared technology, wireless communication is possible between infrared-enabled devices. Your PC has one infrared port to which you can connect an optional infrared-transceiver module.
increases productivity because users are not interrupted during normal working hours and LAN traffic is kept to a minimum. IBM-Preinstalled Software IBM-preinstalled software is provided with some PC models. This software, installed by IBM during manufacture of the computer, includes an operating system, device drivers to support built-in features, and other support programs. Detailed information about this software is included in About Your Software, which is included with the preinstallation package.
Advanced Power Management Energy conservation is an important concern. Your computer has Advanced Power Management (APM) features that allow you to set different levels of energy conservation for specific components of your computer. You can view and change APM settings using the Configuration/Setup Utility program. Security Features Your PC has security features that protect both hardware and software.
3.5-Inch EIDE Hard Disk Drive 3.5-Inch Internal Bay for Optional Drive 3.5-Inch Diskette Drive 5.25-Inch Bay for Optional Drive 5.
In PC models with a preinstalled SCSI hard disk drive, occupied and unoccupied drive bays are as follows: 3.5-Inch Internal Bay for Optional Drive 3.5-Inch Internal Bay for Optional Drive 3.5-Inch Diskette Drive 3.5-Inch SCSI Hard Disk Drive 5.25-Inch CD-ROM or PD/CD-ROM Drive (Standard in Some Models) Expansion Slots: Your computer has five expansion slots. Several of these slots may be occupied, depending upon the model of your PC. Unoccupied slots can be used for installing adapters.
External Connectors The location of the external connectors for I/O devices varies by PC model. The following illustrations show the location of the external I/O connectors. Monitor Infrared Serial Keyboard Mouse USB Parallel Note: The model shown has an S3 Trio64V+ graphics adapter.
Monitor SCSI Infrared Serial Keyboard Mouse USB Video Feature Parallel Note: The model shown has a Matrox MGA Millennium graphics adapter and an Adaptec SCSI adapter installed. The SCSI adapter has one external 16-bit connector to which you can attach SCSI devices. It also has two internal connectors (one 8-bit and one 16-bit). Chapter 1.
Features at a Glance The following information covers a variety of PC 365 models. Some of the features listed apply to specific models only. For a listing of features for your specific PC 365 model, refer to the System Summary screen in the Configuration/Setup Utility program. For instructions on gaining access to the Configuration/Setup Utility program and the System Summary screen, refer to “Viewing the System Summary” on page 27.
PD/CD-ROM Drive One IDE, dual-function, rewritable PD/CD-ROM drive (standard in some models) Input/Output Features One 25-pin, ECP/EPP parallel port One 9-pin, 16550 UART serial port One 4-pin, USB port One infrared port Mouse port Keyboard port (Windows 95-compatible) One 15-pin, monitor port located on S3 Trio64V+ adapter (standard in some models) One 15-pin, monitor port and one 26-pin, multimedia upgrade port (video feature port) located on Matrox MGA Millennium adapter (standard in some models)
Security Power-on and administrator passwords Lockable cover Startup sequence control Startup without diskette drive, keyboard, or mouse Unattended start mode Diskette and hard disk I/O control Serial and parallel port I/O control Software-readable hardware IDs System Management Wake on LAN Wake up on ring Wake up on alarm Operating Systems (Compatible)2 IBM OS/2 Version 2.11 IBM PC DOS Versions 6.3 and 7.0 Microsoft Windows Version 3.11 Microsoft Windows for Workgroups Version 3.
IBM-Preinstalled Software Preinstalled in some PC models are an operating system, device drivers to support built-in features, and other support programs. See About Your Software for a detailed description of the preinstallation package. System Specifications Size Depth: 455 mm (17.9 in.) Height: 160 mm (6.3 in.) Width: 420 mm (16.5 in.) Weight Minimum configuration as shipped: 12.7 kg (28 lb) Maximum configuration: 14.
Electrical Input Sine-wave input (50 to 60 Hz) is required Input voltage: – Low range: - Minimum: 90 V ac - Maximum: 137 V ac - Voltage switch setting: 115 or 115 V – High range: - Minimum: 180 V ac - Maximum: 265 V ac - Voltage switch setting: 230 or 230 V – Input kilovolt-amperes (kVA) (approximately): - Minimum configuration as shipped: 0.08 kVA - Maximum configuration: 0.
Chapter 2. Arranging Your Workspace To get the most from your computer, arrange both the equipment you use and your work area to suit your needs and the kind of work you do. Your comfort is of foremost importance, but light sources, air circulation, and the location of electrical outlets also can affect the way you arrange your workspace. Comfort Although no single working position is ideal for everyone, here are a few guidelines to help you find a position that suits you best.
Glare and Lighting Position the monitor to minimize glare and reflections from overhead lights, windows, and other light sources. Place the monitor at right angles to windows and other light sources, when possible. Reduce overhead lighting, if necessary, by turning off lights or using lower wattage bulbs. If you install the monitor near a window, use curtains or blinds to block the sunlight.
Chapter 3. Operating Your Personal Computer This chapter provides information to help you in the day-to-day use of your computer. Information about the Configuration/Setup Utility program is also included in this chapter.
Starting Your Personal Computer 1. Turn on all external devices, and then turn on your computer. Numbers showing the amount of memory being tested appear in the top-left corner of the screen until the total amount of memory in the system is reached. Your computer is running the power-on self-test (POST). Options for running a fast POST or accessing the Configuration/Setup Utility program appear in the lower-left corner of the screen.
Place the mouse beside the keyboard on a flat surface or mouse pad. (A mouse pad is a flat, smooth, foam-rubber pad available at most computer stores.) The mouse has a ball on the bottom, so working on a flat, smooth surface is important. You can use your right or left hand to control the mouse. Notice that the mouse has two buttons on the top (some mice have more buttons). Rest your hand comfortably on the mouse with your index finger on the left button (if you are using your right hand).
Configuring Your Computer The Configuration/Setup Utility program enables you to view and change the configuration and setup of your computer. The program is stored in the EEPROM (electrically erasable programmable read-only memory) of your PC. You can use the Configuration/Setup Utility program to view and change the configuration and setup of your computer, regardless of which operating system you are using.
Important In most cases, when you add or remove hardware from your computer, the BIOS (basic input/output system) detects the changes and then updates the configuration automatically. Although the computer changes the configuration settings automatically, you must save these changes in the Configuration/Setup Utility program for the new configuration to take effect. If you do not save the new settings, your operating system will not start.
If you have set both an administrator and a power-on password, you can type either of the passwords at the password prompt. However, if you think you might need to change any settings in the Configuration/Setup Utility program, you must type your administrator password at the password prompt. If you type your power-on password, you will be able to view limited information in the Configuration/Setup Utility program, but you will not be able to change any settings.
When working with the Configuration/Setup Utility program menu, you must use the keyboard. Refer to the following table for the keys used to accomplish various tasks. Keys Function ↑ Use these arrow keys to move between menu items until the item you want is highlighted. ↓ ← → Use these arrow keys to display and toggle between choices for a menu item. Enter Press this key to select a highlighted menu item.
2. Before you exit from the Configuration/Setup Utility program menu, select Save Settings if you want to save all settings as they currently appear. If you do not complete this step, your settings will not be saved. 3. From the Configuration/Setup Utility program menu, press Esc, and follow the instructions on the screen.
Viewing the System Summary You can use the Configuration/Setup Utility program to view a summary of the options and features in your computer. To view the system summary: 1. Start the Configuration/Setup Utility program (see “Starting the Configuration/Setup Utility Program” on page 23). 2. Select System Summary from the Configuration/Setup Utility program menu. The System Summary screen appears.
2. Select Date and Time from the Configuration/Setup Utility program menu. 3. Type the date and time in the appropriate fields. 4. Press Esc to return to the Configuration/Setup Utility program menu. 5. Before you exit from the program, select Save Settings from the Configuration/Setup Utility program menu and press Enter. 6. To exit from the Configuration/Setup Utility program, press Esc and follow the instructions on the screen.
Off In password prompt Off mode (also referred to as Unattended Start mode), you are not prompted to enter your power-on password when you turn on the computer. The computer will run the CONFIG.SYS and AUTOEXEC.BAT instructions and start the operating system. However, if you have a mouse connected to the mouse port, refer to the following text box.
Password prompt Off mode is useful for network servers and other computers that operate unattended. If a power failure occurs, the computer will automatically restart and resume operating in this mode when power is restored, without operator intervention. Dual In the password prompt Dual mode, the startup behavior of the computer depends on whether the computer is started from the computer power switch or by an unattended method, such as a modem or timer.
1. Start the Configuration/Setup Utility program (see “Starting the Configuration/Setup Utility Program” on page 23). 2. Select System Security from the Configuration/Setup Utility program menu. 3. Select Power-On Password. 4. Type your password and press Down Arrow (↓). 5. Type your password again. 6. At Password Prompt, select On, Off, or Dual. Press Left Arrow (←) or Right Arrow (→) to toggle between selections. 7. Select Set or Change Power-On Password, and follow the instructions on the screen. 8.
Administrator Password Setting an administrator password deters unauthorized persons from changing settings in the Configuration/Setup Utility program. When an administrator password is set, you can change settings in the Configuration/Setup Utility program only after typing the administrator password at the password prompt that appears when you try to access the Configuration/Setup Utility program.
3. Select Administrator Password. 4. Type your password and press Down Arrow (↓). 5. Type your password again. 6. At Power-On Password Changeable by User, select Yes or No. Press Left Arrow (←) or Right Arrow (→) to toggle between selections. (If you select Yes, the user will be able to change the power-on password if an administrator password is set. If you select No, the user will not be able to change the power-on password if an administrator password is set.) 7.
password jumper) on the system board. See Installing Options in Your Personal Computer for instructions on removing the computer cover and moving jumpers. Refer to the system board label inside the computer cover for the location of the CMOS Clear (password) jumper. Attention: If you move the CMOS Clear jumper, you will lose all setup data stored in the computer, and you will need to reconfigure the computer. Use the Configuration/Setup Utility program to reconfigure the computer and to set a new password.
Display: With this option, you can disable the monitor entirely, or select one of the following reduced-power states: – Standby: In this mode, the screen is blanked, but the screen image is restored immediately when any activity is detected. – Suspend: In this mode, the monitor uses less power than in Standby mode. The screen is blanked, but the screen image is restored within a few seconds after any activity is detected. – Off: In this mode, the monitor power is turned off.
Automatic Power-On Features The Automatic Power-On features within the Advanced Power Management menu allow you to enable and disable features that turn your computer on automatically. Serial Port Ring Detect: If your computer has an external modem connected to the serial port and you want the computer to turn on automatically when a ring is detected on the modem, set this feature to Enabled.
Changing Keyboard Speed You can change the speed at which the keyboard responds when you hold down a key. The normal typematic rate is 10 characters per second, but you can use the Configuration/Setup Utility program to increase this rate to up to 30 characters per second. To change the keyboard speed: 1. Start the Configuration/Setup Utility program (see “Starting the Configuration/Setup Utility Program” on page 23). 2. Select Start Options from the Configuration/Setup Utility program menu. 3.
Changing Monitor Settings Your computer has an S3 Trio64V+ or a Matrox MGA Millennium SVGA (super video graphics array) controller. SVGA is a video standard for displaying text and graphic images on a monitor screen. Like other video standards, SVGA supports a variety of video modes. Video modes are different combinations of resolution, refresh rate, and color defined by a video standard for displaying text or graphics. (For further information on video modes, refer to Understanding Your Personal Computer.
Updating System Programs System programs are the basic layer of software built into every IBM PC. They include the power-on self-test (POST), the basic input/output system (BIOS) code, and the Configuration/Setup Utility program. POST is a set of tests and procedures that is performed every time you turn on your PC. The BIOS is a layer of software that translates instructions from other layers of software into electrical signals that the computer hardware can understand.
Diskettes You can use 3.5-inch diskettes in the diskette drive of your computer. If you want to use 5.25-inch diskettes, you must install a 5.25-inch diskette drive. (Refer to Installing Options in Your Personal Computer for instructions on installing optional diskette drives.) The information that follows will help you identify and use 3.5-inch diskettes. Identifying Diskettes The labeling on 3.5-inch diskettes is not consistent among manufacturers.
Handling and Storing Diskettes Inside the protective diskette case is a flexible disk with a magnetic-sensitive coating. This disk can be damaged by heat, dust, a magnetic field, or even a fingerprint. Use the following guidelines when handling and storing diskettes. Data is stored on the magnetic surface of the diskette. On 3.5-inch diskettes, this surface is protected by a plastic cover. If the cover is damaged, do not use the diskette. A damaged diskette might damage the diskette drive.
Labeling Diskettes Before using a diskette, label it so that you can identify the data stored on it. Labels usually come in the package with the diskettes. Diskette labels can become a problem if you do not apply them correctly. Loose edges or an excessive buildup of labels can prevent the diskette from being inserted or ejected. To prevent this problem, take the following precautions: Remove an old label before you apply a new one. Apply labels carefully to ensure that all edges are secure.
Write Protecting Diskettes It is possible to accidentally format a diskette or unintentionally write data to it. Important information can be written over or lost. For this reason, it is a good idea to write protect important diskettes. You can read data from a write-protected diskette, but you cannot erase or change the data. Most 3.5-inch diskettes have a write-protect switch that can be used to prevent data from being written to or erased from the diskette. If a 3.
The operating system FORMAT command specifies how to format a specific type of diskette. Attention: Always format diskettes to their correct capacity. Failing to do so might cause unreliable results. Differences such as magnetic coatings, the thickness of the diskette material, and the recording technique used all affect the formatting operation. Refer to your operating-system documentation for detailed information on formatting diskettes.
Using a CD-ROM Drive Some PC models have a preinstalled CD-ROM drive. CD-ROM (compact disc read-only memory) technology offers quick access to enormous amounts of information. A compact disc can store more than 650 MB of data, such as the large files needed for audio, still and full-motion video, and still and animated graphics. A CD-ROM drive can play back or read from a CD, but it cannot write information to it. CD-ROM drives use industry-standard, 12 cm (4.75-inch) CDs.
Do not place or store the CD in direct sunlight. Do not use benzene, thinners, or other cleaners to clean the CD. Do not drop or bend the CD. Loading a CD To load a CD into the CD-ROM drive: 1. Press the Eject/Load button. The tray slides out of the drive. (Do not manually force the tray open.) 2. Place the CD in the tray with the label facing up. If you have placed your computer in a vertical position using an optional floor stand,3 extend the retainers closest to the bottom of the tray.
5. Close the tray by pressing the Eject/Load button, or by gently pushing the tray forward. Note: If the tray does not slide out of the drive when you press the Eject/Load button, insert the pointed end of a large paper clip into the emergency eject hole located above and to the left of the CD-ROM indicator light. If you have installed a CD-ROM drive yourself and need additional information about the drive, refer to the documentation that comes with the CD-ROM drive.
Do not insert anything other than a CD or a PD cartridge into the drive. Before moving the computer, remove the CD or the PD cartridge from the drive. The following is an illustration of the front bezel of the PD/CD-ROM drive preinstalled in some PC models. Emergency Eject Hole Tray Eject/Load Button PD/CD Indicator Light Busy Indicator Light Handling and Storing PD/CD Drive Media For information on handling and storing CDs, refer to “Handling a CD” on page 45.
Loading and Ejecting PD/CD Drive Media The following sections provide instructions for loading and ejecting a CD and a PD cartridge from the PD/CD-ROM drive. Read these instructions carefully to prevent damage to your PD/CD-ROM drive and media. Loading and Ejecting a CD: To load a CD into the PD/CD-ROM drive, complete the following steps. 1. Press the Eject/Load button. The tray slides out of the drive. (Do not manually force the tray open.) 2.
the other hand, rotate the clip (located on top of the spring mechanism) in a counterclockwise direction as far as it will go. c. Place the CD in the tray with the label facing up. To do this, place the CD under clip 1 and push the spring mechanism into the computer. While holding the CD, slowly release the spring mechanism, making sure the CD moves under clips 2 and 3. 3. If your computer is not in a vertical position, place the CD in the tray with the label facing up.
the center hole of the CD and placing another finger on the outer edge of the CD) and push the spring mechanism back into the computer until clips 2 and 3 are cleared, as shown in the following illustration. Then carefully lift out the CD and close the tray. (There is no need to retract the clips if you continue to operate your computer in a vertical position. Leaving the clips extended will prolong the life of the clips.
A PD cartridge can be loaded in the same manner described in steps 1 and 2 with the clips in the extended position.) The following is an illustration of a properly loaded PD cartridge in a vertically placed computer. Write-Protect Switch b. If you use only PD cartridges in the PD/CD-ROM drive, there is no need to extend the clips on the tray to prevent a PD cartridge from slipping off the tray. The spring mechanism will hold the cartridge in place. 3.
4. Close the tray by pressing the Eject/Load button, or by gently pushing the tray in. When the tray is closed, the PD/CD indicator light on the front of the drive will activate to indicate what type of media you have inserted. The light will be amber if you have inserted a PD cartridge. 5. To eject the PD cartridge, do the following: a. Press the Eject/Load button. b. When the tray slides out, carefully remove the PD cartridge. To do this, grasp the cartridge and carefully lift it out of the tray. 6.
Instructions for formatting an unformatted PD cartridge and for formatting a previously formatted PD cartridge to FDISK-FAT format are provided for each operating system in the README2.TXT file on the Ready-to-Configure CD that comes with your computer. If your computer has IBM-preinstalled software, the README2.TXT file for Windows NT is also installed on the hard disk. Do not format a PD cartridge at the prompt that appears on the computer screen after you insert a PD cartridge.
Using Locks To deter unauthorized use of your computer, you can lock the cover, sliding door, and keyboard. Locking the Cover and Sliding Door You can use the cover lock and keys to secure the outside cover and the sliding door on the front panel. You can lock both the sliding door and the computer cover, the cover only, or neither. If the sliding door is closed when you lock the cover, the sliding door is locked. If the sliding door is open when you lock the cover, the sliding door is not locked.
56 Using Your Personal Computer
Chapter 4. Taking Care of Your Computer This chapter provides guidelines for the proper handling and care of your computer. Basics Here are some basic points about keeping your computer functioning properly: Keep your computer in a clean, dry environment. Make sure it rests on a flat, sturdy surface. Do not place items on top of the monitor or cover any of the vents in the monitor or computer. These vents provide air flow to keep your computer from overheating.
To clean the screen surface, wipe it gently with a soft, dry cloth, or blow on the screen to remove grit and other loose particles. Then use a soft cloth moistened with a nonabrasive liquid glass cleaner. Mouse If the pointer on the screen does not move smoothly with the mouse, you might need to clean the mouse. 1. Turn off the computer. 2. Disconnect the mouse cable from the computer. 3. Turn the mouse upside down.
The battery requires no charging or maintenance throughout its life; however, no battery lasts forever. If the battery fails, the date, time, and configuration information (including passwords) are lost. An error message is displayed when you turn on the computer. Refer to “Lithium Battery Notice” on page ix of this publication and Installing Options in Your Personal Computer for information about replacing the battery.
60 Using Your Personal Computer
Chapter 5. Solving Problems This chapter presents an overview of diagnostic tools available to you. You can use these tools to identify and correct problems that might come up as you use your computer. This chapter also contains information about option diskettes and terminate-and-stay-resident (TSR) programs. Using Diagnostic Tools Computer problems can be caused by hardware, software, or user error (for example, pressing the wrong key).
Note If your computer does not start when you press the power switch, do the following: Make sure all cables are securely connected to the correct locations. Check to see if the voltage-selection switch is set to the correct position. Make sure the computer cover is installed properly (pushed all the way on). If this does not correct the problem, have the computer serviced.
“Solving POST Error Message Problems” on page 64 and “POST Message Charts” on page 67. If you hear no beep at all during POST, refer to “Troubleshooting Charts” on page 86. You might need to have your computer serviced. Error Messages Error messages that appear on the screen might be text, numeric, or both. There are several types of error messages: POST error messages Messages that appear when POST finds problems with the hardware during startup or when a change in the hardware configuration is found.
Solving POST Error Message Problems: If you receive an error message during the power-on-self-test (POST), completing the steps outlined in this section might enable you to resolve the problem. Note If you have just added, removed, or changed the location of a device and you receive an error message, follow the procedure described in the Important text box on page 22. If the procedure on page 22 does not eliminate the error message, then proceed with the following instructions. 1.
that are malfunctioning or that have been changed since the last time you turned on your computer. If you did not knowingly make a change to a flagged menu item, there is likely a malfunction in that item. If you made a change, continue here. If you did not make a change, go to step 5e. To use the Configuration/Setup Utility program, do the following: a. Select the menu item that is flagged (or that you wish to view) by pressing Up Arrow (↑) or Down Arrow (↓), and then press Enter. b.
6. For more information about what caused an error message to appear and what action to take, refer to the following chart. Problem Go to: POST error code or message appears. “POST Message Charts” on page 67. After more than one beep, application program or operating system appears. “Diagnostic Programs” on page 96. Blank screen, unreadable screen, or other unusual response occurs. “Troubleshooting Charts” on page 86.
POST Message Charts The computer might display more than one error message. Often, the first error to occur causes subsequent errors. When using the POST message charts in this section, always begin by following the suggested action for the first error message that appears on your computer screen. Note that, in these charts, “X” can be any alphanumeric character.
POST Message Description 161 The battery on the system board is dead. CAUTION: Danger of explosion if lithium battery is incorrectly replaced. Replace the battery with the same or equivalent type recommended by the manufacturer. Dispose of batteries as required by local ordinances or regulations. (See “Lithium Battery Notice” on page ix and “Replacing the Battery” on page 58 for important information on battery use, disposal, and replacement.
POST Message Description 162 A change in device configuration occurred. This message is displayed under one or more of the following conditions: A new device has been installed. A device has been moved to a different location or cable connection. A device has been removed or disconnected from a cable. A device is failing and is no longer recognized by the computer as being installed. An external device is not turned on. Processor update code has not been installed or cannot be found.
POST Message Description 163 The clock is not working correctly. Action: Set the correct date and time. If the date and time are set correctly and saved and the 163 error message reappears, replace the battery. If this does not correct the problem, have the computer serviced. Note: The computer can be used until it is serviced, but any application programs that use the date and time will be affected. 164 A change in the memory configuration occurred.
POST Message Description 20X A failure occurred during testing of the memory. This error can be caused by incorrectly installed memory, a failing DIMM, or a system-board failure. Action: 1. If you have added memory, see Installing Options in Your Personal Computer and “Configuring Your Computer” on page 22 of this booklet to verify that the new memory is correct for your computer, and that it is installed and configured correctly. 2. Run the diagnostic programs to verify the problem.
POST Message Description 601 A failure occurred during testing of the diskette drive and diskette-drive controller. This error can be caused by a loose or incorrectly connected cable, a failing drive, or a failing system board. Note: The computer can be used, but one or more diskette drives might not work. Action: Verify that all diskette drive cables are properly installed and securely connected.
POST Message Description 662 A diskette drive configuration error occurred. Action: 1. Verify that the Configuration/Setup Utility program correctly reflects the number of diskette drives you have installed. (For instructions on using the Configuration/Setup Utility program, refer to “Configuring Your Computer” on page 22.) 2. If you installed or removed a diskette drive, you must save the new configuration in the Configuration/Setup Utility program.
POST Message Description 1800 A PCI adapter has requested a hardware interrupt that is not available. Action: 1. Make sure that all ISA legacy adapters are set correctly in the Configuration/Setup Utility program. If the hardware interrupt settings are not correct, change and save the settings. Setting the resources used by ISA legacy adapters to Not available enables the Plug and Play function to configure around the legacy adapters.
POST Message Description 1801 A PCI adapter has requested memory resources that are not available. Action: 1. Make sure that all ISA legacy adapters are set correctly in the Configuration/Setup Utility program. If the memory resource settings are not correct, change and save the settings. Setting the resources used by ISA legacy adapters to Not available enables the Plug and Play function to configure around the legacy adapters.
POST Message Description 1802 A PCI adapter has requested an I/O address that is not available, or the PCI adapter might be defective. Action: 1. Make sure that all ISA legacy adapters are set correctly in the Configuration/Setup Utility program. If the I/O address settings are not correct, change and save the settings. Setting the resources used by ISA legacy adapters to Not available enables the Plug and Play function to configure around the legacy adapters.
POST Message Description 1803 A PCI adapter has requested a memory address that is not available, or the PCI adapter might be defective. Action: 1. Make sure that all ISA legacy adapters are set correctly in the Configuration/Setup Utility program. If the memory address settings are not correct, change and save the settings. Setting the resources used by ISA legacy adapters to Not available enables the Plug and Play function to configure around the legacy adapters.
POST Message Description 1804 A PCI adapter has requested a memory address that is not available. Action: 1. Make sure that all ISA legacy adapters are set correctly in the Configuration/Setup Utility program. If the memory address settings are not correct, change and save the settings. Setting the resources used by ISA legacy adapters to Not available enables the Plug and Play function to configure around the legacy adapter.
POST Message Description 1850 A Plug and Play adapter has requested a hardware interrupt that is not available. Action: 1. Make sure that all ISA legacy adapters are set correctly in the Configuration/Setup Utility program. If the hardware interrupt settings are not correct, change and save the settings. Setting the resources used by ISA legacy adapters to Not available enables the Plug and Play function to configure around the legacy adapters.
POST Message Description 1851 A Plug and Play adapter has requested memory resources that are not available. Action: 1. Make sure that all ISA legacy adapters are set correctly in the Configuration/Setup Utility program. If the memory resource settings are not correct, change and save the settings. Setting the resources used by ISA legacy adapters to Not available enables the Plug and Play function to configure around the legacy adapters.
POST Message Description 1852 A Plug and Play adapter has requested an I/O address that is not available, or the Plug and Play adapter might be defective. Action: 1. Make sure that all ISA legacy adapters are set correctly in the Configuration/Setup Utility program. If the I/O address settings are not correct, change and save the settings. Setting the resources used by ISA legacy adapters to Not available enables the Plug and Play function to configure around the legacy adapters.
POST Message Description 1853 A Plug and Play adapter has requested a memory address that is not available, or the Plug and Play adapter might be defective. Action: 1. Make sure that all ISA legacy adapters are set correctly in the Configuration/Setup Utility program. If the memory address settings are not correct, change and save the settings. Setting the resources used by ISA legacy adapters to Not available enables the Plug and Play function to configure around the legacy adapters.
POST Message Description 1854 A Plug and Play adapter has requested a memory address that is not available. Action: 1. Make sure that all ISA legacy adapters are set correctly in the Configuration/Setup Utility program. If the memory address settings are not correct, change and save the settings. Setting the resources used by ISA legacy adapters to Not available enables the Plug and Play function to configure around the legacy adapters.
POST Message Description 1856 A Plug and Play adapter has requested a DMA address that is not available. Action: 1. Make sure that all ISA legacy adapters are set correctly in the Configuration/Setup Utility program. If the DMA address settings are not correct, change and save the settings. Setting the resources used by ISA legacy adapters to Not available enables the Plug and Play function to configure around the legacy adapters.
POST Message Description 1962 A startup sequence error occurred. Action: 1. Make sure the startup options are set correctly in the Configuration/Setup Utility program. If the settings are not correct, change and save them. For instructions on using the Configuration/Setup Utility program, see “Configuring Your Computer” on page 22. 2. Make sure the primary IDE cable is properly installed and securely connected. 3. Make sure all adapters are installed correctly.
Troubleshooting Charts You can use the troubleshooting charts in this section to find solutions to problems that have definite symptoms. Important If you find it necessary to remove the computer cover, first read "Removing the Cover" in Installing Options in Your Personal Computer for important safety information and instructions.
Diskette Drive Problems Action Diskette drive in-use light stays on, or the system bypasses the diskette drive. If there is a diskette in the drive, verify that: 1. The diskette drive is enabled. Use the Configuration/Setup Utility program to check this. For instructions on using the Configuration/Setup Utility program, refer to “Configuring Your Computer” on page 22. 2. The computer is checking for the diskette drive in the startup sequence. Use the Configuration/Setup Utility program to verify this. 3.
Monitor Problems Action Wavy, unreadable, rolling, distorted, or jittery screen images. If the monitor self-tests show that the monitor is working properly, verify that: 1. The location of the monitor is appropriate. Magnetic fields around other devices, such as transformers, appliances, fluorescent lights, and other monitors might be causing the problem. To determine if this is the difficulty: a. Turn off the monitor. (Moving a color monitor while it is turned on might cause screen discoloration.) b.
Monitor Problems Action Screen flickers. Set the monitor for the highest, noninterlaced refresh rate supported by your monitor and the video controller in your computer. Refer to the documentation that comes with your monitor and the S3 Trio64V+ SVGA Device Driver Installation Instructions or Matrox MGA Millennium Graphics Adapter Software Installation Guide that comes with your computer for further information.
Monitor Problems Action Blank screen. Verify that: 1. The computer power cord is plugged into the computer and a working electrical outlet. 2. The monitor is turned on and the Brightness and Contrast controls are adjusted correctly. 3. The monitor signal cable is securely connected to the monitor and the monitor connector on the graphics adapter. To find the monitor connector on the graphics adapter installed in your PC, see “External Connectors” on page 10. 4.
Intermittent Problems Action A problem occurs only occasionally and is difficult to detect. Verify that: 1. All cables and cords are securely connected to the rear of the computer and attached devices. 2. When the computer is turned on, the fan grill is not blocked (there is air flow around the grill), and the fans are working. If airflow is blocked or the fans are not working, the computer might overheat. 3.
Memory Problems Action The amount of memory displayed is less than the amount of memory installed. The amount of available memory shown might be somewhat less than expected because of basic input/output system (BIOS) shadowing in random access memory (RAM). Verify that: 1. You have installed the correct type of DIMMs for your computer. Refer to Installing Options in Your Personal Computer for instructions on adding DIMMs. 2. The DIMMs are properly installed and securely connected. 3.
Option Problems Action An IBM option that was just installed does not work. Verify that: 1. The option is designed for your computer. 2. You followed the installation instructions supplied with the option and in Installing Options in Your Personal Computer. 3. All option files (if required) are installed correctly. See “Installing Files from Option Diskettes” on page 97 for information about installing option files. 4. You have not loosened any other installed options or cables. 5.
Parallel Port Problems Action Parallel port cannot be accessed. Verify that: 1. Each port is assigned a unique address. 2. The parallel-port adapter, if you added one, is properly installed and firmly seated. Refer to Installing Options in Your Personal Computer for instructions on adding adapters. If the problem cannot be isolated and corrected, have the computer serviced. Serial Port Problems Action Serial port cannot be accessed. Verify that: 1. Each port is assigned a unique address. 2.
Software Problem Action Is your software program OK? To determine if problems are caused by installed software, verify that: 1. Your computer has the minimum memory requirements needed to use the software. Refer to the information supplied with the software to verify memory requirements. Note: If you have just installed an adapter or memory, you might have a memory address conflict. 2. The software is designed to operate on your computer. 3. Other software works on your computer. 4.
Diagnostic Programs IBM provides programs that you can run to diagnose hardware and some software problems. A description of these programs follows. QAPlus/PRO: You can use QAPlus/PRO to diagnose hardware problems. QAPlus/PRO also includes several utility programs that provide helpful information about your computer. For testing purposes, QAPlus/PRO isolates your computer hardware from any software that was preinstalled (or that you have installed) on your hard disk.
CoSession: CoSession is a remote-control diagnostic program that can be used by another individual, such as an IBM HelpWare technician or your in-house administrator, to help diagnose problems with your computer from a remote location. CoSession is provided on the Ready-to-Configure CD that comes with your computer. To use CoSession, it must be installed in your computer, and your computer must have a modem.
98 Using Your Personal Computer
Chapter 6. Getting Help, Service, and Information If you need help, service, technical assistance, or just want more information about IBM products, you will find a wide variety of sources available from IBM to assist you. This section provides information about those sources. Services available and telephone numbers listed are subject to change without notice.
Technical information is available on a wide range of topics, such as: Hardware setup and configuration Preinstalled software OS/2, DOS, and Windows Networking Communications Multimedia In addition, the latest device driver updates are available. The IBM PC Company Bulletin Board System (BBS) can be reached 24 hours a day, 7 days a week. Modem speeds of up to 14 400 baud are supported. Long distance telephone charges might apply. To access the PC Company BBS: In the U.S.
You can call the IBM PC Company Automated Fax System 24 hours a day, 7 days a week. Follow the recorded instructions, and the requested information will be sent to your fax machine. To access the IBM PC Company Automated Fax System, do the following: In the U.S., call 1-800-426-3395. In Canada, call 1-800-465-3299. Getting Help Online Online Housecall is a remote communication tool that allows an IBM HelpWare technical-support representative to access your PC by modem.
Please have the following information ready when you call: Serial numbers of your computer, monitor, and other components, or your proof of purchase Description of the problem Exact wording of any error messages Hardware and software configuration information for your system If possible, be at your computer when you call. These services are available 24 hours a day, 7 days a week (excluding some holidays).5 In the U.S. and Puerto Rico, call 1-800-772-2227. In Canada, call 1-800-565-3344.
Enhanced PC Support Line Enhanced PC Support is available for desktop and mobile IBM computers that are not connected to a network. Technical support is provided for IBM computers and IBM or non-IBM options, operating systems, and application programs on the Supported Products list.
Using IBM and non-IBM network operating systems Interpreting documentation You can purchase this service on a per-call basis, as a multiple-incident package, or as an annual contract with a 10-incident limit. For more information about purchasing Network and Server Support, see “Ordering Support Line Services.” Ordering Support Line Services Enhanced PC Support Line and Network and Server Support Line services are available for products on the Supported Products list.
On-site service to premium on-site service If your warranty provides for on-site service, you can upgrade to premium on-site service (4-hour average on-site response, 24 hours a day, 7 days a week). You also can extend your warranty. HelpWare Warranty and Repair Services offers a variety of post-warranty maintenance options, including ThinkPad EasyServ Maintenance Agreements. Availability of the services varies by product. For more information about warranty upgrades and extensions: In the U.S.
106 Using Your Personal Computer
Appendix A. Computer Records This appendix contains forms for recording information about your computer, which can be helpful if you decide to install additional hardware, or if you ever need to have your computer serviced. Serial Numbers and Keys Record and retain the following information.
the page and store it in a secure place, or store this manual in a secure place when you are not using it.
Device Records Use the following tables to keep a record of the options in or attached to your computer. This information can be helpful when you install additional options, or if you ever need to have your computer serviced.
Location Option Description Infrared Connector 3.5-Inch Bay 1 1.44 MB diskette drive 5.25-Inch Bay 2 Ø IDE CD-ROM drive Ø IDE PD/CD-ROM drive Ø Other: 5.25-Inch Bay 3 Ø SCSI hard disk drive Ø Other: 3.5-Inch Bay 4 Ø EIDE hard disk drive Ø Other: 3.
Appendix B. Product Warranties, License Information, and Notices Hardware Limited Warranty The following is the statement of limited warranty for the United States, Canada, and Puerto Rico. International Business Machines Corporation Armonk, New York, 10504 Statement of Limited Warranty The warranties provided by IBM in this Statement of Limited Warranty apply only to Machines you originally purchase for your use, and not for resale, from IBM or your reseller.
If you transfer a Machine to another user, warranty service is available to that user for the remainder of the warranty period. You should give your proof of purchase and this Statement to that user. However, for Machines which have a life-time warranty, this warranty is not transferable. Warranty Service To obtain warranty service for the Machine, you should contact your reseller or call IBM. In the United States, call IBM at 1-800-772-2227. In Canada, call IBM at 1-800-565-3344.
claim damages from IBM (including fundamental breach, negligence, misrepresentation, or other contract or tort claim), IBM is liable only for: 1. damages for bodily injury (including death) and damage to real property and tangible personal property; and 2. the amount of any other actual direct damages or loss, up to the greater of U.S. $100,000 or the charges (if recurring, 12 months' charges apply) for the Machine that is the subject of the claim.
114 Using Your Personal Computer
Appendix C. License Information The license information in this booklet is for IBM and non-IBM logo programs covered by the IBM International Program License Agreement. Some programs referred to in this booklet might not be available in all languages or in all countries. Some programs might be different from the retail versions and might be customized to work only with the product with which they are shipped. These programs might not include all documentation or functions.
Warranty System Programs – No. PROGRAMS DESIGNATED AS "NO" ARE PROVIDED WITHOUT A PROGRAM WARRANTY. THEY ARE PROVIDED "AS IS" WITHOUT WARRANTY OF ANY KIND. IBM DISCLAIMS ALL WARRANTIES FOR THESE PROGRAMS, EITHER EXPRESS OR IMPLIED, INCLUDING BUT NOT LIMITED TO IMPLIED WARRANTIES OF MERCHANTABILITY AND FITNESS FOR A PARTICULAR PURPOSE. U.S. Government Users Restricted Rights U.S.
YOU MUST REPRODUCE THE COPYRIGHT NOTICE AND ANY OTHER LEGEND OF OWNERSHIP ON EACH COPY, OR PARTIAL COPY, OF A PROGRAM YOU CREATE ON DISKETTE OR OTHER PORTABLE MEDIUM. Appendix C.
Notices References in this publication to IBM products, programs, or services do not imply that IBM intends to make these available in all countries in which IBM operates. Any reference to an IBM product, program, or service is not intended to state or imply that only that IBM product, program, or service may be used.
PRODIGY QAPlus QAPlus/PRO S3 TME 10 VESA Prodigy Services Company DiagSoft, Inc. Diagsoft, Inc. S3 Incorporated Tivoli Systems, Inc. Video Electronics Standards Association Microsoft, Windows, and Windows NT are trademarks or registered trademarks of Microsoft Corporation. Other company, product, and service names may be trademarks or service marks of others. Appendix C.
Electronic Emission Notices Federal Communications Commission (FCC) Statement Note: This equipment has been tested and found to comply with the limits for a Class B digital device, pursuant to Part 15 of the FCC Rules. These limits are designed to provide reasonable protection against harmful interference in a residential installation.
Telecommunication Notices Federal Communications Commission (FCC) and Telephone Company Requirements 1. This device complies with Part 68 of the FCC rules. A label is affixed to the device that contains, among other things, the FCC registration number, USOC, and Ringer Equivalency Number (REN) for this equipment. If these numbers are requested, provide this information to your telephone company. Note: If the device is an internal modem, a second FCC registration label is also provided.
Canadian Department of Communications Certification Label NOTICE: The Canadian Department of Communications label identifies certified equipment. This certification means that the equipment meets certain telecommunications network protective, operational, and safety requirements. The Department does not guarantee the equipment will operate to the user’s satisfaction.
AVIS : L'INDICE DE CHARGE (IC) assigné à chaque dispositif terminal indique, pour éviter toute surcharge, le pourcentage de la charge totale qui peut être raccordé à un circuit téléphonique bouclé utilisé par ce dispositif. L'extrémité du circuit bouclé peut consister en n'importe quelle combinaison de dispositifs pourvu que la somme des INDICES DE CHARGE de l'ensemble des dispositifs ne dépasse pas 100. Appendix C.
Power Cord Notice For your safety, IBM provides a power cord with a grounded attachment plug to use with this IBM product. To avoid electrical shock, always use the power cord and plug with a properly grounded outlet. IBM power cords used in the United States and Canada are listed by Underwriter's Laboratories (UL) and certified by the Canadian Standards Association (CSA).
IBM power cords for a specific country are usually available only in that country: IBM Power Cord Part Number Used in These Countries 13F9940 Argentina, Australia, China (PRC), New Zealand, Papua New Guinea, Paraguay, Uruguay, Western Samoa 13F9979 Afghanistan, Algeria, Andorra, Angola, Austria, Belgium, Benin, Bulgaria, Burkina Faso, Burundi, Cameroon, Central African Rep.
126 Using Your Personal Computer
Index BIOS, updating 39 bulletin boards 99 bus ISA 2 PCI 2 Numerics 1-800 telephone assistance 900 number support 103 101 A C adapters 2, 6 adjusting chair 17 administrator password computer startup 20, 30 Configuration/Setup Utility program 30 deleting 33 forgotten 33 setting 32 using 32 advanced power management 7, 34 air circulation 18 America Online 100 antiglare filter 18 arranging workspace 17 assistance 99 automatic power-on modem ring detect 36 serial port ring detect 36 setting 36 wake on LAN
D damage, preventing 57, 59 date, setting 27 DDC (display data channel) 38 device configuration error 69 device drivers, video 37 diagnostic charts 86 programs 6, 96 tools 61 DIMMs 12 diskette drives adding 7 eject button 19 indicator light 19 location 7 problems, solving 87 supported 12 types 44 diskettes capacities 40, 44 copying 44 ejecting 19, 42, 44 formatting 43 handling 41 inserting 42 labeling 42 option 97 storing 41 types 44 using 40—44 write protecting 43 display See monitor display data channel (
graphics adapter 5 L LAN wake-up requests 5, 36 laser compliance statement viii lighting 18 lights, indicator 19 lithium battery caution 68 locking keyboard 55 locks 19, 55, 90 H hard disk drives adding 7 backing up 59 indicator light 19 location 7 maximum 3 power management 35 supported 3, 12 hardware power management 34 heat output 15 help 99 HelpWare 101 home page, IBM Personal Computer I IDE 3 identification numbers 107 indicators, status 19 infrared port 5, 13 input/output features 13 intermittent
mouse cleaning 58 locked 28 password prompt off mode port 20, 29 problems 91 serial port 20, 29 unattended start mode 29 using 20 moving computer 59 29 N network server startup support 101 server support services, fee 103 networking 36 noise level 16 notices 111 O office space, arranging 17 Online Housecall 101 online information services 99 operating systems supported 6, 14 option diskettes 97 installed 109 problems 93 ordering support line services 104 P parallel port available 13 ECP/EPP 4 problems 9
power-on self-test See POST printer problems 94 privileged-access password See administrator password problems solving 61 startup 20 processor See microprocessor PRODIGY 100 publications, ordering 105 Q QAPlus 96 QAPlus/PRO 96 R records, device and feature 109 refresh rate 38 remote technical support 101 resolution 38 riser card 2, 13 S S3 Trio64V+ graphics adapter 37 safety, electrical vii screen filter 18 SCSI hard disk drive 3, 11 security features 7, 14 keys 55 locks 19, 55 passwords 28 write protec
turning off computer 21 on computer 20 typematic rate 37 U unattended start mode 29 universal serial bus port 4, 13 V venting of hot air 18 VGA (video graphics array) 38 video 5 controller 13, 38 device drivers, installing 37 modes 38 port 13 SVGA 38 VGA 38 W Wake on LAN 5, 36 wake up on alarm 36 warranty copy of 111 extensions and upgrades 104 service 101 work area, arranging 17 World Wide Web home page 100 write protecting diskettes 43 132 Using Your Personal Computer
IBM Part Number: 84H8308 Printed in U.S.A.