
Personal Computer User Manual
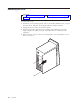
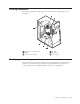
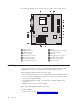
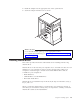

Table Of Contents
- Contents
- Safety Information
- Overview
- Chapter 1. Installing options
- Features
- Specifications
- Available options
- Tools required
- Handling static-sensitive devices
- Installing external options
- Removing the cover
- Locating components
- Identifying parts on the system board
- Installing memory
- Installing adapters
- Installing internal drives
- Physical security
- Changing the battery
- Replacing the cover and connecting the cables
- Erasing a lost or forgotten password (clearing CMOS)
- Chapter 2. Using the IBM Setup Utility program
- Appendix A. Updating System Programs
- Appendix B. Manual modem commands
- Appendix C. System address maps
- Appendix D. Interrupt request and direct memory access channel assignments
- Appendix E. Notices
- Index
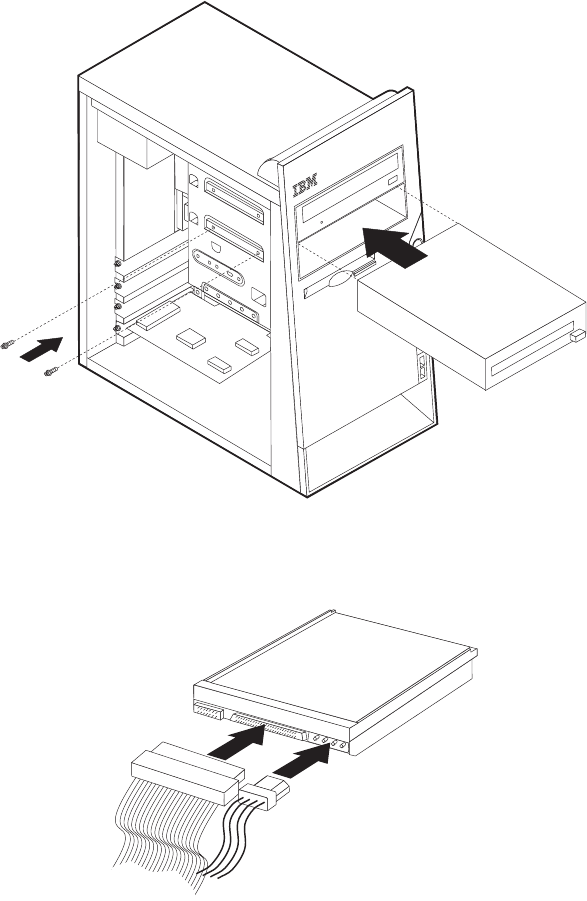
6. Install the drive into the bay. Align the screw holes and install two screws to
secure the drive.
7. Each integrated drive electronics (IDE) drive requires two cables; a four-wire
power cable that connects to the power supply and a signal cable that connects
to the system board. For a CD-ROM drive, you might also have an audio cable.
The steps to connect an IDE drive are different depending on the type of drive you
are connecting. Use one of the following procedures for your drive connection.
Connecting the first IDE CD-ROM drive or DVD-ROM drive
1. Locate the three-connector signal cable that comes with your computer or with
the new drive.
2. Locate the secondary IDE connector on the system board. See “Identifying parts
on the system board” on page 11.
3. Connect one end of the signal cable to the drive and the other to the secondary
IDE connector on the system board. To reduce electronic noise, use the
connectors at the end of the cable only.
4. Your computer has extra power connectors for additional drives. Connect a
power connector to the drive.
18 User Guide